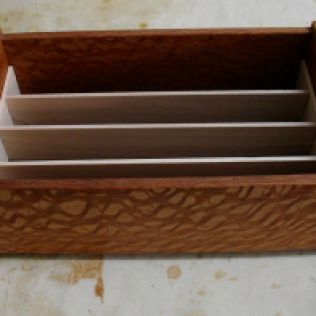
One of the marketing things I’ve learned about is to show what you’re marketing with an intended use. Perhaps this will expose a potential client to something they didn’t even know they needed! For the most part I’ve been letting the beauty of the wood and the craftsmanship of my work be my selling tools. I’d like to increase sales so here’s something that will be on the Etsy store soon. An excellent use for my boxes that are of sufficient size is a place to store your remote controls. With the influx of video systems out there you can hardly go into someones house and not see a collection of remotes scattered around their television area —- messy! This will be an elegant solution for that.
With the addition of dividers that can be removed if not needed, this beautiful box takes on a new purpose. The dividers themselves are made of maple and simply slot together. As I was making them the teacher in me started writing this blog. It’s interesting to me that things folks of my generation learned are not known by younger generations. During a recent handtool class I taught we needed to divide an odd sized piece of wood into equal sized divisions. Many of the students, who for the most part could do things on their smart phones, tablets, or ??? that I can’t even imagine they were somewhat stumped. I showed them this technique:
This board needs to be divided into four, equal sections. The trick is to angle a ruler across the wood until you have a measurement that is divisible by 4. I was able to lay out 4 1/2″. At first glance you may say that it’s 5 1/2″ but it’s always good to burn an inch on a ruler. Four and a half divides by 4 easily (1 1/8″) so that’s what you lay out using a little bit of math, marking the board at 1 1/8, then 2 1/4, then 3 3/8 and you’re done.
 Those markings were extended to the top edge of the board, both ends were taped together and the slots were cut on the table saw as shown.
 Next, the ends of each divider were cut using the same set-up. It did take some trial and error to have the blade cut exactly half way up the dividers.
Last of all, they were all treated to some light sanding and a coat of my favorite Liberon Black Bison Wax and inserted into the box.
The box shown above is made of Lacewood and Sapele.
My opinion is that adding this function to my work will increase sales, at least I hope it does! This box on the table is made of Quarter Sawn White Oak and Walnut and seems to fit quite well in our home; what do you think?


Very nice box and excellent advice.
LikeLike
Great idea. I like the look of your new site!
LikeLike
Thanks for the comments on the site and post. Trying to do a little on it every day but would rather be making sawdust than keystrokes!
LikeLike
Perfect use and so beautiful too!The boxes are so handsome John, love them
LikeLike