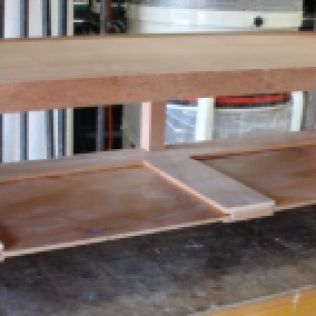
At the onset I knew this project would have its share of challenges but that’s what it’s all about! I wanted to use techniques that I hadn’t used a lot before in other my work. Making a cabinet of this size with solid material changes the construction techniques. One another challenge was figuring out the sequence of assembly. After several “dry runs” this seemed to be my best course of action.
The sliding, bare faced dovetail used on the shelf was the first thing to consider. I found it was easiest to slide the side down onto the tail portion of the shelf. I then used a block of wood about 3″ long hold the side up so that glue could be spread inside the socket. This way the front edge of the shelf will be glued flush with the front of the sides but still be able to move within the socket to adjust for humidity changes. The other piece to be glued during the first phase was the bottom stretcher with the front, drawer web already glued in place.
After that assembly was unclamped making the drawer frame/web was next. I decided to use Alder for my secondary wood since I had some of it on hand plus a partial sheet of 1/4″ plywood left from another project. The plywood will be used for the dust panels and the back of the case. Just as with the front stretcher, the back stretcher has the rear drawer web glued in place. The web is tongue and groove construction and since it’s completely held captive inside of the case and it needs to be able to move, only a spot or two of glue was applied to the center pieces that will have the drawer guides attached.
In the pictures you can see how the side of the cabinet has a shallow 1/4″ dado for the web to sit in. The dust panels were also shellacked prior to assembly. So now the dust panel, drawer frame/web, and also the top rear stretcher are glued up.
Last detail on the case was to add the drawer guides between the three drawers. The sides of the cabinet will be the outer guides but the inner guides were added afterwards. I used a piece of Alder that is the same thickness as the dovetailed in, drawer dividers. After planing them to match the dividers they were installed with screws only. They are screwed through the bottom of the drawer frame and were a bit tricky to hold squarely in position so clamping it in place helped a lot. I had considered glueing them but decided that just in case things didn’t work out the way I visualize it in my mind, I better be able to change them!
With the assembled unit sitting on top of the workbench I just couldn’t help myself! Earlier I discussed my design considerations to access the electronics. Since everything is controlled by remotes these days your options are:
- Open shelves
- Glass doors
- Solid doors with some type of relay system $$$
Since neither of those options appealed to me I investigated the possibility of using sliding doors. If you’ve ever seen the plastic track that’s available for them it’s quite ugly! I found an article in Fine Woodworking (Sept/Oct. 2004) written by Seth Janofsky showing how to make your own sliding door track. I decided to go on faith and build follow the plans without making any type of mock up and you know what —- it works and I’m so happy!
I just had to make a mock up door out of some MDF and it works great. The actual doors will be made out of a piece of Big Leaf Maple and should be stunning. The concept is that the door slides on a very small portion of the bottom edge without bottoming out in the track. I’ll do a more detailed post on it when I get to that part of the project. I have my choice on where to go next; the pedestal base, the drawers, the sliding doors, or the top. I do need to build up my inventory on the Etsy store and not get so obsessed with this project but it’s keeping me engaged for sure!


Our 42″ flat TV screen is 32.5kg with the foot. The top of the table we have bought is sagging!
You might need to take this into consideration, reinforcing the bottom of the top board and/or transmitting part of the load to the shelf below with a vertical board in the middle.
Sylvain
LikeLike
Hi Sylvain, definitely taking that into consideration. The thickness of my top will be 1 3/16″ and solid Sapele so should be sufficient. If not, your thought on adding the center member would be an easy fix. The back of the cabinet will be solid material as well with an inset, panel and frame construction. I suspect your unit is probably plywood and 3/4″ thick — hopefully mine won’t sag although I suppose we could hang the TV on the wall!
Thanks for your comment — John
LikeLike
This is really coming along nicely, can’t wait ’till it’s done!
LikeLike
It’s a joy to find sonomee who can think like that
LikeLiked by 1 person