I just had that “ah ha moment”. Once I found my camera and began to use it on the tripod rather then my phone I noticed the pictures all seem to have a yellowish tinge to them. I played around with the usual suspects but it’s still there. I mentioned it to Diane and she thinks it may have to do with the setting for the type of light — no duh! My new shop has LED lights while the old one had fluorescents. I’m guessing that’s the culprit, I’m willing to bet that this camera won’t have a setting for LED, it’s pretty old!
For the drawer units I decided to use an old standby which I’d like to say is “quick and dirty” but nothing really is, is it? In the old shop I used a drawer system where the bottom of the drawer also functions as the guides. It begins by carefully cutting 1/4″ grooves in the plywood sides of the unit. You need to pay attention that you end up with sides that face each other and aren’t mirror images. Having a notch for the toe kick helps.
After cutting the fronts and backs for all the drawers it was time for a fairly straight forward tongue and groove joint. This too is 1/4″ since 1/2″ clear coat Baltic Birch plywood was used for the drawers. Like I said, no dovetails for this project and it’s even been assembled with glue and nails! After the unit itself was built, 1/4″ MDF was sized to fit into the grooves and slide easily. It’s not like these are kitchen drawers that will be opened and closed many times a day — basic shop storage units designed to be utilitarian but still look good. After gluing and nailing the box together, the bottom was attached using spacers to align and square the entire assembly. A couple of nails (#18 x 1 1/4″) did manage to blow out of the side but that’s to be expected. Here’s the process simplified:
The next step was planing the Alder I had remaining for the drawer fronts down to 1/2″ in thickness. Can’t help myself here, have to use my L-N Bronze smooth plane to finish all of the surfaces, utilitarian or not! The drawers are about 14″ deep and 26″ wide so I think two pulls are in order.
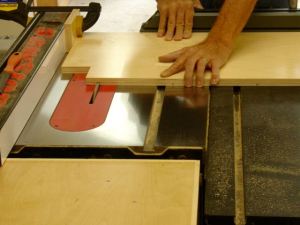
Rather than buy them my choice was making them. I saw a recent Facebook video post lamenting how we’ve become such a throw away society and that many folks have no idea how things are made or put together. As a life long shop teacher that was something I always emphasized; what we have was made by someone. Nowadays, most things are “spit out” by some computerized contraption that a human being switches on and off! Don’t want to get on a soap box but these drawer pulls are made from a piece of Pine that the previous owner left in the garage. This picture shows the rough piece of wood and the subsequent pull. I thought about all of the little steps required to get from that board to 16 pulls, allow me to list them: 1. Plane edge; 2. Rip to 7/8″; 3. Plane edge again, repeat until there is enough stock for all 16 pulls plus a spare or two “just in case”; 4. Cut 45 degree on all edges on tablesaw; 5. Block plane those edge; 6. Cut to length; 7. Chamfer ends to match; 8. Counter bore for screw head; 9. Drill through hole 10. Spray Deft for protection — and that’s only for the pulls! Also needed to plane, chamfer, and finish the drawer fronts. Then locate mounting hole for the pull in the same location on all eight of the drawer fronts. Simple jigs were made to aid with this. When it was all said and done it was quite time consuming but worthwhile in my opinion. It’s all about the process of thinking and planing to get from point A to point B. I rather enjoy that process, here’s a slide show to illustrate that.
The final step for this storage wall is to make sliding doors that will cover the shelves. I do need to get started on the picture frame design to secure the commission for it. Seems like it’s been such a long time since I’ve done any carving I’m a bit apprehensive! Most definitely will blog about that, looking forward to that project and process.


Oh my, no dovetails???
OK, That’s the extent of my snobbishness. 🙂 I’m using an old chest of drawers constructed similar to those you are making. It’s been in daily service for decades and is going strong.
As for that yellow cast, look for White Balance in your camera’s settings. More detail on page 73-74 of the camera’s manual: http://pdf.crse.com/manuals/2318592121.pdf
For photos already taken, the cast can be removed by judicious use of color level functions in editors such as PhotoShop or Gimp. (Hint: use the black and white sampling tools.)
Keep havin’ fun!
LikeLike
Pingback: Why I Love Working Wood! | Woodworks by John