

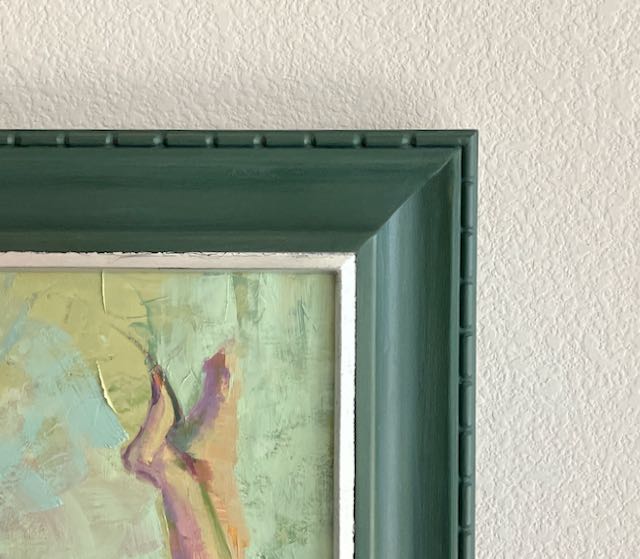
Here’s the most recent frame from my shop and it was fun to create so thought I’d share the story! It’s oil on canvas measuring 12″x16″ and by my wife, Diane Eugster. When I first saw it in her studio my mind went to a wood nymph; whatever that may be! This painting needed something other than a traditional black/gold frame, something more fun and maybe with a bit of whimsical carving to enhance it.
Creating the Profile
Creating the profile began with my typical Basswood sized approximately 1″ thick by 2 7/8″ wide. The process begins by cutting the backside each pieces at 15° to create a profile that angles the frame away from the wall leaving plenty of room to install a 3/4″ thick canvas. I refer to this as my 15° Profile and it’s a way to angle the frame. I wrote a BLOG about it some time ago. I’ve modified the process somewhat since then but that blog gives you the basic method to do it. It took me less than 2 hours to profile this frame, carving took much longer than that.
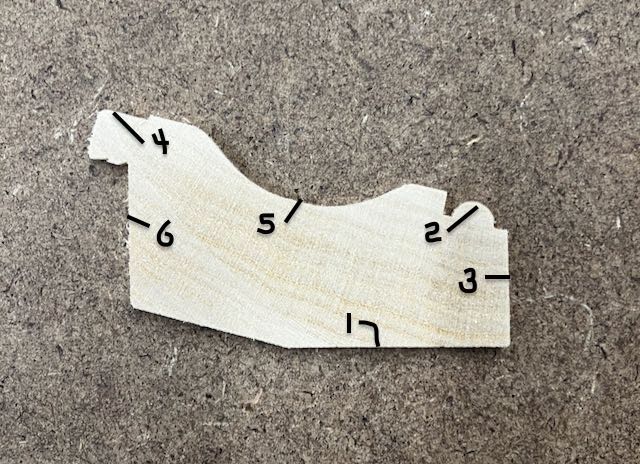
The process began with cutting the 15° angle on the back of the piece, that’s #1 in the picture, this will become the outside edge of the frame. If you do any beading on the frame it’s important to do that before cutting the outside edge 90° to the angled cut. This makes it easier to clamp when gluing the frame together. For this profile I cut a 1/4″ bead on the outside edge, #2 with a small plow plane. Draw a 90° line (#3) from the angled cut to locate the outer edge of the bead. This piece will be cut off after the bead is complete. For this profile I wanted a flat section at the sight edge for gilding, this is #4 and was created with a skewed rabbet plane. To create more interest to the frame I also cut a cove; #5. This was done with a tablesaw, it’s an interesting process and I wrote this BLOG explaining my process. The final cut is #6, the rabbet. This is somewhat tricky so check my blog on how to do it. Very important to note that I always have at least one extra piece of stock about 10-12″ long to set up the tablesaw for all of these cuts.
Carving
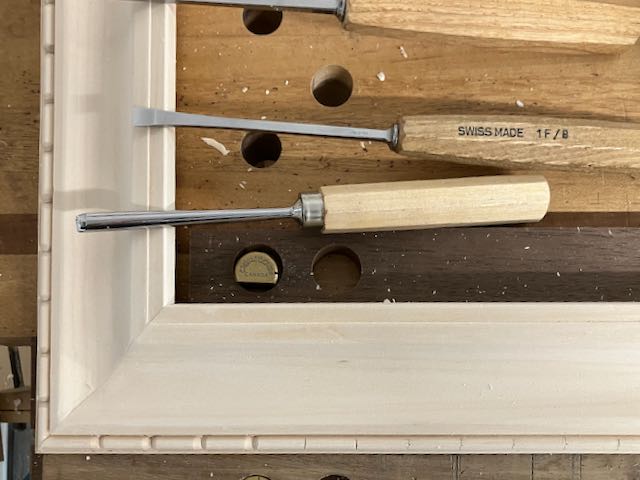
Not exactly sure what these are called, they look like an elongated bead or a sausage but I’ve seen them called either billets or reels. To figure out the spacing it’s easiest to use a set of dividers and step the divisions off once you decide their approximate length. Do that on a piece of masking tape, not your frame because there’s a lot of trial and error involved and your bead would have all the markings from the divider. Once you’re satisfied with the spacing put the markings on the frame. My preference is to start at the center and work to the ends. Any slight error will show up at the ends only. I used a 1F/8mm skew to divide them, then a 8/6mm gouge to create the rounded ends. Finally a 1S/5mm removes the bits between the reels.
Finishing
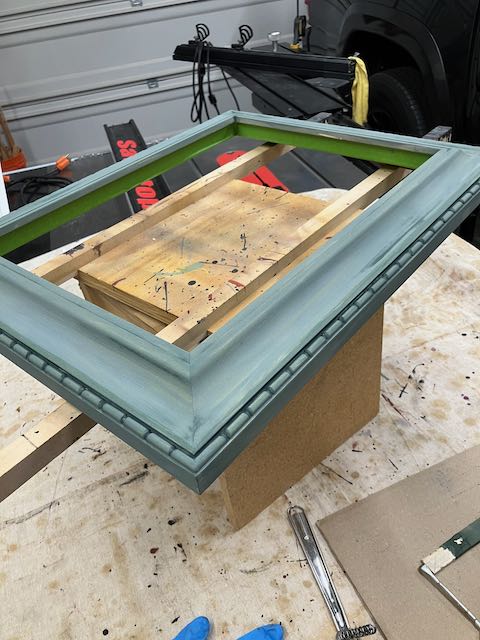
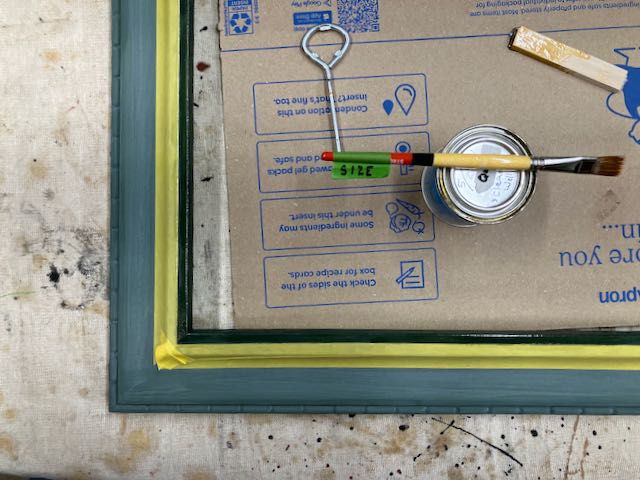
I’ve been using milk paint from RMPfinishes (formerly Real Milk Paint) lately to finish some of my frames. I like the effect of it and it comes in a powder form. That means I only mix up a small amount as needed and the powder will keep forever unlike paints that come in a can. For this frame I chose Blue Spruce. I mix 2 ounces of powder with 2 ounces of distilled water and that’s enough to complete the frame. I’ve found that the foam brushes they sell work great, much better than those available from my local big box store. I lightly scuff between coats (2 usually) with a Mirka 1500 pad. This frame has a gilded, silver sight edge so that was taped off and applied with quick set size. Milk paint should be sealed and I’ve used wax, OSMO #3043, and also Platinum Blonde Shellac which I spray on with an air brush. That’s how this frame is sealed, the shellac also seals the imitation silver leaf. The final step is rubbing out the shellac with Liberon wax to take some of the sheen off of the shellac and even out the spray pattern from the air brush.
That’s the process for this profile; in my opinion, adding the cove and the carving creates many shadows and patterns that brings interest to the frame.
