
 It’s taken quite some time to day to get to this point but I think all of the final details have been addressed and we’re ready for final sanding and applying the finish. I’m waiting for word from my client as to what type of finish we’ll go with. Initially my plan called for Watco oil with hand rubbed top coats but the more I worked on this and thought about where it will be I’m now leaning towards the EnduroVar which is a water borne polyurethane finish. I’m certain that there will be coffee cups and other drinks placed on the shelf and the poly would be a better finish for that. Hope to hear from him soon so I can do the finish in the mornings, too hot once we get past 10:00 am or so.
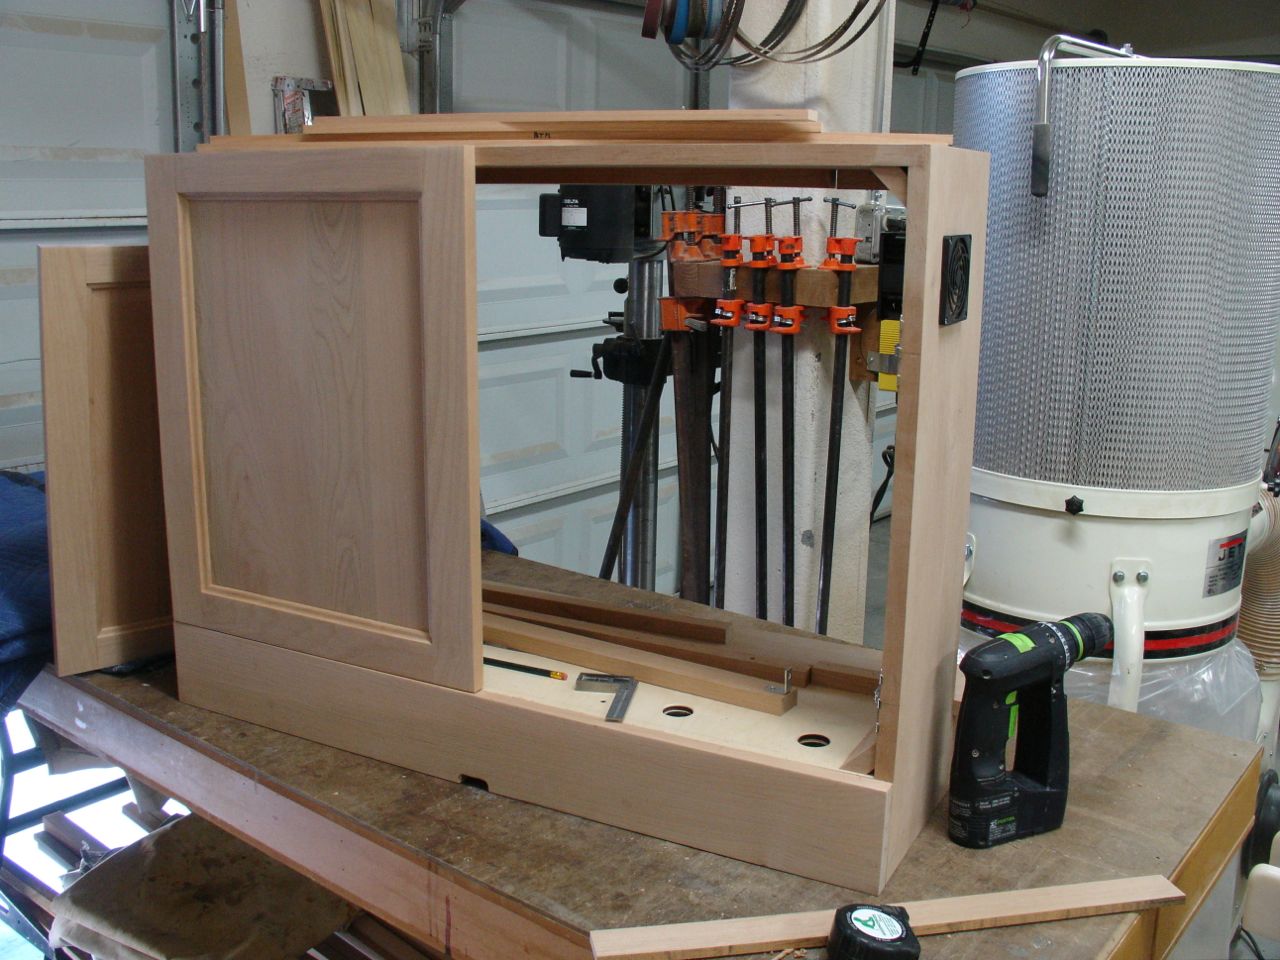
 Lots and lots of final details for any project and this was no exception. As I mentioned in an earlier post the hinges will need to be off-set so they don’t interfere with the two cooling fans. In this photo you can see why, that’s the fan at the top of the cabinet and the hinge mounting bracket is too long so had to be placed lower. The lower hinge is installed into a scrap piece. I’ve learned from experience that whenever I use European style hinges to always make a test piece first. This way you can check that the set up on the drill press is correct for drilling the 35mm holes required by the hinge. Here you can see the glue blocks too that are placed in the corners to add rigidity to the case. The way I do the hinge holes is on the drill press. I have a piece of Oak that I use as a guide. By bringing the bit into the hole and then clamping a fence behind it I get the required setback. Everything references to the center line. For this case, the hinges mounted 7″ from the top and then an additional 12 3/4″. These measurements were located on the door edge and the cabinet. Once everything is set up it’s a simple matter of lining up the markings and drilling the holes.
-

- Lining up One Hinge Hole
-
- Drilling Hole #2
Here is a brief listing of the final details checked off today:
- Cut trim pieces to go around monitor screen after it installed. The sides were one width while the top and bottom were each different. This means mitered corners aren’t possible. These will be applied with some 23 gauge pins only in case the unit ever has to be removed. I’m not a huge fan of 23 ga. pins — you can see them!
- Add spacers to both sides of the screen mount to attach trim pieces to
- Come up with a more elegant electrical plan. My client gave me a power strip but it was too large and just looked ugly! Looked all over to find one that had the rocker switch opposite the side where the power cord runs in but no luck. The power strip will be in the center section so I fashioned a cover that will conceal much of the wiring yet still allow easy access to the switch. That one rocker switch will turn on the monitor and both ventilation fans. Also found some cable clamps that will screw into the underside of the unit and corral the cords — hate messy cords!
- The span of this unit is close to 36″ so that created two minor problems. First off, the bottom trim piece had to be scribed to the shelf to get a close fit. Also, I needed to add a brace in the center of the back. At first I thought my doors were out of square but it was the top bowing down a little. That is solved with a center brace that will be screwed in place so that removal will be easy should the back of the monitor need to be serviced.
- Experimented with the door adjustments and found I needed to plane a little bit from both inner edges. A full overlay hinge will just barely cover a 3/4″ thick frame, learned that you can push the adjustment but it tends to push the inner edge of the door outward — better to have a slight reveal on the side.
So, I’m at the end of this particular project. In my previous blog I mentioned a possible commission designing a presentation box for a electronic device. Well, after a 2 hour plus meeting yesterday I got the job. This will be a very interesting project and it’s a bit secretive too. Maybe I’ll have to give it a code name like they used to do at Area 51 here in Las Vegas!
