
 So, here’s my excuse for not being out in the shop lately — been visiting my daughter and family up in Spokane. This is Connor and he’s the one I made the monster truck for, he loved it! He’ll turn 3 this weekend but the other great news is that we also have another new grandson, Rory. He was born on the 12th. so it was a great reason to visit. Must admit I missed being out in the shop but getting the chance to visit family and relatives is priceless.
We’re on the final approach to our first ever craft fair, making the list and checking it twice! The only projects I want complete are the eyeglass cases. Then all that will remain, as far as the projects go, is to line the bottoms of the last series of boxes. There’s also one additional box done in part as a prototype for the mystery box project that I need to hinge.
 The work remaining to be done on the eyeglass cases was mainly the finishing. Here I have everything set up, ready to do the final sanding on them. I absolutely love my carving bench! Every class I bring it to finds students asking for plans and several will make their own. It’s a Godsend as far as I’m concerned. For me, it’s the perfect height for carving and routing work. Add chopping and cutting dovetails and other joinery too. It just brings the work to a better level, my regular workbench is great for planing work where you need to put force down around waist level but too low for the types of work where you’d find yourself stooped over the work. At my age, the stooping isn’t so hard it’s straightening back up that’s the problem!
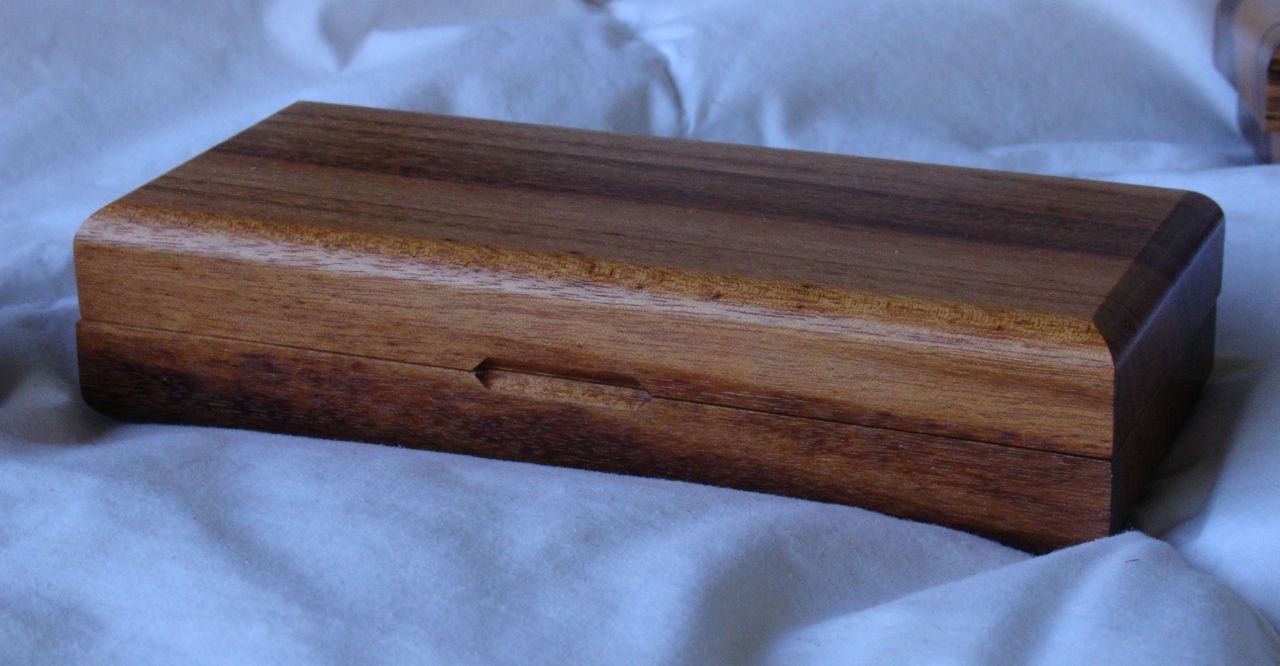 Here’s one refinement I’ve made to the glasses cases, a finger grip. The design concept I had for these cases is that they look like a solid block of wood, which they are. I have trouble on the prototype case that I use knowing which side opens and which is hinged. This may not sound like a huge problem but it’s surprising what a minor annoyance can do to your overall enjoyment of something like this. I’m going to try to disassemble mine to add this improvement to them.
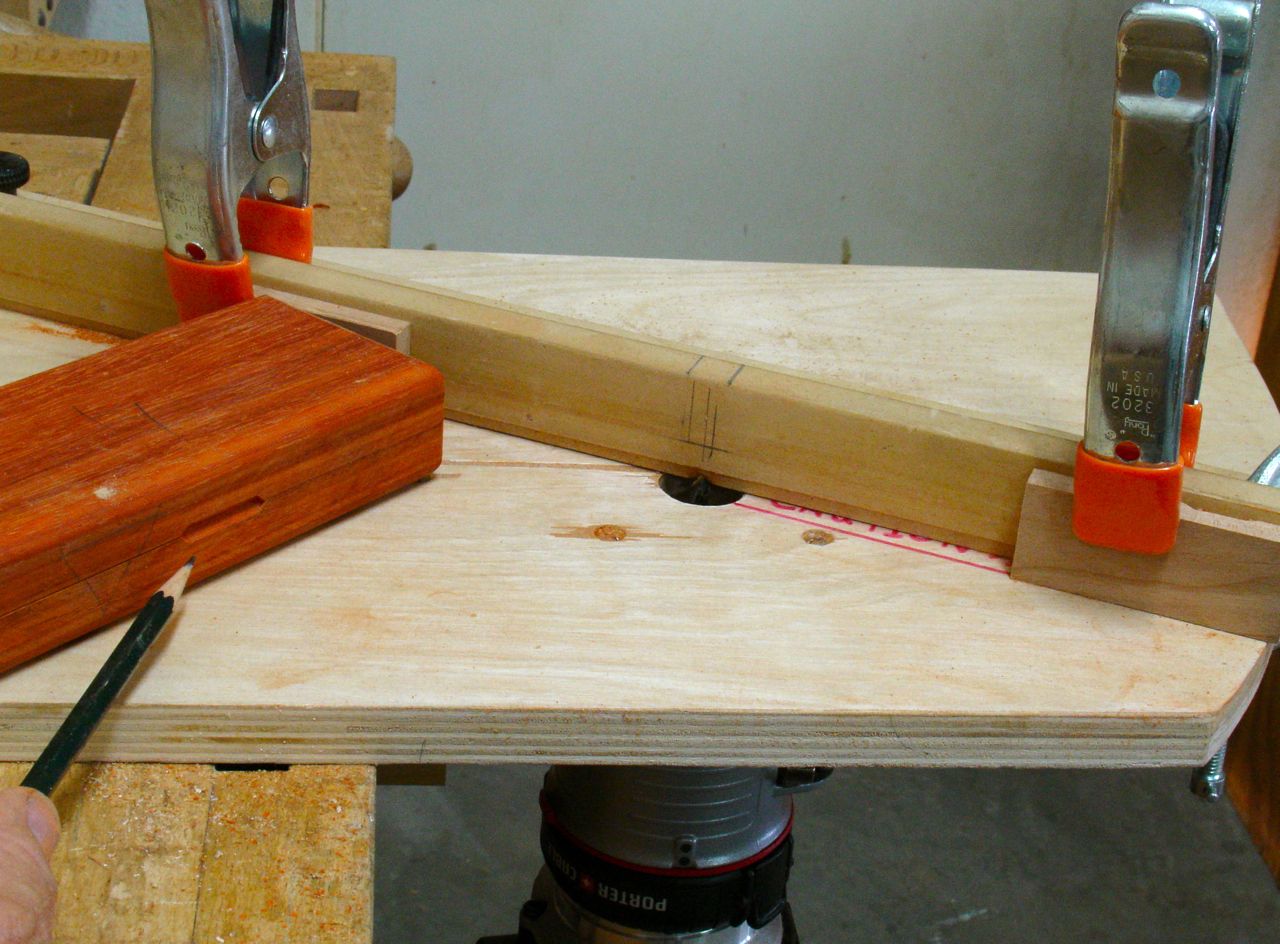 It was a fairly simple process. The use of a small router mounted in the table along with a V-shaped cutter was all that was required. As you can see there are stop blocks that limit the travel so once the box is positioned against the fence you move it both directions, from stop to stop and that’s it! I’m pointing out the finger grip but you can see it quite clearly in the photo above.
All of the boxes were given several coats of shellac before we left for Spokane. I mix up my own flakes which I purchase from Shellac.net and used a super blond platinum on these to give the clearest finish possible. These are applied with an air brush and sanded between coats with 400 grit paper. They cured while we were gone and have now been rubbed out with a super fine scotch brite pad (white) and my favorite, Liberon Black Bison wax. I should be able to assemble and have them on the Etsy store within a few days. Also, two of them in African Paduak will be going out to my client in the U.K.
