
Welcome to the New Year, 2014. Although I’m not one to make resolutions (too easy to break) I do have a couple of major projects I’d like to complete this year. If I share them that will make me accountable so here goes. First of all, our family room needs to be updated by removing the architectural features of the 90’s. That TV media niche and bull-nosed corners just doesn’t work anymore. The plan is to blank off the wall which is more carpentry but then build a unit to hold whatever technology is needed underneath a wall hung flat screen. My thoughts are for this to be hung from the wall with French Cleats. Secondly, I’d like to replace my bedroom chest of drawers and Diane’s armoire with two chests based on a design by Thos Moser and possibly make the first one with the hopes of having it accepted into the Design In Wood competition in San Diego. Last major goal is to do the Summerlin Art Fair again in October. There; I’ve said it so now I’m going to be held accountable!
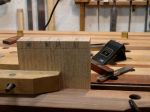
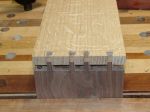
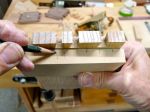
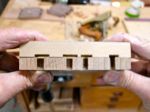
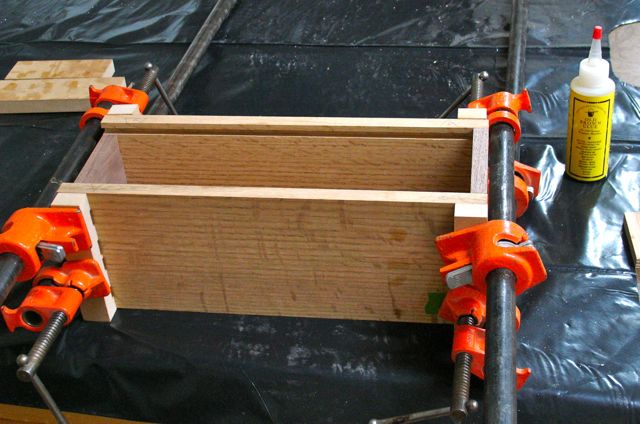 The current project is a wine presentation box. You may recall that one of the entries in the 2 x 4 x 8 Challenge was a finger jointed one and I decided I’d like to try one with dovetails. I glued it up this morning and here’s the picture of it. Kind of hard to really see what it will look like so you’ll just have to be patient! More than likely this will be finished with shellac and wax and that will bring out the fleck of the QS White Oak.
Dovetails: Tails First
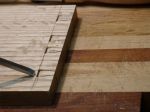
Cutting dovetails is a subject that is one written about quite a bit. When teaching it I’ll emphasize that as a woodworker everyone will develop their own style but it’s based on the methods of others that you’ve seen in person, on video, or taken instruction from. I do tails first 90% of the time. One main advantage is being able to cut both boards at the same time. Here’s a pictorial sequence of my method:
-
- Clamp boards squarely together, I use the rip fence to help alignment.
-
- Clamped into bench, ready for layout.
-
- After one side is done, flip boards over and clamp other side without changing their position.
-
- Ready to cut, notice waste area is penciled in.
-
- I remove a wedge from baseline first to prevent chisel movement to base line.
-
- Removing the waste between the tails.
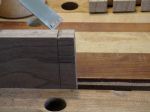
Dovetails: Pins
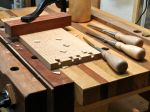
Now that the tails are done it’s time to transfer them to the pin board. Whenever possible I will leave the board longer than needed just in case of a major goof up. Kind of like Murphy’s Law. You know, if you’re making a project and decide to cut an extra piece or two “just in case” you rarely need them but; should you not cut that extra one, it’s for sure you will! What I did here was to leave the pin board long and cut the pins on both ends. After they were fit to the tails they were cut to length so that’s why they look way long in some of the pictures. The box measures 5″ wide by 14″ long.
-
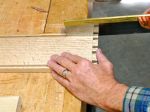
- Transferring the tails in special jig.
-

- After extending the line, I’ll cut the pins with jig in place.
-
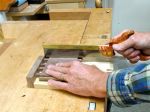
- Before removing shoulder I notch with chisel to aid starting the saw.
-
- Remaining material chiseled out.
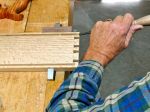
-
- Ready for some final tweaking.
Final Steps
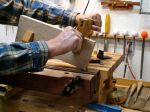
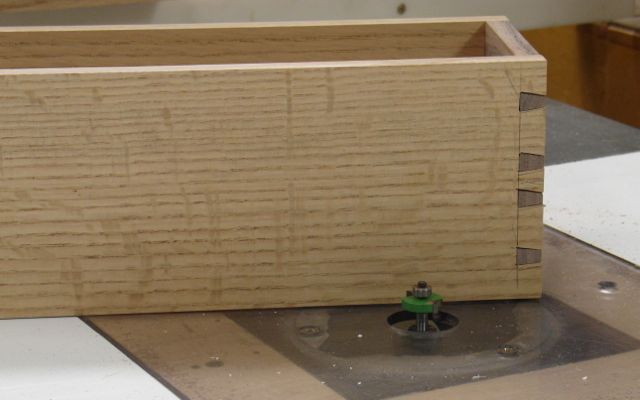 The majority of this project is hand work. I like to use this router bit from Lee Valley. The way it works is that you assemble the box and clamp it if needed. The bit is put in a table mounted router, mine is 1/2″ above the table. Now you simply place the box over the bit and cut around the inside. I’ve found it easier to make the cut in two passes. Since this box has a sliding lid, both top and bottom was slotted. The corners of the bottom and lid need to be radiused to compensate for the router bit but this is much easier than cutting stopped dados.
The front of the box needed to be cut away so the lid can slide in and out. Careful work with a rip saw, block plane, and chisel to finish it off is all that’s required.
-
- Cutting front to size, followed by block plane.
-
- Extending lid slot to edge of board.
-
- Finishing cut with chisel and mallet.
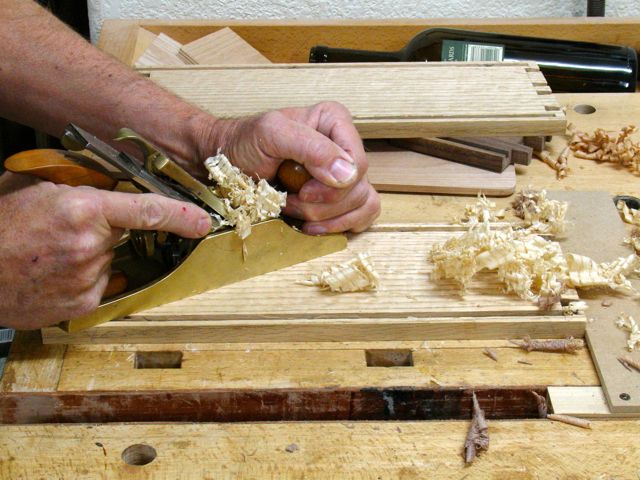 Last of all, the inside surfaces were planed to remove any marks and prepare them for finish. Not only does this give the interior of the box a smooth surface it also gives me an idea of how difficult the outside of the box may be to plane after assembly. Happy to say, the boards planed nicely.
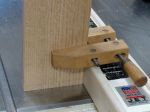
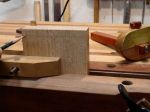
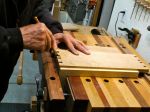
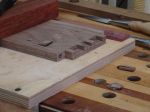
Gluing up dovetails can be somewhat tricky. If you leave your pins slightly proud, which is a standard practice, it is difficult to get full contact with the clamps. I find that it’s worth the 10 minutes or so to make some custom cauls. Using a piece of 3/4″ MDF I first lay out where the tails are. This piece is the height of the box and about 7″ long. The material is removed by making multiple passes on the tablesaw with the blade raised about 1/8″. After all the cuts were made you simply cut the board into 1″ wide pieces. A quick coat of wax and you’re good to go.
-
- Roughly lay out tail locations.
-
- Grooved out on tablesaw, about 1/8″ deep.
