
If you know me you’ll know that I do like to challenge myself in my creative endeavors and before the botched knee surgeries, running endeavors as well. I mean, what’s life if you don’t throw in some different stuff from time to time — certainly isn’t meant to be spent on the couch waiting for something to inspire you or happen! I received a phone call last week from a man who was given my name by Woodworkers Emporium. He and his wife had this very nice crib that all of their children had used and they just hated to part with it. The idea of turning it into a desk for her without drawers and having a glass surface. The thought of seeing her children’s teeth marks while doing her paperwork had a certain appeal. After mulling it all over and knowing how special the crib I made for my grandsons is to me I decided to meet with them and see what this project could be all about.
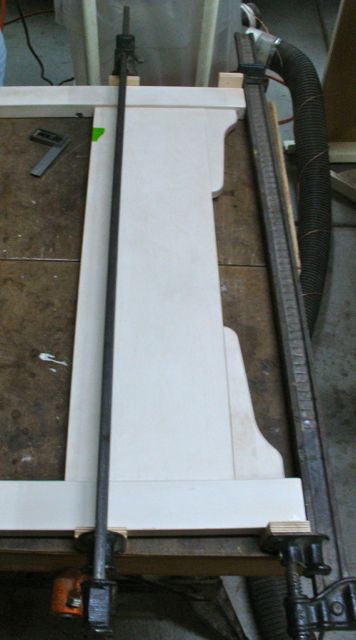
 I met with them and after discussion and a picture of a similar type of project they had found, I decided to go ahead with it and took their crib home. As you can see, the basic parts are the front and back slatted sides plus a headboard which is taller than the footboard. Both of them are much taller than the standard desk height of 30″ so the first step was figuring out how to “section” and still maintain the integrity needed. The construction is short, stub tenons that were probably glued, clamped, and then pinned to hold everything in place. Disassembling everything could be disastrous so decided the best way to go about this was with a lap joint. A mortise and tenon would have been ideal but I was leery about attempting that by hand, the pieces are so large and awkward that clamping them securely didn’t seem feasible. Like the song says, the first cut is the deepest and I might add; the hardest! Although my client understands that with work of this nature there is no guarantee my own pride and work ethic makes me want to end up with a successful, end product.


Repairing a loose joint
The way the this crib is constructed is that the top of each slat was simply glued into a machine cut mortise but the bottoms of them were also pinned. Since they’re on the bottom, inside of the crib you wouldn’t see that small pin hole. The tops were fairly easy to remove, desert heat and shrinking wood weakened that joint so that after a bit of wiggling the slats came free. Working as carefully as possible, the bottom slats were freed with some tear out due to the pin. I noticed that one side was kind of loose so decided to try some CY glue and clamps to tighten things up.
Next step was creating the lap joint to put it all back together. Because of the awkwardness due to the size of the crib I decided to make a jig to guide a plunge router to the proper depth and length. The purpose of the lap joint is to get as much face grain to face grain surface in each leg to create the strength. A simple biscuit or dowel (neither of them my choice of joinery) just wouldn’t have given the strength required — you just can’t glue end grain to end grain and expect any kind of lasting integrity!


One of the legs drove me crazy! You would assume that since this is a piece built in a factory and on an assembly line that everything would be exactly the same but no so! One leg was about 3/64″ thicker than the others so when the lap went together there was quite a difference. Thankfully that wasn’t the one I made the initial cuts on or everything could have been way off. What I need to do here is fit the joint from the inside because it can’t be leveled from the outside after assembly as the finish would be destroyed. That’s were the hand tools came into play. Each joint is acceptable as of now but I will fine tune them just prior to gluing them up.
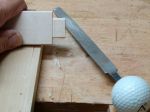
Next is sizing the slats. After following the “measure twice, cut once” philosophy and also making some mockup pieces for testing they were cut to length. This is followed by forming the tenon on the newly cut slat to fit the factory mortise. They are rounded so a file was used to ease each corner and things fit as planned.
-

- Cutting shoulder of tenon: dado and stop block
-
- Rounding over tenon to match factory mortise
-

- Checking fit as I go
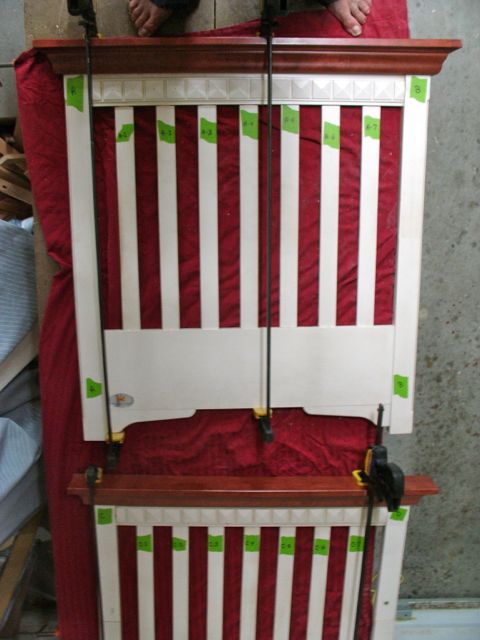 This is the results of a couple of mornings work. We’re having a bit of a hot spell right now so once the thermometer gets close to 100 degrees it’s time to head inside. When I get into a project though it’s hard to relax and sit back so after lunch I just had to see how things may go together, warm temps or not. Yes, that’s my bare feet — no boots or safety considerations at this point; it’s hot out there!
The plan is to make stretchers for the top front plus two more top and bottom at the back. One of the crib side sections will be attached to the top and a piece of 3/8″ of glass will rest on that to create the writing surface. The two stretchers in back will have the other crib section attached to it. Those stretchers will be made from Maple and assembled with mortised and tenon joinery. It’ll be easier to cut the joinery before reassembling the pieces but still a challenge due to the size of the pieces.
