

Treble Clef Motif
A week or so ago, I received a request for a custom box based on the design of my Gilded Cats series. Rather than having a cat though, they wanted a treble clef carved onto the lid and the box made much larger to hold remote controls. After a few conversations we came up with a design and price so I have now started on this box. This is just the incentive I needed to make a few more boxes to add to the inventory. Traditionally, sales on Etsy are slow during the summer time and will ramp up again as the holiday season approaches. Although my work has a lot of hand operations there are certain steps where the machines perform the grunt work for me to refine later. I’m going to take advantage of that and make some additional boxes as well. The motif for the box will look like this image.
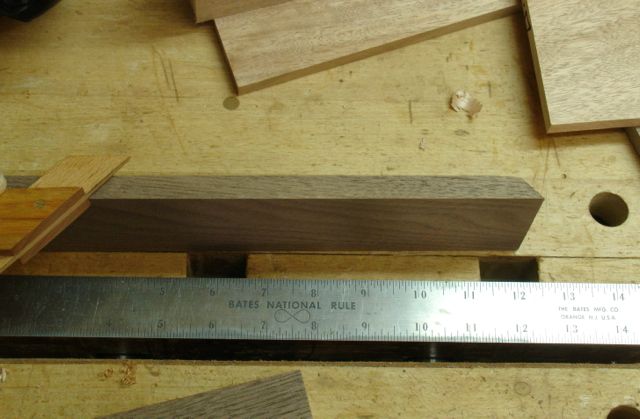
We decided on using a light colored wood which gave me the chance to use a piece of figured, African Okoume. Since it was slightly thicker than an inch I was hopeful that I could re-saw it and yield pieces that were 3/8″ – 7/16″ in thickness for the box and it worked out as I had hoped. I’m using a 1/2″ Wood Slicer blade from Highland Woodworking which, as you can see; does a great job. This board is about 6″ wide and the cut was straight and true.


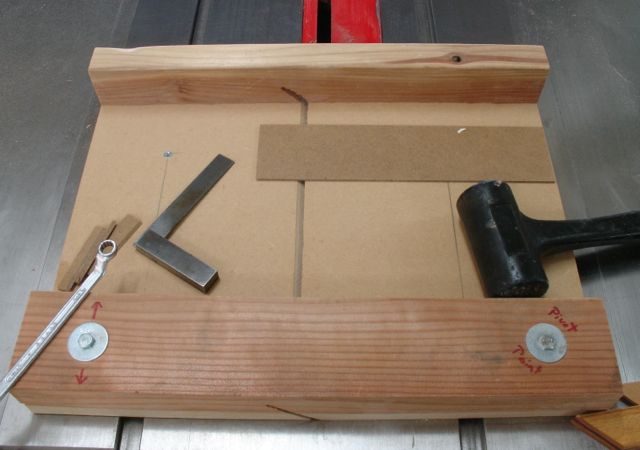
Table Saw Miter Jig
Whenever I cut miters on the tablesaw my choice is to leave the boards wider than they need to be by about 1/2″ to compensate for any tear out that tends to occur when cutting. My jig has two runners on it so is pretty stable. It seems that jig fences never stay 90 degrees so I learned a long time ago it’s wise to engineer a way to adjust them. In the jig, the hole for the bolt on the left side is oversized. This allows me to loosen them both and make trial cuts to check for 90 degrees, once it’s dialed in both bolts are tightened and we’re ready to begin cutting the various required pieces.
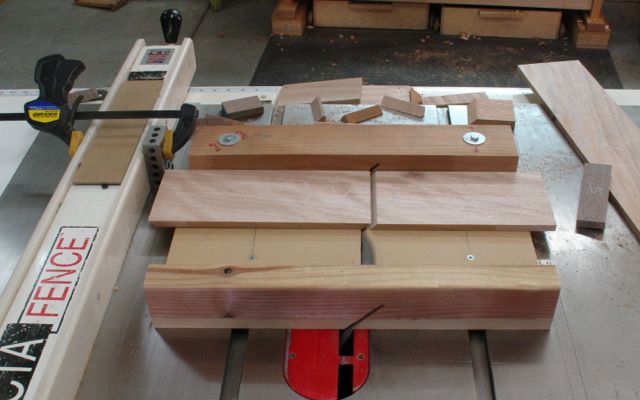
I have simple method of cutting the pieces for mitered boxes I’ll share with you. It’s important to plan your work so the grain of the wood will have a continuous flow at the corners. Visually it just looks better and shows some craftsmanship. It begins by cutting one end at 45 degrees and then marking the longest box side.
Measuring First Piece
A stop block is clamped against the fence to allow for clearance and the first piece is cut.
First cut to length
The long side is set aside, the piece on the sled is flipped over and cut near the end. This is done so the outside of the board will be correct.
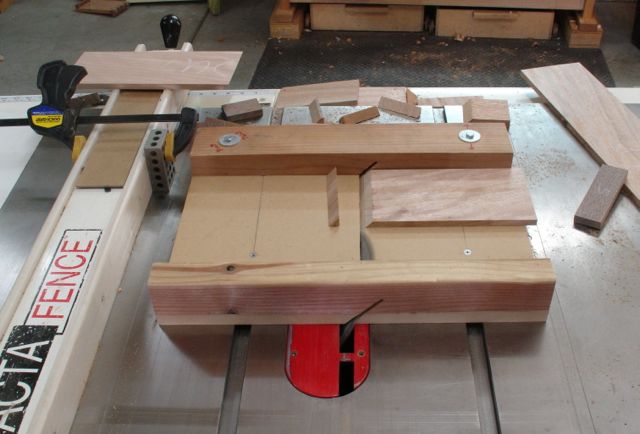
Trimming miter end
Next, I’ll use a stop block that is as long as the difference of the box sides. For example, this box is approximately 5″ wide and 10″ long. A 5″ spacer is put between the stop block and the board and the shorter side can then be cut.
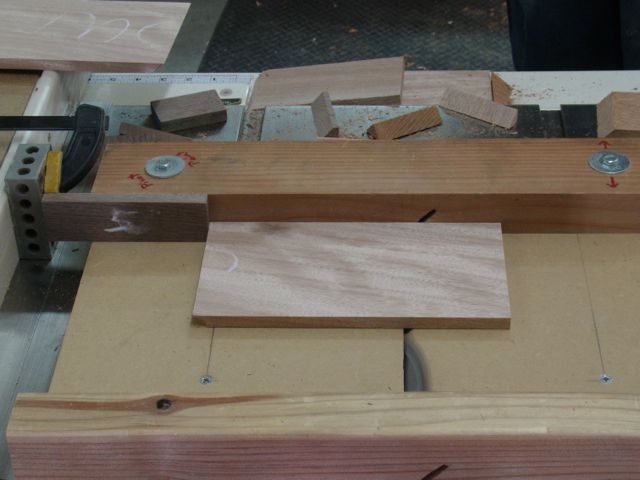
Short side cut with spacer
Flip and trim, remove the spacer to cut the longer side; flip, trim, and repeat. It’s important to keep the pieces in order as you cut them to ensure continuous grain flow. Marking them with tape is the most fool proof way for me to keep things organized. As I mentioned, I’m also making several other boxes to add to my stores inventory so at the end of this phase here’s what I had:
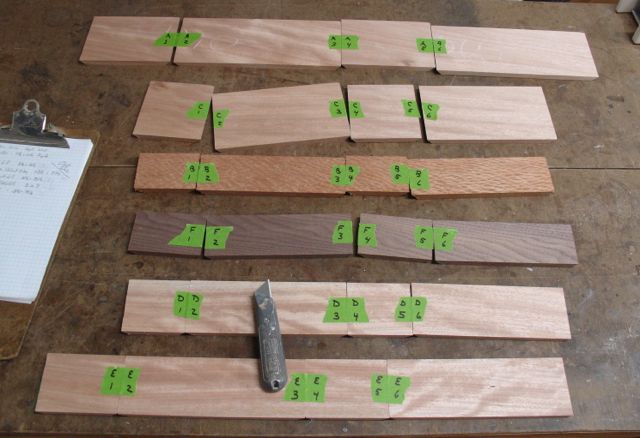
Box Parts Galore!
The parts for the custom box are at the top. The next one down will be a hinged lid box while the rest will be sliding lid boxes. After cutting the pieces to final width and also putting dados in them for bottoms and lids I managed to get all of the bottoms cut so as this picture shows, things are coming along well!
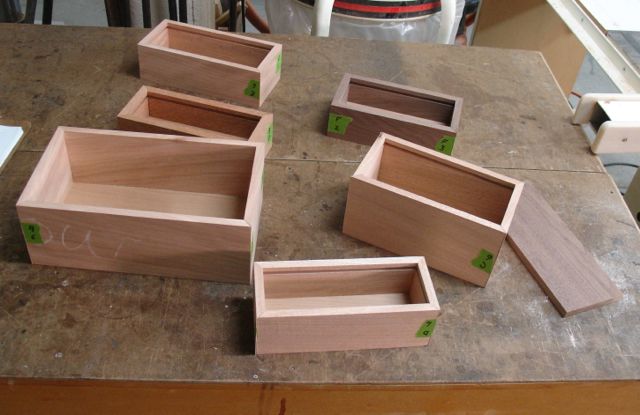
Plethora of Boxes to Be!
As a general rule, table sawn miters need a little bit of truing up which will be my next step. This is done with a block plane and a shooting board which I’ll show in the next blog. For the sliding lid boxes, one end will need to be cut down so the lid can be slid into position. Each box will have corner splines of a contrasting wood to strength as well as adding a decorative element to them. It’ll be time to start carving the treble clef and right now the piece of Basswood for that is being laminated. This lid is about 6 1/2″ wide and the only Basswood I had was 6″ — darn, an additional step!
