
 During the time that the dovetail joinery is being cut and fit, I’m also trying to make up the panels for this project. There are two needed for the door, plus two more for each side, and a small one above the stepped drawers. As the work continues I’m questioning re-sawing the 8/4 stock into three pieces for them. There is some movement which makes it a challenge to square the edges in preparation for glue up. At about 1/2″ thick, balancing the plane on the edge is tricky. I’ve never thought of making a shooting board for long boards before but now I think it may be a valid idea! Of course, a dedicated shooting board plane at $400-500.00 is out of the question!

John’s Armoire Plan
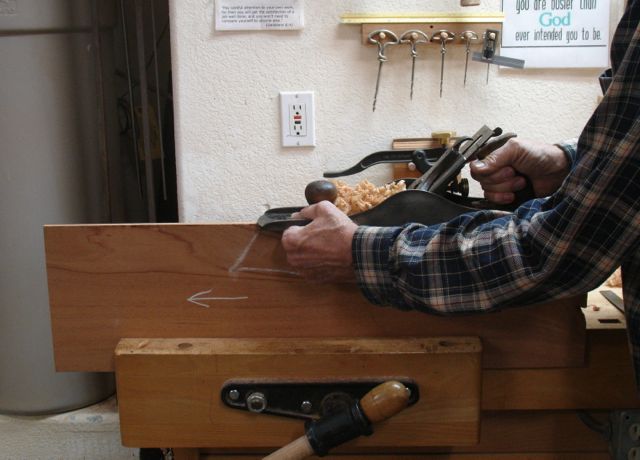
The dovetails for the framework are complete, next step is the lap joint for the center stile. This will be glued and screwed from the inside of the case after the drawer stretchers are in glued and pinned in place. This is one of many places things get complicated and careful layout is a must. The pieces for the center stile are longer than needed so this is a good time to work on my hand skills to cut the lap joint at the ends that will be notched into the second drawer stretcher. Maybe the sketch at left will help you visualize how this will all go together.
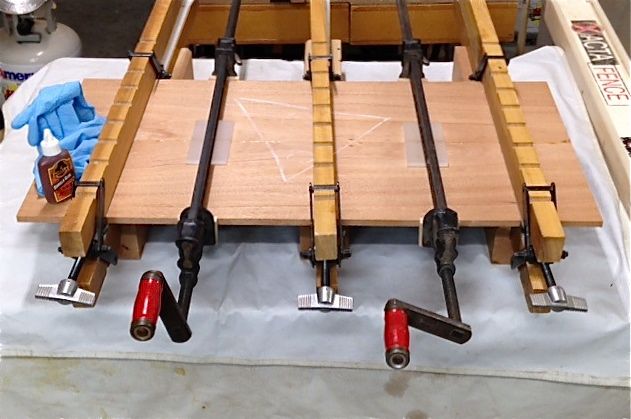
Tablesaw aka Clamping Table
By the way, these steps could have been quickly and easily done on the tablesaw but, as mentioned; the panels are also being glued up and the tablesaw has now become a clamping table! I do enjoy the hand work so this will be a great opportunity to cut the joinery by hand. Speaking of which, these panels are over 17″ and my planer is 15″ so I’m looking forward to improve my skills at smoothing large panels like using all hand techniques. Thankfully, there is only one show side so I can improve my skills on the inside of the panels before going to the one I’ll have to look at every day!
Lap Joint at end of Center Stile
The first step is to mark out the area that needs to be removed with the marking gauge, square, and marking knife. Both pieces were clamped together and the first cut is pretty straight forward. Here’s where a sash saw would come in handy but my crosscut dovetail saw is up to the task.
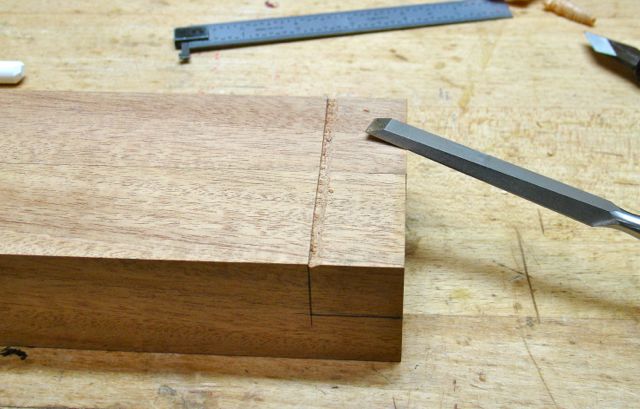
Notch to aid starting the saw
Before making the cut, a chisel was used to cut a slight notch on the waste side of the scribed line. This technique will help you get the saw started, similar to the technique used when cutting shoulders on dovetails. The other cut for this joint was harder to make because of the length of the board. It’s made with a rip cut saw but as you can see, even though I’m over six feet tall it was a stretch!
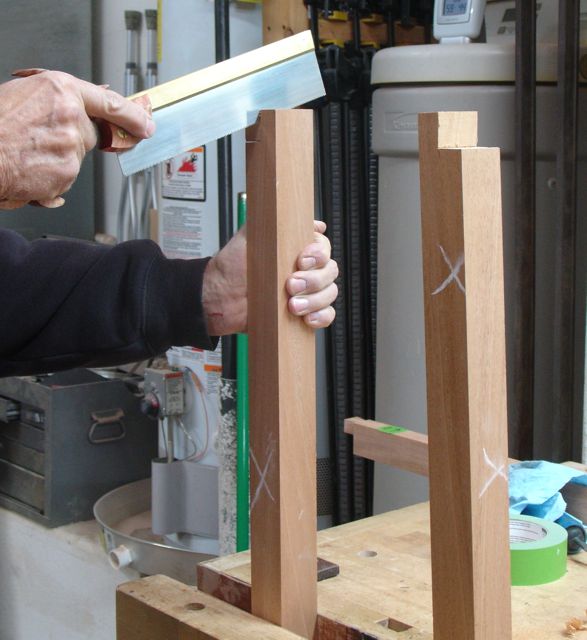
On my toes!
After squaring up the shoulders with a paring chisel my plan was to flatten out the bottom of the lap with an old #71 Stanley Router Plane — never too old to learn something though! The depth needed is 7/8″ and, until now; I never knew that the #71 has a depth limit of 3/4″ — now what? By turning the adjustment wheel upside down I was able to gain the travel needed for this cut.
-
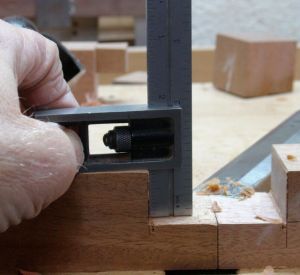
- Checked for square
-
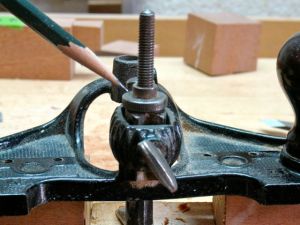
- Adjustment wheel flipped over to gain 1/8″ of depth
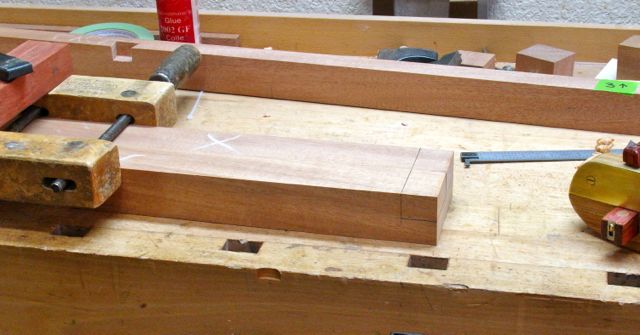
After being satisfied with the lap at the ends of these pieces it was time to cut the corresponding joint. Since these are the sides that support the drawers it’s critical for them to be in exactly the same position on both the front and rear frames. The drawer stretchers were clamped together for marking and initial cuts but then separated to fit individually.


It’s been very busy in the shop lately with work on this personal project plus the “neighborly diversion” I mentioned in my last blog, and the commission for the media table made with the recycled materials. I’m waiting for my supplier to get another load of them and for the legs to be delivered. If that’s not enough to keep me stressed and happy my client sent an email stating: “I am ready to financially commit and get going on constructions”; now if that isn’t music to my ears I don’t know what is! He’s currently out of town so I’ll need to finalize the plans and get his deposit. This promises to be a very challenging and interesting project but more on that as it happens.
