
That may strike you as a strange blog title but many times during my teaching career a student would ask me: “what’s the difference between a good woodworker and one that’s not so good?” Keep in mind, these were sixth to eighth graders so not the time to get into huge philosophical replies. My simple answer was this: “a good woodworker has learned how to hide his or her mistakes”! Simple as it may sound; I think that all woodworkers or artists in most fields will make mistakes. Sometimes it’s due to your own fault in handling tools or measurement and related math. Other times it may just be due to the materials we work with. You may recall that the bottom stretchers of the armoire are assembled with dovetails. These are about 3/4″ thick. One one, my layout line was off slightly less than 1/16″ (don’t know how that happened) so it needed to be moved up that amount. What I chose to do in that instance is glue a piece on the lower side of the tail and then chop out the socket to raise that member. The other mistake was due to the wood, see the before and after:


My guess is that the piece split out while fitting the joint. Redoing the entire stretcher was out of the question so I knew it needed to be repaired. Basically the damaged area was cut out and another piece of Genuine Mahogany was glued to it. This was then cut, planed, chiseled, etc. until it fit as it should. Here’s a slide show of the process I went throughout to accomplish the fix:
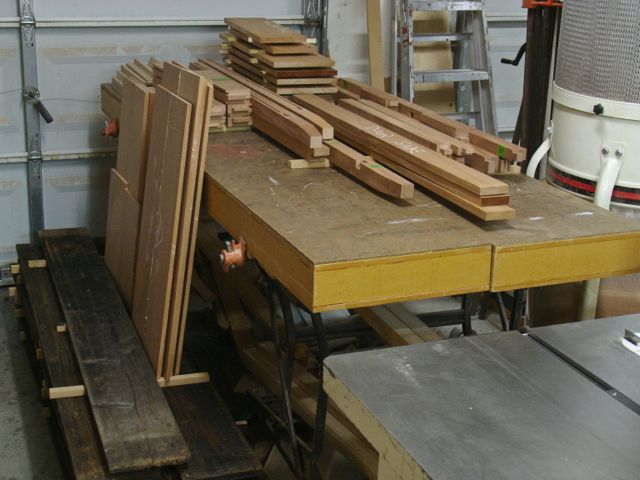
The other area I wish I would have taken a before picture of was the shop in general. The shop takes up the single side of our 3 car garage. Luckily, Diane’s car is small (Mini-Cooper) so besides that on the double side of the garage there is room for all my machines on wheels plus storage. I have an assembly table that doubles as the out feed for the tablesaw but it got to where every horizontal surface was completely covered with wood, tools, pencils, sawdust, etc. — I just couldn’t stand it any longer!
Organized Chaos
Seems I wasted more time trying to find what I needed and it became a safety hazard. All of the pieces that had been fitted and dry clamped together were disassembled and marked. As far as the sequence of assembly goes I will first assemble the front and rear frames. Those will then be joined together with the appropriate panels between them. What you see here are all of the panels joined but needing to be surfaced — all hand plane work that I’m actually looking forward to. The dark pile of lumber they are sitting on is for a paid commission that I’ll start this weekend — more on that later. The pile of boards on the back of the assembly table are the drawer fronts that have been resawn and surfaced and are now stickered to stabilize. All the other pieces are for the frames and drawer web.
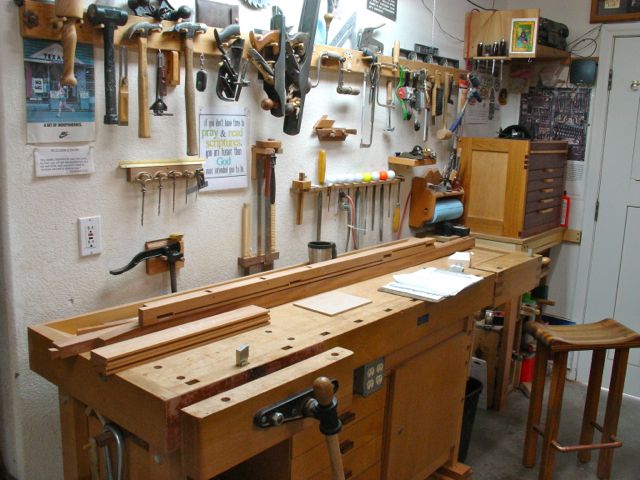
Clean Workbench!
My work bench can now also be found! The last bit of mortise and tenon joinery needs to be made for the back of the door unit. That’s what I have planned for tomorrow. If all goes according to plan, Walnut dowels/pegs will be next followed by surface planing all of the frame pieces prior to assembly. I currently have two paying jobs (yeah!) that are waiting for items ordered from 3rd. party vendors. One of those is a media table with metal legs, those are scheduled to arrive Friday. I need to build the top and drawer section for that project to fit the legs so really need to physically have them before cutting the wood. The other project is an extreme challenge and the crucial part for that won’t be here for another 3 weeks. I’ll leave you with a teaser though, here’s a google search for mechanical cellarette to pique your interest.
