
Some of you may recall my post dealing with the Cigar Presentation tray that was recently completed and delivered. The construction of that featured finger joints cut on the tablesaw. One thing I’ve learned while making boxes for the Etsy store is that it’s better to make a number of boxes rather than just one at a time as special orders come in. This holds true especially on those that don’t feature hand cut joinery. I had some of the recycled fence boards left over from Nicks Media Center that, even though they were inexpensive; I couldn’t make myself just throw them away! Running them through the planer to create a flat gluing surface and exposing the old growth redwood they looked fantastic. It crossed my mind that these boards could be good candidates for future boxes.
With that in mind, I selected the pieces that I thought might have some promise. After weathering out in the wilds of California for who knows how many years there was a fair amount of cupping, warping, and cracking. Because of that, the width I could get was limited to about 4″ or so. When I tried to make a taller box than that the warp in the boards prevented the finger joints from coming together without splitting the board — didn’t look too good so I’m keeping the boxes at a lower height. Using 1/4″ finger joints and the accepted practice of an odd number of fingers will determine the over-all size. As much as I dislike production line work, a project such as this benefits from it. Once the finger joints were cut here’s a brief overview of the process:
Off The Fence
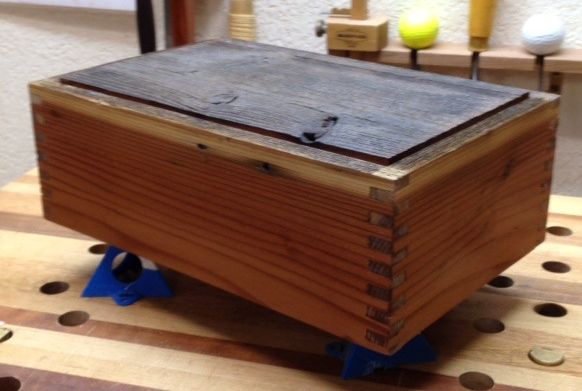
Maybe you noticed how some of the boards still have a bit of the original “patina” to them. The plan is to leave the top au natural just the way it came to me. The only thing I’ll do to it is wire brush it to remove any loose materials. I did one example (shown here) so you can get the general feel for how they will come out. Diane suggested leaving the top completely unfinished, for this example I shellacked it which she thought took away from the character of the box.
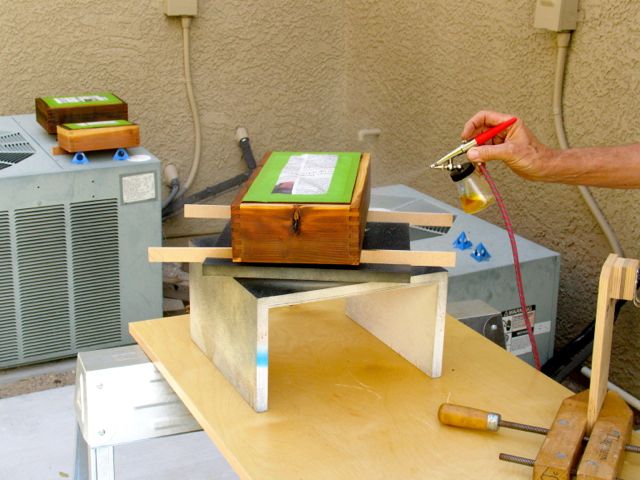
Outdoor Spray Area
Since she has a design sense I really trust I’ll follow it, here are the assembled boxes being shellacked outside — notice the top is taped off to keep it natural. These should be an interesting series of boxes. When they’re complete they will have some decorative, black hardware and the bottoms will be lined with denim.
Just a couple of notes about this project. There’s a company I use from Canada called Small Box Hardware that has quite an extensive collection of interesting hardware. Another item I’ve mentioned before in my blogs is the box slot cutter router bit from Lee Valley that makes cutting the grooves so much easier. As you saw in the slide show, it’s simple to use. After clamping the box together you run the bit inside, I recommend going to the full 1/4″ depth in two passes and using your vacuum to keep things clean. Using a 1″ belt sander makes quick work of rounding the corners of the top and bottom. My glue of choice is Old Brown Glue as it gives me more than enough time to get glue on all of the fingers and clamped before things start to set up. It’s made in the USA and works great.
After the shellac cures it’ll be time to finish them and list on the Etsy store. I’m considering doing the Summerlin Art Festival again this year in October. The entry deadline is June 1st. and I’d need to get juried in. It’s a good way to get local exposure for my furniture work plus, hopefully, make a couple of bucks! Now that we have the tent, tables, and shelving the expense won’t be as bad as our initial Art Festival.

Pingback: Off the Fence — Details, Details, Details !! | Woodworks by John