….and I don’t mean this one!
Ali checking it out!
Just thought I’d start this out with a little bit of humor and show you how close to me my cat likes to be. When we first began our search for a 6 month place to live, finding one with a garage was high on the list. This proved to be hard to come by and now I really like my little corner of the bedroom where the bench is set up. An advantage too, is that my Oriental Shorthair (who is bonded with me to the max) can spend more time in my company. I also wanted to use the title as a lead in to my self imposed teaching. The phrase, more than one way to skin a cat; is one I used when I taught construction at the boy’s prison — funny how some of the boys took that literally! Just as I explained to them that there can be more than one way to complete a job successfully, now that I’m on the other side of the desk I’m reminded of exactly how true that is. While watching both of the workshops I’m enrolled in I see differences in Mary May and Chris Pye approaches as they do similar work. My task as the student is to experiment using both of their techniques or a modification of them to see which works best for me. It’s a definite learning process that brings me enjoyment and maybe a bit of frustration thrown in for good measure too!
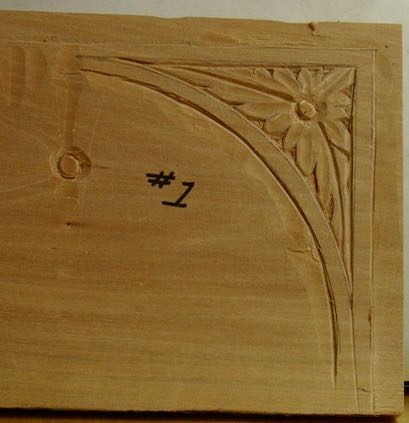
Corner Motif #1
This project is one I wanted to incorporate into a picture frame. It’s based on a mirror frame that Chris Pye has on his site. Essentially it has an 8″ diameter mirror on a flat piece of Lime wood , I was attracted to the leaf motifs in the corners and thought they could be incorporated into a design for a frame. This is the first attempt on a piece of the Basswood brought from home that is somewhat grainy — excuse? yep! After quite a bit of experimentation this is the final result. It’s interesting, being on the student side of the desk and watching CP (Chris Pye) take out those little pieces that outline the edges of the leaf — cut here, cut there, and out it pops! Took quite some time and practice to get that process down. Just a side note here, I have some friends (you know who you are Bill!) that have suggested that if I didn’t spend the time to photograph and blog I could probably get done quicker. The bottom line is that by following this process it makes me stop and think, plus there is now reference material on line for me to refresh my memory when this process is needed again.

Corner Motif #2
The next step was putting this leaf motif onto another Basswood piece, this time mocked up to mimic the miter joinery found on picture frames. Grain direction would really be interesting here! I had some concern about the boss in the center of the leaves but the results were acceptable. Laying out the inner curve was interesting and will be even more so when it comes time to do the actual frame. That penciled in line on the inner edge shows where there is a ridge on the actual molding.
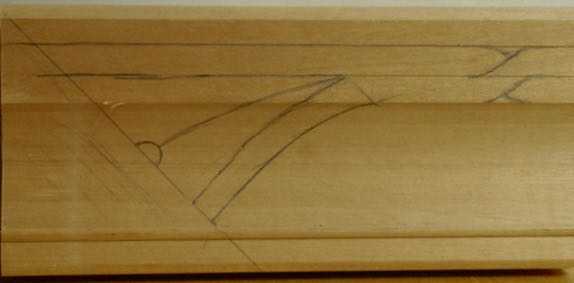
Molding Profile
Okay, it didn’t come out too badly on the flat surface in #2 but the frame in mind has a very pronounced ridge and cove to it’s profile. MM (Mary May) had a video where she did an altar piece that was already assembled with mitered joints. Watching that gave some inspiration of how I may approach this. Lay-out was tricky but I’ll explain that more when I do the actual frame. Here’s a piece of the molding with the design partially drawn on it. It’s not mitered so that’s only penciled in. The design will have two “ribbons” that separate in the corners and I’d like to have them crisscross in the middle of each leg.

Corner Motif #3
Work began by rounding over the pronounced ridge before starting work on the design itself. Any problems encountered now will only be magnified when working on the already assembled. In any case here’s the results on the molding profile sample. I can see I was a bit too aggressive with the initial outline of the area with the V-tool. Also need to be more careful to maintain a uniform width where the ribbon dives into the corner. All I can say is “so far – so good”. Many unknowns at this point which can only be solved by doing. The carving needs to be deep enough to be clear under the gesso (sealer/burnisher) but not so deep that it’s difficult to lay the leaf without it cracking and leaving many voids. Onward and upward — anxious to see how this will all end on my first, Scottsdale Adventure frame! I’ll leave you with this picture of the pre-assembled, uncarved frame and the sample piece. This frame is for an 8″ x 10″ painting.

Frame to Be!
