

Sample Piece and Frame to Be

Foster Planing Mill No. 95
A very classic design for moldings is the waterleaf motif. Although they appear quite complicated its form comes from a series of cuts made with specific chisels in a given sequence. Whew, all that being said as an ultra runner I seem to like repetition; you know the process — left foot, right foot, etc., etc. Start that pattern and in 10 hours or so you’ve conquered whatever 50 mile mountain race you happen to be doing at the time. One of the molding profiles we found at Foster Planing Mill seconds area is the one pictured here. It currently lists for $6.85 per foot and I know we paid a lot less than that for it! The waterleaf will fit nicely on the Ovolo section.
For reference I’m using the water leaf molding series on Chris Pye’s website as well as his book: Wood Carving, Projects & Techniques. Another book used for reference is by Frederick Wilbur: Carving Architectural Detail in Wood. These are books that have been around for quite some time so you can probably find them bargain priced on eBay. I also use Pinterest and image searches on the internet. All that being said, the most difficult thing to find is detailed images of how to treat the corners of the molding — thankfully Diane has a pretty good eye for that, mine is still developing!
The frame I’ll be doing has a sight size of 16″ x 20″ and can handle a stretched canvas. After doing a practice section and gilding it to see how difficult that may be I was ready to begin work. I’ll break this up into a couple of slide shows to give you the basis of how I went about it — no substitute for Chris Pye’s video and practice but hopefully it’ll break the process into simpler steps. First was to make a plastic template that fit in the Ovolo section of the molding. The eye (place where two leaves meet) is generally 1/3 of the distance but your gouge size determines it as well, I had a #5/23mm.
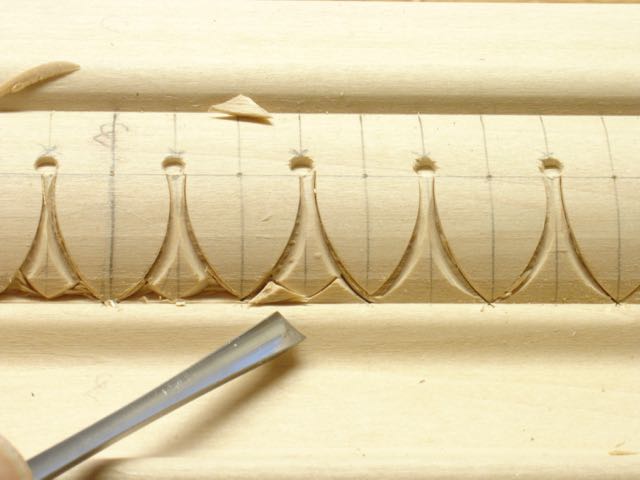
The spacing of the units was trial and error but main focus was matching the gouge size to create a nice pattern. To draw the straight lines the pencil point is put into the divider mark, slide the square edge of the pattern to it, and draw your line, just be sure your pattern in 90 degrees and square. A #9/3mm is used to make the eyes followed by a punch to flatten the torn fibers at the bottom.


Now it’s time to shape the leaves themselves. I began by using hand pressure to lightly set the line from the lower corner to the eye. This was followed by what I hoped were uniform taping with a light mallet to set them in to a consistent depth. All cuts were made in one direction then the other. Now to remove a crescent shaped sliver using the same #5/23mm gouge — difficult to get consistent cuts as you can see so practice is required! I keep reminding myself though about that saying of the beauty of handcrafted items being their imperfections. Also, it’s the painting that should be the star while the frame has the supporting role.
Secondary Leaves
When the frame is gilded the variations shouldn’t be so obvious. Now that the main leaves are complete the secondary ones between them need to be formed. The #5/6mm fishtail is just right for this step. By cutting all from one direction, then the other, then both sides of the main leaf I hoped to achieve a uniform rhythm. Once all four sides were cut, they were popped out using either the fishtail or a small, skewed gouge.
All that remains is to form the tops of the leaves. The line between the eyes was first stabbed with a double beveled, fishtail chisel (#1F/16mm) making it deeper at the top and shallow on the eye line. The tops of the leaves were then formed with a #5/12mm fishtail.


So there you have it, a short tutorial on cutting waterleaf molding. The question that always comes up is: “how long did it take?” The first one didn’t count because I took all of these pictures to share the process but the second, 16″ leg took right at 45 minutes. I recently had a conversation with a fellow woodworker and her and I seem to be on the same page. Doing things like this is all about the process, the reward is mainly your own self-satisfaction. Can’t ask for anything better than that as far as I’m concerned!

Pingback: Waterleaf Molding — Gilded | Woodworks by John
Pingback: Faux Sgraffito | Woodworks by John