
My Happy Place!
Ah yes, it’s been a long time coming and now the plan to become known as a custom, boutique framer is under way. My goal is to establish my work here somewhere between those frames that are priced in the thousands of dollars and the big box frames that are okay for framing diplomas or you grandkids picture but not really gallery quality. Like Diane told me; “You need to be the artists friend”! Pricing will be the key knowing first hand that the phrase “starving artist” is really valid! This frame, Ocean Waves; is the first on that will be made from the Woodworks by John#1 molding. After talking with many of you at the Scottsdale Artist School and hearing your questions about my process of frame making I thought this would be a good opportunity to share that with you. It’s very similar to the process I use with custom furniture where my clients input plays an important role. In the past, I used some of the molding we had milled for Diane’s work or else the moldings I’d get from Foster Planing Mills seconds area. Now that Barger Molding here in Phoenix is milling my profile this will be my stock molding.
The process begins with our initial contact. The price for this 8″ x 10″ carved and gilded frame is $330.00 plus shipping. My client emailed me from New Jersey with these images, the one on the left is of the painting he now owns and the one on the right is of the frame idea he has in mind:


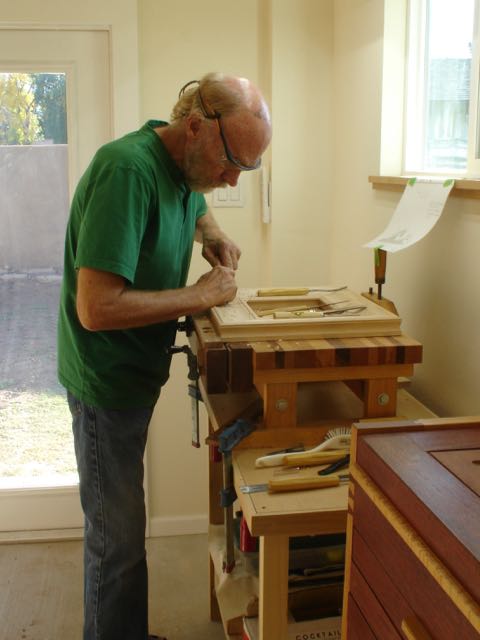
Seeing that frame you can understand why I chose to title it “Ocean Waves”. The painting it was on was much larger so the design obviously needed to be modified. Technology comes into play first by allowing me to scan and resize the image with computer and printer. This is then modified by old fashioned drawing! After getting approval from the client a pattern is created to ensure that all corners be uniform, there is more detail about that process in this Blog. The next step is to figure out which chisel is appropriate to first outline the pattern. The pattern, which is mounted to a piece of thin plastic, is actually cut out with the chisel and noted on a piece of paper. This helps me remember which chisel to use — keep in mind there are eight of these to carve!


I realize that this pattern could be programmed into a CNC router and spit out in minutes rather than hours of hand work but the final product just isn’t the same. Even if I were to make a number of these frames, each one would have its’ own personality and hand crafted quality. The carving process begins by outlining each curve, connecting the longer elements with a V-chisel, and then grounding out to set it apart from the background. The challenge is maintaining a uniform depth, thankfully the quality of the Basswood is great!


This process is time consuming but many of you artists know that feeling of becoming so engrossed by the creative process that time doesn’t seem to matter. Many times we get into that “zone” and discover half the day has passed without even realizing it! Great feeling isn’t it? At this point half of the frame is pretty much complete. The steps that follow include applying burnisher/sealer to the entire frame followed by gilding and patination. I’ll keep continue to blog about the process. Here is how the frame is looking at this point.
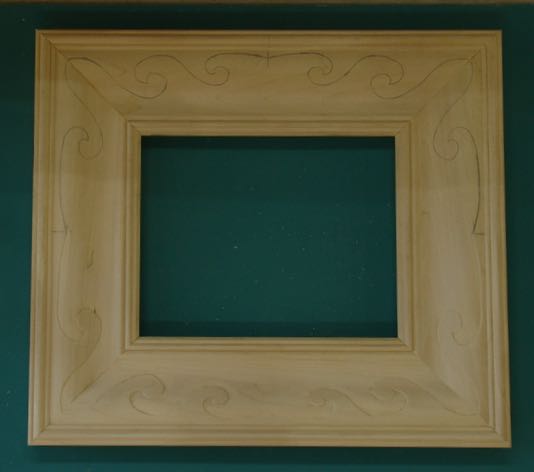
Partially Complete

cnc has no place in a craftsman shop..if they call themselves a craftsman
LikeLiked by 1 person