My current furniture project is a small bookcase made of Walnut. I talked about my design approach and the requirements for it in my last blog. While working away in the solitude of the shop I started thinking about why I do my work the way I do, after all; there is more than one way to skin a cat and you know I like that saying; “ask 10 woodworkers the same question and you’ll get 12 different answers”! My blog serves a couple of purposes; keep my clients informed, share and get feedback from other woodworkers, and; being a “man of a certain age” give me an easy way to go back and remember what I did!
My woodworking began in high school in the mid 1960’s and I distinctly remember Mr. Ben Aiello, my woodshop teacher explaining how doweled joints will ultimately fail at the dowel because you’ve added a different type of wood. With the advent of pocket hole joinery, Kreg’s jig, biscuits, and now the Domino I still remember that so prefer mortise and tenon and also tongue and groove joints in my work. Yes, they take more time to fit but I really admired Mr. Aiello and had seen older furniture fail at dowel joints. Ironically, the Ash coffee I made in high school using dowels to laminate the top together from 3-4 boards failed about 15 years after making it! So, that’s the back story of why I utilize these joints.
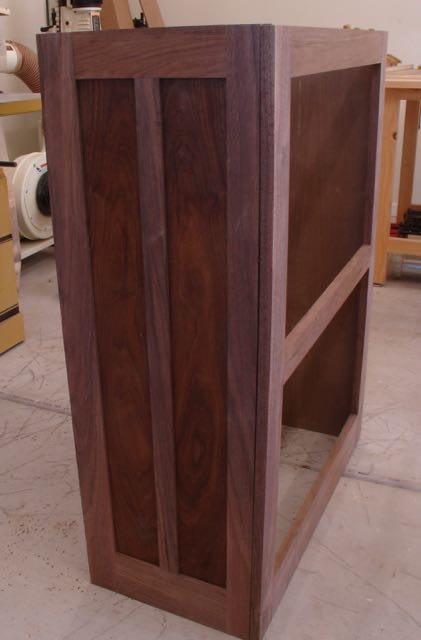 Approximate dimensions of this bookcase are 14″ deep x 30″ long and 41″ tall. It will sit in a corner so only the face, left side, and top are solid Walnut. The book matched panels were oiled prior to gluing up that side. The glue I use is Old Brown Glue, a liquid hide selected because of the ease of cleanup and longer open time. This is constructed with mortise and tenon joinery.
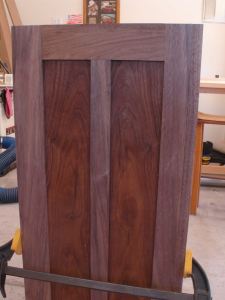
This is the left side which will show, the right side buts up against a wall so is 3/4″ Walnut plywood. Both sides glue into the front face frame with a tongue and groove joint shown below.
-

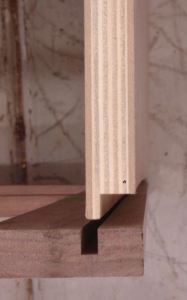
- Left Front Corner
-
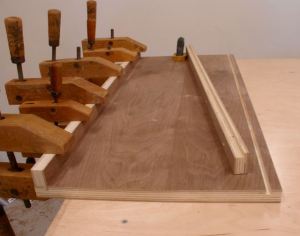
- Joint Clamped-Up
-
- Right Front Corner
Left Front: Face frame has 1/4″ groove and side is rabbeted to fit. The front is left slightly proud and is planed flush after glue up. So that both vertical members of the side are equal width the one that is rabbeted is narrower than the other — just some math required. You can see how when it is assemble there is no seam and the entire corner is securely glued.
Right Front: Since this side goes against the wall it is slightly inset to compensate for any variation in the wall, already know the corners not square but will scribe the top to fit.
The plywood is a challenge! It’s what’s referred to as a combination core which has a lumber core covered with a thin layer of MDF and then the Walnut veneer. At $140.00+ I would have expected it to be flat but unfortunately that’s not the case! A consideration for this bookcase is that it will hold many heavy books. In the past I would laminate two pieces of plywood together but don’t think that will work. The solution was to create almost an I-beam unit by cutting a groove into the bottom of the shelf so a tongued piece can be clamped and glued into it. This piece is pre-drilled for screws and my plan is to glue and screw it to the face frame and 3/4″ plywood back. It’ll be an interesting glue-up process but I’m confident it will come out fine!
-
- Shelf with Reinforcement
-

- Plywood back rabbeted into sides
That’s my method, comments and questions are always welcome!
