

Clamped Up
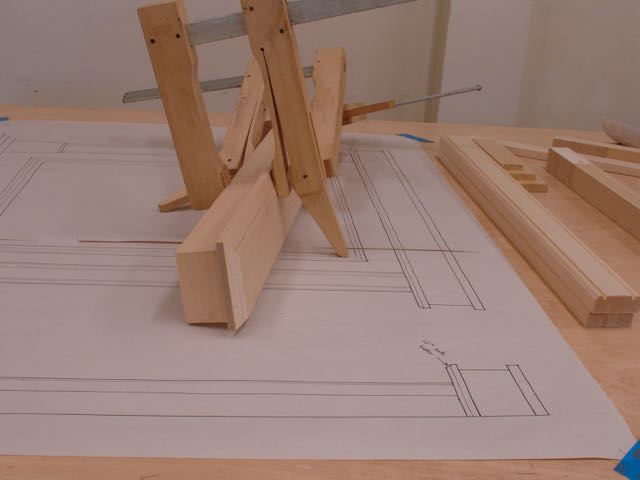
I’m not sure if all artists and woodworkers get as excited about the progress of their projects as I do but my guess is that they do! It’s just plain exciting to watch something take three dimensional shape after drawing it and “conjuring” it up in your mind. That’s where I am on the Tabernacle frame # 157. After some time, things are really starting to come together as this picture shows. The final top piece won’t be installed until later, I need to miter and fit the embossed piece of molding first. It’ll be a challenge matching up the pattern so stay tuned for that one! Pin nailers are great tools but as particular as I am, find that the hole they make still needs to be filled prior to finishing. They are valuable though to secure the piece in place prior to clamping. Trying to glue and clamp the piece like the column is crazy — they just move all over! My technique is to apply the glue, shoot in a couple of pins, and then clamp it and watch the glue ooze out of the joint so I know I’m getting a good bond.
For the stepped molding it was rabbeted so that is used to register the location so no clamps needed. For the plinth blocks though I found it necessary to pin it in place before clamping. Those blocks were chamfered at the tops with a block plane prior to assembly.


Wanting to keep the chamfer on those plinth blocks as angular as possible I decided using a block plane was the best bet. Only about 1/8″ and an eyeballed 45°. The columns needed to be sanded to smooth a little bit of tear out left by the beading cutter, tadpole sanders and some 220 grit paper took care of that little detail.

Embossed Molding
Top glued, ready for molding and final piece
The top of the frame will have an embossed molding, this is what it looks like. The trick will be figuring out how to match the pattern as it miters back towards the sides of the top. I’ve ripped off the rounded edges as it seemed too tall. Here’s the bottom/top piece with a chamfer cut which is designed to draw your eye up. This piece was pre-drilled and is now attached with glue and screws to the top of the tabernacle frame. Once that embossed molding is fitted I can install the top piece. The molding will be oil gilded over a red base and then antiqued to add that much needed patina and age — yep, I already have some thoughts on how to go about that one as well.
That’s it for this update, I’m starting to understand that brushing on the red burnisher base coat and then the Japan black will be yet another challenge since the pieces are going every which way. There’s a lot of ins and outs and pieces going in opposite directions.

Coming along beautifully John.
LikeLiked by 1 person
Thanks Bob, haven’t heard from you in a while, hope all’s good with you!
LikeLike