Glad to be back working on the finer aspects of woodworking as compared to making the craft show display shelves. Yes, lots of tablesaw work, glue-ups, nail guns, electric sanders, and paint sprayers have their place but nothing compares to the quieter aspect of woodwork when you use primarily hand tools.
A box style that I developed is one I call Slanted Dovetails. This box design features sides that are either angled in or out and the sides of the box are then dovetailed into it. Pretty labor intensive but the over-all look is one people seem to like. Here’s an example of what that looks like. I titled this box Maple Splendor and sold it on my Etsy store.

As you might imagine, cutting those long dovetail sockets in the end grain of a chunk of Maple is pretty time consuming. Here’s a LINK to a previous post on how I used to go about it.
I’ve changed my methods to expedite cutting the sockets. Here’s a quick tutorial, the first step is laying out the tails. For this I have no magic formula but rather draw the outline of the box sides on and eyeball what looks good to me. I’m using a 1/6 ratio and make the cuts into both of the side pieces at the same time.

Before sawing the outer pieces off my habit is to use a chisel to start the saw cut.

The first cut is straight down on the marking gauge line. This is followed by removing a small notch from the board.
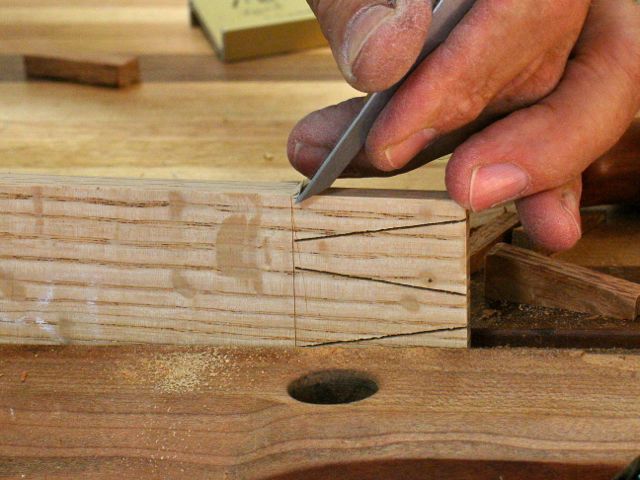
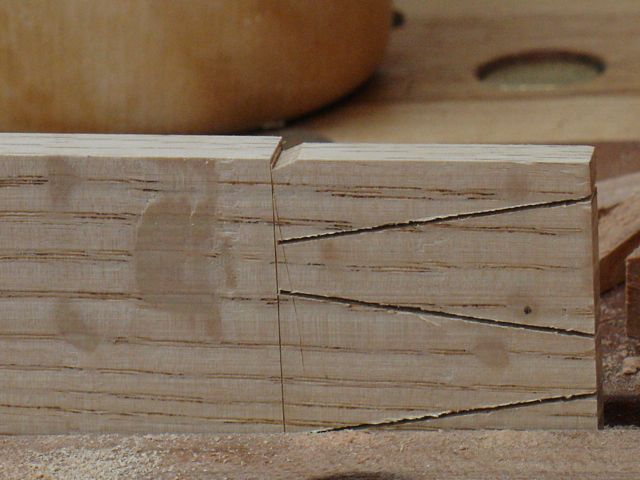
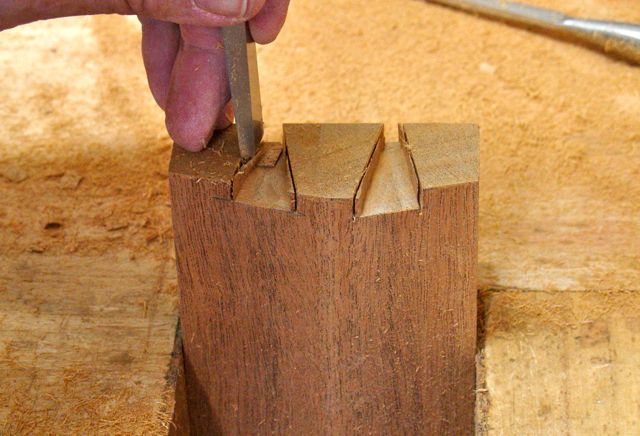
I find that this simplifies starting the saw since you’ve created a squared off notch to begin your cut. Next up is removing the waste between the tails. I start this process pretty much the same way; a vertical chisel cut into the line made by the marking gauge during layout.

That cut is followed up with angled cuts to begin the waste removal process. On a tail this long I don’t even bother trying to remove the material all the way to the end of the board. Instead, I’ll continue to create the notch pointed out by the pencil until I’ve removed about half the thickness. Then I’ll flip the board over and repeat the process on that side until the waste is removed. There’s been a lot of talk lately on using a fret, coping, or the new Knew Concept saw to remove the waste but to me chiseling it out this way is just as efficient.
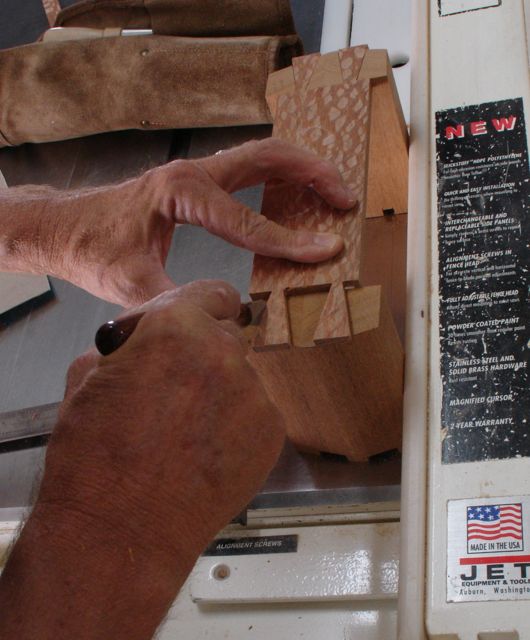 Next step is lining the tail board onto the ends and scribing them in. It can be a bit tricky keeping everything squared up! Using the tablesaw fence as a guide worked for this particular box.
This is an example of my “hybrid” woodworker concepts. As I mentioned at the start of this post, I used to remove all of the material with chisels.

My amended/revised procedure is to make the cuts with a rip style dovetail saw followed by a trim router and small bit to remove the bulk of the waste. This leaves me with enough wood at the sides to trim with the chisels. A definite advantage is that the bottom of the socket is smooth and uniform, something that’s hard to accomplish with chisels alone. I’m going to take credit for coining the phrase “hybrid woodworker” and define it as one who utilizes power tools in the same way the craftsman of old utilized apprentices. Once the grunt work is done, it’s my joy to use hand tools to fit and finish to perfection or as close to it as I can muster!
How much time does it take? Who really cares when you’re on a creative journey. At a recent Sin City Woodworkers meeting someone was asked how long it took to make a piece and how much he charged for it. He said he couldn’t remember exactly but figured he earned close to fourteen cents an hour!
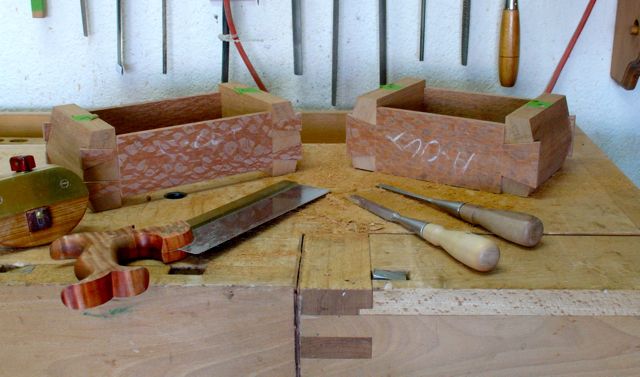
So, what ever amount of time it took me I must admit that I enjoyed the process. Here’s a picture of two more boxes ready for the next step. I’ve picked up a technique from my wife. Whenever she begins a series of rag dolls she tends to make four at a time. Like woodworking repeating the process for four boxes at a time is more efficient than making one at a time.