
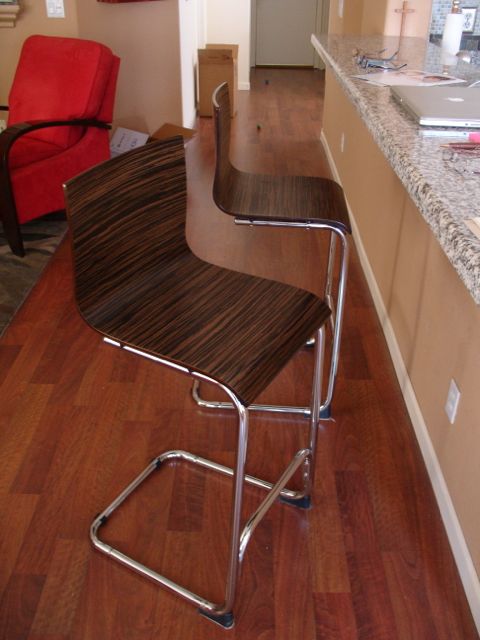
 Well, yes we do have a set of bar stools and they really are pretty nice. Matter of fact, we’re always asked if we made them because they appear to be a laminated Zebrawood form but; must admit, they’re not my work. So, you may wonder what’s wrong with these? Basically not too much but just enough to make a change. We bought them several years ago from Overstock.com for something like $120.00 per pair. Here’s the issues, first of all they’re about 1 1/2″ too short for the counter. Diane made some nice cushions for them but after some years of use they needed to be replaced. They also don’t swivel so getting in and out of them is problematic for some. The large, chrome base (besides not fitting into our decor) is a great dust collector. We have been on the search to find replacements but after going all over town and the internet haven’t been able to find anything we like better. You know the story, I’m a furniture builder who can always use a challenging project so like my byline says on the heading of my blog: “Journey with me through the fascinating world of woodworking.”
This project will find me doing techniques I’ve never done before and am hesitant to throw it out there for all the world to see but come on — let’s start the journey and build a prototype first!
Issues:
- Seat height is a bit low. No problem there, since we have a floor lamp and a coffee table I’ve made of Baltic Birch plywood, that’s the material chosen for this project. The first step was to rip and laminate two pieces 3/4″x 2″ x 33″ of the plywood for the legs. The final length will be determined once everything else is planned out.
- No swivel action. Ordered 4 lazy susan bearings from Lee Valley that are 9″ in diameter and rated for something like 500-750 pounds. I don’t have any friends that heavy! This did present a slight problem though as I began to plan it out. My initial thoughts were to stick with tried and true mortise/tenon joinery. However, notice that the chair is rectangular so if you swivel two rectangular pieces together there will be a time they are diagonal to one and other creating a great place to pinch your hand or leg between as you sit on the stool — not a good option!
- Pinch Points. After making some mock-ups from cardboard and foam core I can see that the top of the stool needs to be round which would make mortise/tenon joinery pretty complicated. I could have made a small, square base and then placed the 9″ bearing on top of that but I felt a base that small wouldn’t be very stable.
The Solution (I think)
Instead of mortise/tenon creating the framework I will use the four legs together with two discs. I think that by cutting a dado in the backside of each leg and then gluing/screwing a disk to that the structure should be sturdy but won’t know until I actually do it. The bottom disc will have its center cut out so it will do double duty as a foot rest as well as the stretcher. The solid disc on top will be the upper stretcher and is designed to support the bearing and chair. If I dial in the dado to achieve a snug fit it seems to me that’ll work. The joint would be reinforced with two screws per leg that will be concealed with a Walnut plug. I love the look of the many layers that are the trademark of the Baltic Birch. I believe the 3/4″ has about 13 plies. When the corners of the legs are radiused the plies will gradually be exposed and give that decorative look I really like. Walnut plugs will accentuate that, the finish will be a light wipe of oil to bring out the color and highlight the layers followed by several coats of sprayed on , water borne lacquer for durability.
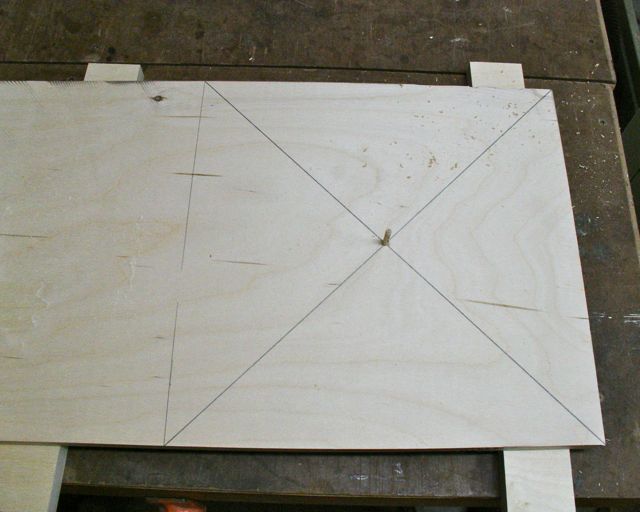
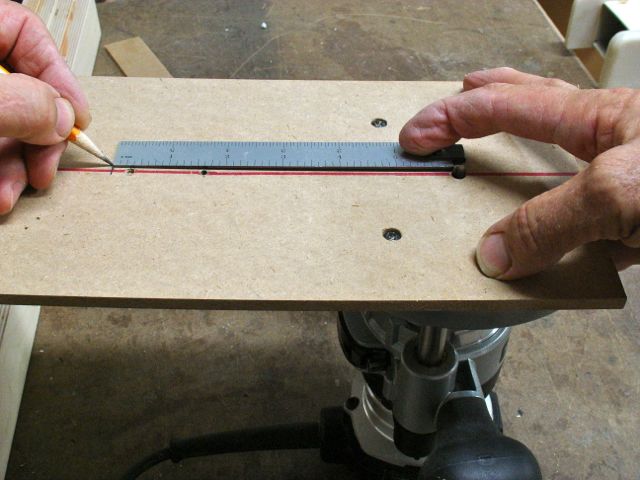 First up was to make the discs. Started with making the trammel base for a small, plunge router. After attaching the router to the end and running a 1/4″ upcut bit through it I measured to make a 12″ disc. Notice I drew a straight line (red sharpie) to center the bit and the hole for the pivot point. I draw this line the entire length of the base to ensure the cutter and pivot point will always be aligned. After drawing out a 13″ square on the plywood I marked the diagonals and a 3/16″ hole was drilled completely through. A short piece of dowel will be the pivot point.

Initial Pass about 3/16″ deep
After elevating the piece with some scrap to prevent cutting the table, the trammel point was placed over the dowel, the piece was securely clamped, and the cut was made in 4 passes.
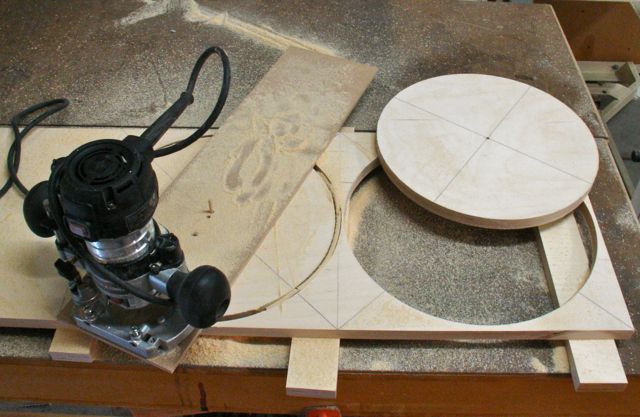
One disc cut and only 7 to go!
Here you can see the first disc is complete and I’m starting on the second. If the prototype works that’ll mean 6 more to go. This is a definite time to use a dust mask and ear plugs. Router is pretty loud!
The next step will be cutting four flat spots that is exactly 90 degrees around the disc. This is where the legs will be attached. I’ll save that for tomorrow.
