
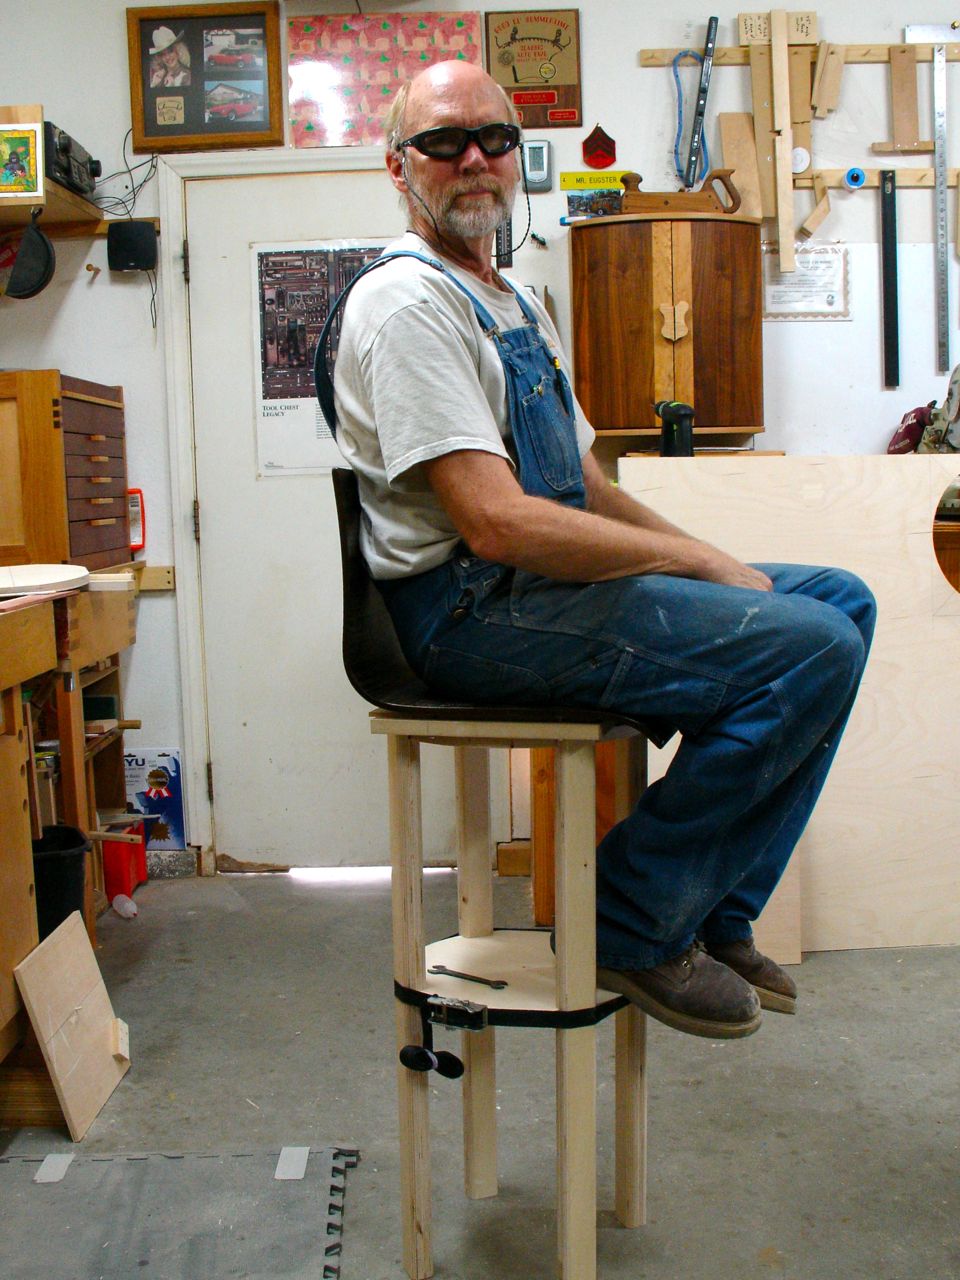
Well, here you have it and all I can say is “so far, so good” but it took some doing to get to this point. There’s a reason you make prototypes for items such as this and the journey has been interesting. This is the second base made so far and this may be a keeper! Just in case you ever want to try this let me talk you through some things to be concerned with.
First off, my plan is to have two, circular discs between the legs that have several functions. They will be the stretchers so sit inside of a groove at the foot rest portion and are inset into a rabbet like cut at the top. They fit snugly and will be glued/screwed in place. The plan is to conceal the screws with Walnut plugs adding to the over-all look of the piece.
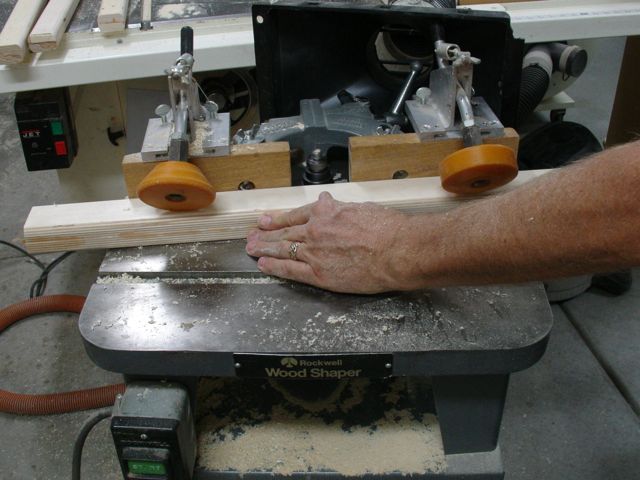 Before slotting the legs though they needed to have their edges radiused. To do that I used my almost antique Rockwell shaper with a 3/4″ radius cutter. Not sure why so many woodworkers shy away from this tool although it does have a reputation for shredding your finger rather than a nice, clean cut from a tablesaw!
Once the the dado head was dialed in to match the thickness of the Baltic Birch plywood, a stop block is attached to the fence and the upper rabbet is cut. After those were cut I used the rip fence with another stop block on it to establish the distance from the seat to the foot rest. Click on the pictures to get a larger, more detailed look at how this was done.
-

- Set up to cut top rabbet
-
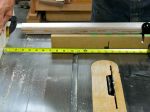
- Measuring 14 3/4″ to locate foot rest
That distance can be difficult when you’re designing something that needs to be used by a leggy 6′ 2″ man and his 5′ 3″ wife! Something you don’t consider until you go out shopping for furniture and compare things. It’s going to be a compromise as everything else in life is.
Now the concern is getting a round piece to fit securely and seat completely into a square dado or rabbet. To accomplish that I devised this jig for the table saw: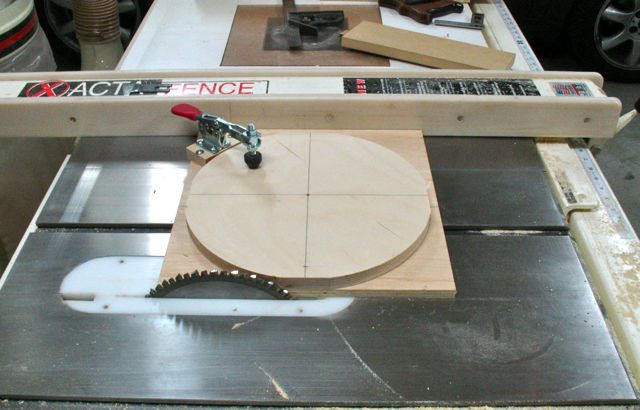
It is a plywood platform that rides against the fence. The disc is held in place by a 3/16″ dowel at its center point. After doing the first cut it became apparent that there is a tendency for the disc to rotate so I added the clamp to counteract that. To make sure things line up properly it’s important that each cut is 90 degrees from the previous one — still need to perfect that.
Here’s what the first mock up looked like:
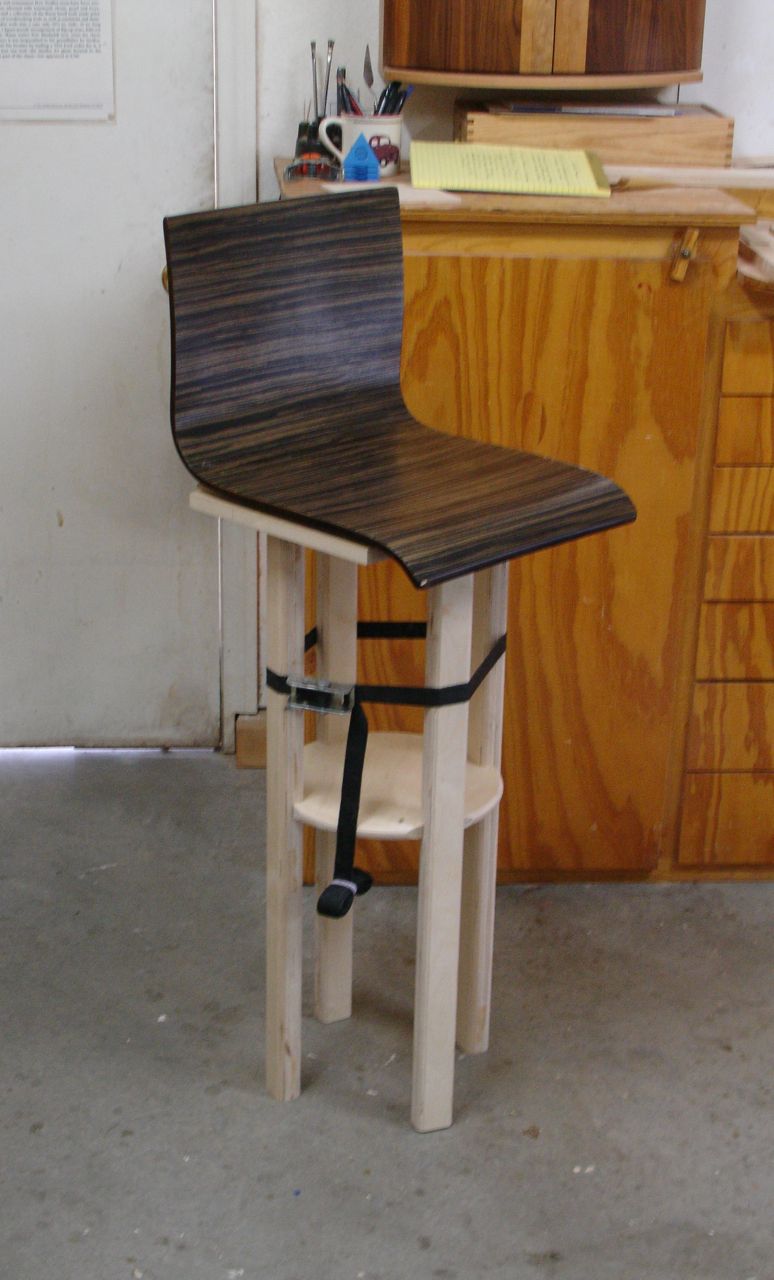 It has a couple of problems with proportions. Not only does the base look too small it’s also a bit unstable. For this one the discs were 12″ in diameter while the one you see me sitting on at the beginning of this blog has been increased to 14″. Not only is stability an issue, in this prototype you can’t fit both of your feet on the foot rest portion. Two, adult sized heels are too wide. The final foot rest will have the inside removed so it’ll be a ring rather than a disc. To lighten up the over-all appearance of the legs the bottom 5-6 inches will be tapered. A spokeshave will be used to match the radiused edges all the way to the floor. Also need to work on a more attractive way to mount the seat to the stool. There’s no way to change the mounting location as they are threaded inserts that have been molded into the seat. Adding to the difficultly is the fact that the seat isn’t flat on the bottom, rather it is curved to anatomically cradle you. What the heck, what would life be without a challenge or two!!

Thanks for the info, I’m out of town currently but will check it out when I return.
LikeLike