
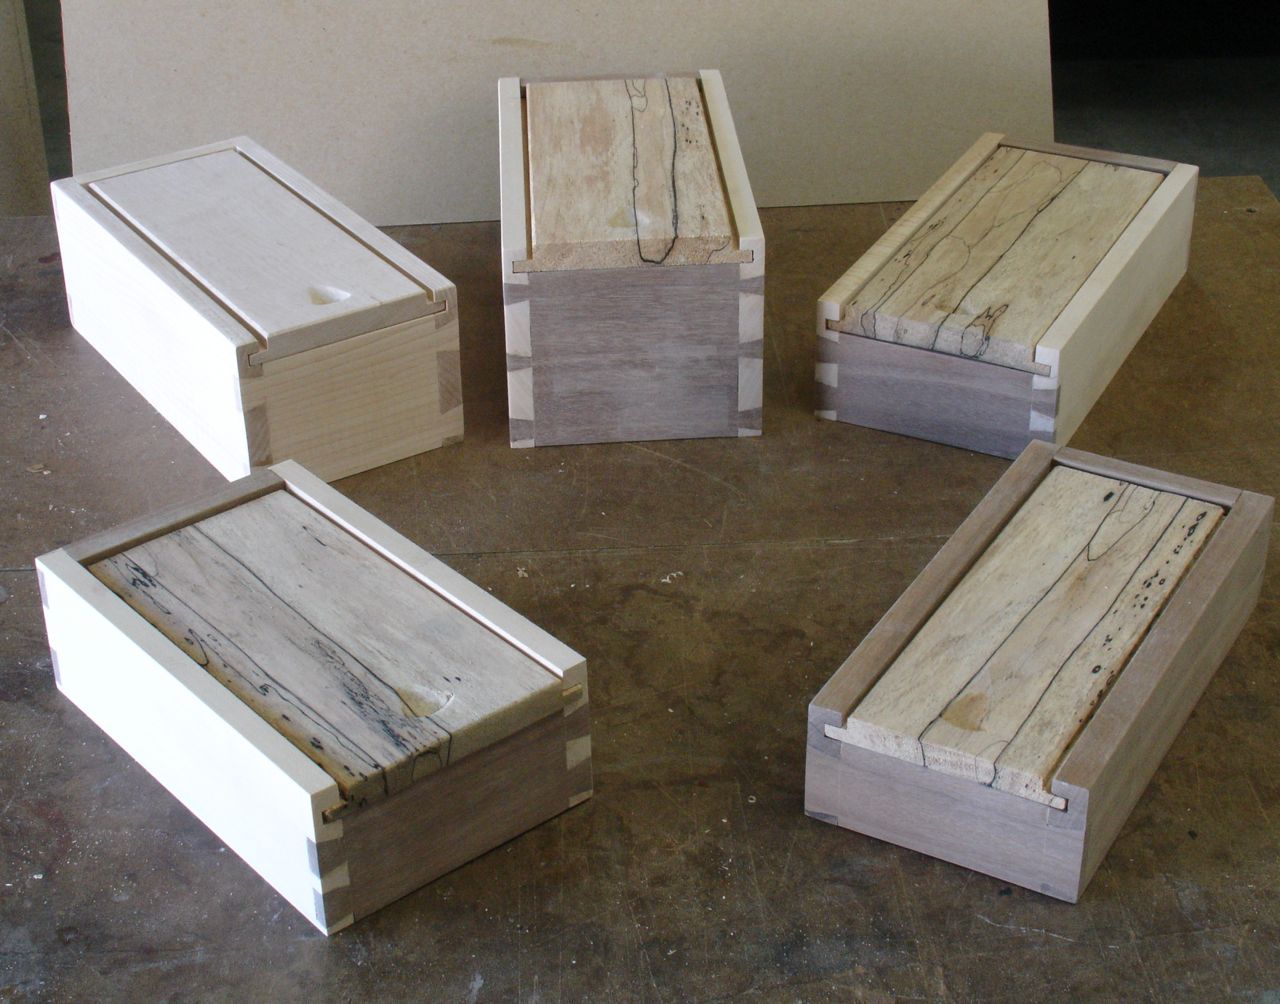
 In my last blog I was working on the sliding lid boxes which are almost completed. All that remains is the shellac finish, lining the bottoms, and adding dividers for some that will be marketed as remote control storage boxes. Must admit I was getting tired of the semi mass production of cutting the dovetails but I remind myself that it’s a good exercise. The picture shows them ready for finish. The Spalted Maple lids are a really cool feature to them and I’ve learned quite a bit about using this wood. Sanding wasn’t a good option, it results in the sanding dust from the dark areas being ground into the lighter areas and giving a smudged appearance. Instead, I’ve used a cabinet scraper to smooth the surface and my thoughts are that once the wood is sealed with shellac I’ll be able to polish it. All of the boxes with the Spalted Maple lids are made of Walnut and Quarter Sawn Sycamore, the other is made of some Striped Maple with a Bird’s Eye Maple lid. Okay, lets work on the pin boards for the dovetails.
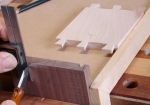
The process begins with marking them out, I love this little fixture that helps to hold the pieces in alignment:
The board has been scribed to match the thickness of the tails so those cuts are made first. I leave the piece in the fixture but raise it up to avoid cutting into the fixture:
-
- Line Extended to Required Depth
-

- Making the Cut
After repeating this process on all of the pieces (mass production remember?) the waste is removed. I tried to be methodical and it was effective. Removing the waste follows the same procedure of first creating that wedge shaped pocket right at the scribe line. This is an effective way of keeping the edge perpendicular to the board by not allowing the bevel of the chisel to push the cut backwards beyond your scribed line.
 Once all were cut and fitted, bottoms of 1/4″ Baltic Birch ply were sized and the insides of each box was sanded prior to glue up. One of the things I really dislike about the semi, mass production process is that it seems to add stress to my life! I over tightened one of the clamps and created a minor split in one of the boxes — seemed I forgot the adage of righty tighty, lefty loosey; could it be seniorites?
 In any case, planing the ends flush then some machine sanding followed by hand block sanding completed the process. It’s been good but I’m definitely ready to tackle a piece of furniture. Boxes are fine but not what I prefer to spend most of my woodworking time on. Also need to prepare for a demonstration at our next Sin City Woodworkers meeting on making and using scratch stocks.
