
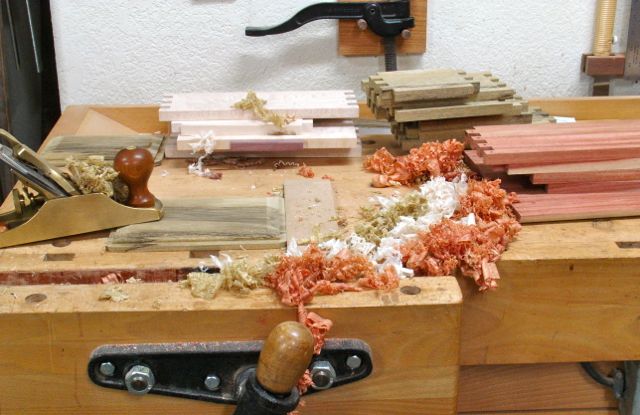
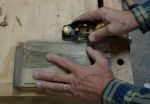
Now, that’s what I like seeing — a pile of shavings made with a bronze smooth plane. No dust or no noise (other than the radio) and a shimmering piece of wood! What I’m doing here is smoothing both the inside and outside surfaces of the four boxes in this series. The piece under the plane is the raised panel lid made of Black Limba, the others are the Macacauba and Birdseye Maple.
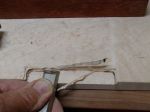
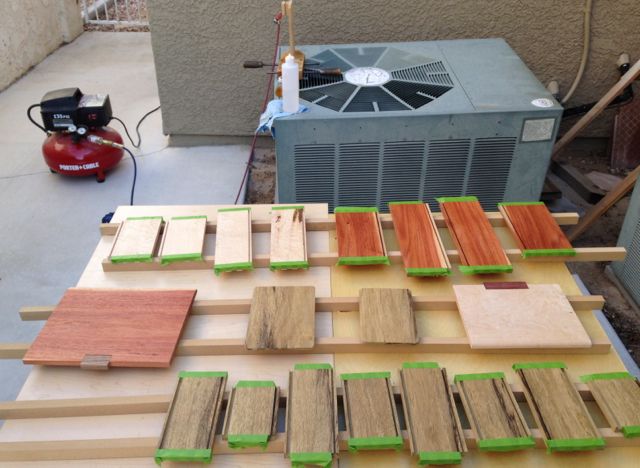 These boxes will be finished with platinum shellac which I mix fresh from flakes and the easiest way to go about that is with an airbrush. Since several of the boxes are fairly large, plus the lidded finger joint style has the lid attached when it’s finished I decided to spray the insides before assembly. After smoothing both sides of each piece tape was wrapped around the joints so they wouldn’t get any shellac on them. That would tend to seal the woods pores and weaken the glue joint. The day was an unusually cool one for us and even though we had some rain last night I decided to go ahead with the shellac anyway. Diane and I went out to lunch and wouldn’t you know it, rain drops were falling on our heads! Shellac and water don’t make for a good mix but I was blessed and it didn’t rain at all at our house, only at Panera’s about 3 miles away! The interiors were given two coats of shellac and will be finished with wax after final assembly. The picture shows how things looked when we left for lunch.
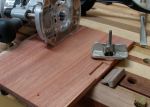
Other than planing the surfaces I also needed to raise the lids for the two, Black Limba boxes. You may recall that I decided to make them traditional, hinged boxes rather than the more complicated lidded finger joint design. This is another one of the processes done by what I refer to as hybrid woodworking. It could all be done by hand but using a combination of power and hand work is more efficient. Actually, the Wood Whisperer (Marc Spagnuolo) is writing a book by that title and I emailed him about it. I mentioned that I thought I was the one who came up with this term and I got a very nice response from him where he showed me how he’d used that term years ago in his writing. The book is set to be released sometime before the end of the year and it just may go onto my Christmas list, here’s a LINK to it if you’re interested. Okay, sorry for getting side tracked here’s the procedure used to raise the panel for the Black Limba boxes.
-
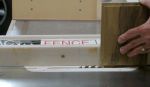
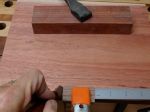
- Tongue cut by holding vertical against rip fence, several passes required.
-
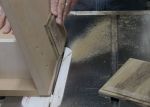
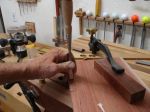
- Panel is raised with this fixture at 15 degrees. Fixture slides over the rip fence.
-
- Using a block rabbet plane to fine tune the tongue.
-
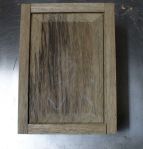
- Finished top dry fit into box.
There was an additional step completed yesterday before the finish was sprayed on this afternoon. That was fitting in the lid lifts for the lidded finger joint boxes. Another hybrid woodworking process. It begins with locating the lift on the underside of the lid, scribing it with a marking knife and then outline that with a chisel. I’ll use a small plunge router to remove the bulk of the wood and then finish with chisels and a Stanley #271 small router plane. Using the plunge router eliminates using a chisel to mortise out for the lift and again, although I’m perfectly capable of doing that it is more efficient to use the power first since I already had the router set up with the required bit. If there was only one required it would be quicker to simply go through the entire process by hand — I think, Macacauba is a pretty hard wood!
-
- Lid lift clamped in place and marked.
-
- Cleaned out to required depth; shown on Maple box for clarity.
-
- Two routers, power on left & hand on right.
So, the day ended by assembling the Macacauba box. I’ll leave it clamped over night and maybe assemble the Maple box before we go set up for the Summerlin Arts Festival.

3 years late in commenting, but wanted to ask specifically about airbrushing. I’ve always thought of airbrushing as intended for pretty small work. Here, I see you using it for boxes similar to sizes I build … a surprise to me. What do you see as the panel size limits for airbrushing? And if you don’t mind, a little about your brush(s) would be nice to know.
And YES, these turned out to be very handsome boxes.
THANKS!
LikeLike
Hi Bob, I too thought an airbrush was for smallish stuff and began to use one to seal the finishes on picture frames between the various coats. I use a single action Paasche (cheapest one they make!) fitted with a #5 air cap. Like I mentioned, make my own shellac and filter it into the bottle. I’ll give a splash of DNA to clean filter so shellac is very thin. Two fairly wet coats which are sanded with 400 grit open paper when thoroughly dry. Two more coats usually is sufficient. I’ll wait a couple of days and then use wax and white scrubby to smooth it all out. Not as nice as an oil rubbed finish but nicer and easier then anything else. At home I put a water filter on my PC pancake compressor and shot at around 15 psi. For the Scottsdale adventure purchased a Iwata Sprint Jet compressor which works well on the frames and is much quieter to keep the nearby tenants happy. By the way, best way to clean the shellac from airbrush is a mixture of water and sudless ammonia. Feel free to ask any other questions, that’s what bloggers and blogs are for!
LikeLike