
Just as I sent the latest project off to Oregon (antique victorian bookstore bell mount) I received notification from Etsy that there was a request for a custom item. For those of you that may not be familiar with Etsy, here’s a LINK and an invitation from me to check it out! It is a huge, on-line website that features the work of individual artists and crafts people like me and my wife. The work needs to be completed by the artist; in other words, it’s not the mass produced and usually imported stuff that seems to make up the bulk of things we buy. It’s a fantastic website to find one of a kind gifts and unique items you probably won’t find anywhere else. You can search for all sorts of items with the many categories they are classified in. Many of the people on Etsy, like myself, also offer custom work. I’ve had requests for a variety of items ranging from a custom game box, a flute case, and cremation boxes. Personally speaking, it keeps me in the shop, feeds my wood addiction, and fulfills my days by allowing me to do what I love to do anyway and make it self supporting.
 Whereas the last commission was the Victorian Bell Mount and was primarily all hand work with its dovetail joinery, this request is for a finger jointed box of a specific size made of Walnut. The picture shows it “in progress” with the finger joints cut and the wood selected for the lid. This client had seen the Rustic Pine Box on the Etsy site and although he liked the over-all appearance was wondering if I had anything like it in a darker wood and a specific size. Lucky for him (and me!) I had just enough of the Walnut left over from the bell project to fulfill his request. We had to go slightly smaller than his original request but were able to add a sliding tray to accommodate the items he wants to use the box for. Another positive is that he’s essentially local so once the item is complete we’ll meet somewhere between our locations and save him the cost of shipping.
Whenever you make boxes it’s a plus if you have a single board to cut all of the box pieces out. This will give you the best possible design if you cut your pieces in sequence. When the box is assembled the grain pattern of the wood will be continuous around three of the edges which is pleasing to the eye. I had some Monkeypod wood that I wanted to use for some boxes as well so in keeping with my multiple boxes to optimize work time concept am making two from that material. I also want to experiment with a different style of floating panel lid so this is a good opportunity for that.

Finger joint jig with 1/2″ spacer
The process begins by first cutting the wood to the required width. These will be 1/4″ finger joints and the general practice is to have an odd number of them for your box. When you do that you’ll have a full length finger at the top and bottom of your piece. To cut the pieces I use a sled on the tablesaw with a stop block set for the longest side of the box, in this case 7″. Since the shorter side of this box is 6 1/2″ it made sense to use a 1/2″ setup block as the spacer, that’s the black block at the left by the stop block in the picture . One of the other boxes I’ll make measures 6″ x 8″ so for that one I’ll use a 2″ wide scrap for a spacer. It’s important to keep the pieces in sequence as you cut them — I tend to label them on their outer, show surface with tape and a sharpie so as not to get confused. Pencil is harder to see and gets smudged plus it can be a hassle to get out of the grain of the wood. Here you see them ready for the next step, the Walnut box is the boards at the top of the photo.
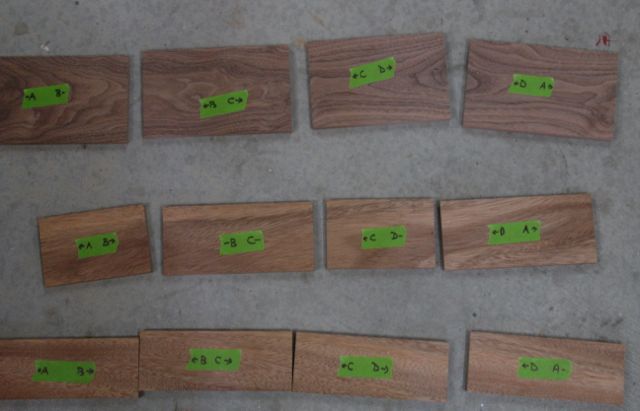
Pieces laid out in sequence to maintain the grain pattern
Now it’s time to cut the finger joints. For this I use a Freud Box Joint Cutter Set which cuts perfectly square joints unlike a dado head that tends to leave a slight V at the outer edges of the joint. Combined with a jig the work progresses fairly quickly. I lucked out and only needed to make 2 slight adjustments to get the accuracy I wanted.

Trial cut for the finger joints
There is very little to complain about when using this set up other than a sore back from being hunched over the tablesaw! There’s always a little bit of fine tuning the joinery but much quicker and easier than cutting all of the fingers by hand! Having done that in the past you can take my word for the efficiency of this setup. I believe adjustments are needed when the wood may be forced up a little during the cut because it wasn’t held securely or maybe it wasn’t tight against the jig. In any case, I’ll save those hand cut joints for larger scale joinery.
Next up will be cutting the slots for the top and bottom, forming the raised panel inserts for the lid, and planing all of the surfaces prior to assembly.

Wow, so nice to see the work in progress and how it all happens,you make it look easy, but I know better than that, it’s years of being a skilled craftsmen.looks great
LikeLike