
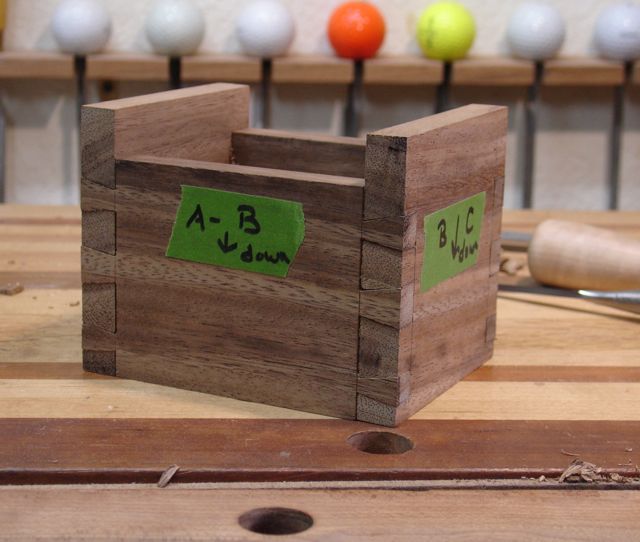
 The thing I’ve always enjoyed about my career choices, whether it was teaching or woodworking, is that there is always a challenge. I may have taught the same subject hundreds of times but because there was a different student the approach will change. Looking at woodworking in that light it’s the same — I may have cut hundreds of dovetails but because each piece of wood is as individual as my students were, the approach had to change. Saying all of that leads up to the current project that is being built of Monkeypod wood. The picture of the almost dialed in joints is shown at the left. Experience tells me that the more showy and beautiful the grain is on a piece of wood, the challenge of working it seems to increase proportionately! Case in point, those two light colored streaks near the bottom of the box have the grain reversing the direction of the surrounding wood. Add to that the coarse grain of the Monkeypod and that makes achieving a smooth cut somewhat difficult. The plan is to once more, hone the chisels and work shoulders to achieve the best possible joint.
Tails First:
Yesterday saw the tails being laid out and cut. I’m a “tails first” dovetailer and knowing that the wood may be challenging required taking time figuring out the best layout. I settled for two fairly narrow tails at the top and bottom with a slightly wider one centered in the width of the board. Here is a photo essay to illustrate my dovetail method.
-

- Boards are clamped together, inside out for cutting at the same time.
-

- Cuts complete, notice the slight rabbet created earlier for the “Stanley 140 trick”.
-

- V-cut on shoulder aids sawing.
-

- Close up of that cut.
-

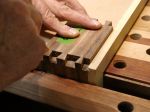
- Removing waste between tails, spacer under the rabbet steadies the board.
-

- Tails done.
Then the pins:
Here is montage of pictures showing the process I went through to cut the pin boards for this project. You’ve probably noticed a lot of green masking tape on all of the boards. This seems to be the most efficient way to mark them so they will be worked and assembled in the right sequence. I’ve used pencil and chalk in the past but it can smudge and even become hard to remove. For mortise and tenon joinery I like using machinists letter stamps to permanently mark the wood on the inside of the joinery where it won’t show once it’s assembled.
-

- Starts by scribing tail thickness on pin board.
-
- Using a guide jig, tails are transferred to pin board.
-

- Couldn’t use the jigs fence for one side so a square is used to line pieces up.
-

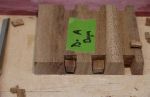
- Waste was marked right away to avoid removing the wrong part!
-

- All cuts were made on every board at one time.
-

- Waste material removed from the show side first, set both pieces in line in a semi-production mode.
-
- Each board was flipped over to remove the waste from the other side.
The next phase of the project is selecting just the right piece of wood for the lid which will be hinged using hidden brass pins. This means a lot of trial and error during the fitting process but my plan is to use pieces of plywood that is the same size as the box front and back pieces to avoid having to assemble and re-assemble the dovetailed parts. Don’t want to risk damaging them.
