
See the light?
I’m willing to bet that I’m not the only woodworker that re-saws 6/4 or 5/4 stock to get materials for making 1/2″ thick drawer sides —- am I right? I’ve done it in the past and had good results but now that I’m working on my challenge project the results are dismal!
When I was in Arizona I was able to find a 6/4 piece of Maple that was almost 7″ wide. Great, or so I thought; I would be able to resaw it and get all of the drawer sides and backs from it. The same goes for the drawer bottoms. I had some 5/4 Alder that I used in a planing seminar at Woodworkers Emporium. I cut these long enough so that I could use them for the bottoms after my students used them for practicing their plane set up and use on. Seemed like such a good plan, that is until the wood did what it wanted to do and cupped like you see in that picture.
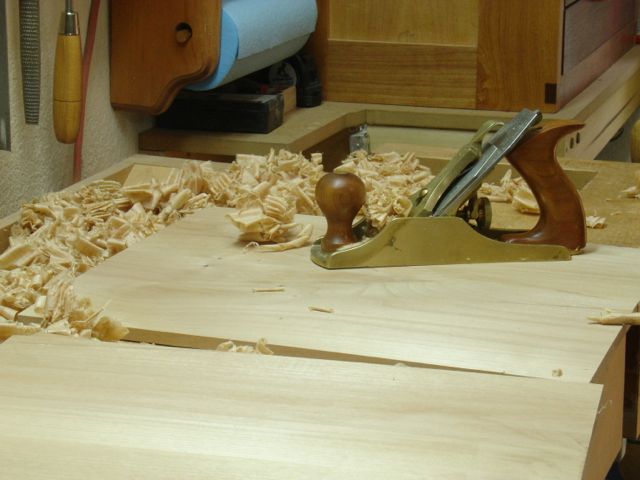
Surfacing with my bronze smoother
So, you know what that means? If this was a project for a paying client I’m pretty sure I would have scrapped these pieces and started anew. But, since I’m living on a retired teacher’s pension decided to do the best work I possibly can with them. That means lots of planing to try and flatten them which, by no means, guarantees they’ll remain flat once glued up. For my insurance I’m using liquid hide glue which is my preferred glue for dovetails and box joints anyway. Should worse come to worse at least it’s reversible so I’ll be able to save the drawer fronts. I assembled the middle drawer this evening so we’ll see how things look in the morning.
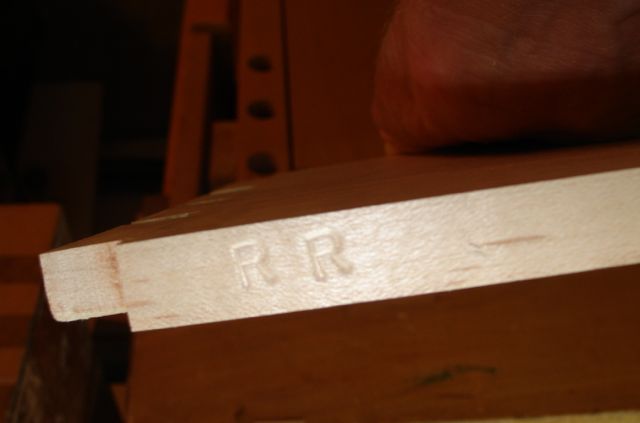
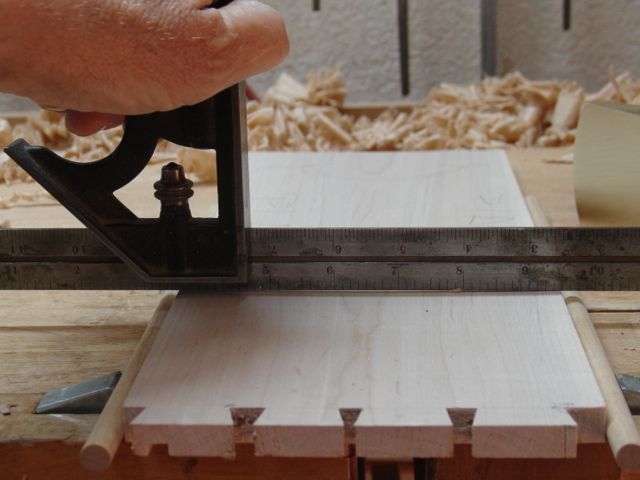
RR = right side of right drawer
There are numerous ways to mark the parts of a piece of furniture during construction. I’ve done chalk and pencil but find that the best markings are made with a set of machinists stamps. I’ll put them on either the bottom of parts like this drawer or else directly on a tenon and them mark the corresponding mortise in such a way that the assembled joint covers over it. That takes care of the drawer sides.
As for the bottoms, as I mentioned they were made from a piece of resawn Alder. I had a 1/4″ blade in my bandsaw so rather than changing to a wider blade these pieces were initially cut on the tablesaw, about 1/2″ deep to make it easier for the narrow blade to track through the full, 7″+ width of the board.


So what’s the lesson learned from all of this? I think that it may be false economy to resaw my own lumber for drawer sides, especially ones this large that are 6+” x 15″. I know that quarter sawn lumber is preferred for drawer sides but it’s darn near impossible to find. Resawing to make sides for smaller drawers or boxes should be just fine but next time I have drawers of this size I’ll buy 4/4 stock and it through the planer, alternating sides for each pass. Then, after they sit in the shop for a week or more they should be stabilized. I honestly didn’t think I’d have this much trouble with the Maple. Figured it came from Phoenix which is almost as dry as Las Vegas so the differences wouldn’t be big deal, guess I was wrong!
