
After living in our house for 18+ years we knew the bathroom would need some major work. You know, tiles and grout are just not designed to last indefinitely and water does a lot of damage to any structure, no matter how well it was built to begin with. Besides, just like everything else in houses, things do get dated and it’s a good idea to keep this major investment current. More than 10 years ago, our master bathroom got an update in the form of flooring and cabinetry. We removed the full wall mirror that was standard for tract homes in the 90’s and I built solid Walnut cabinets that included laundry baskets and a tall center unit flanked by 2 round mirrors. We also did new granite counters with undermount sinks. 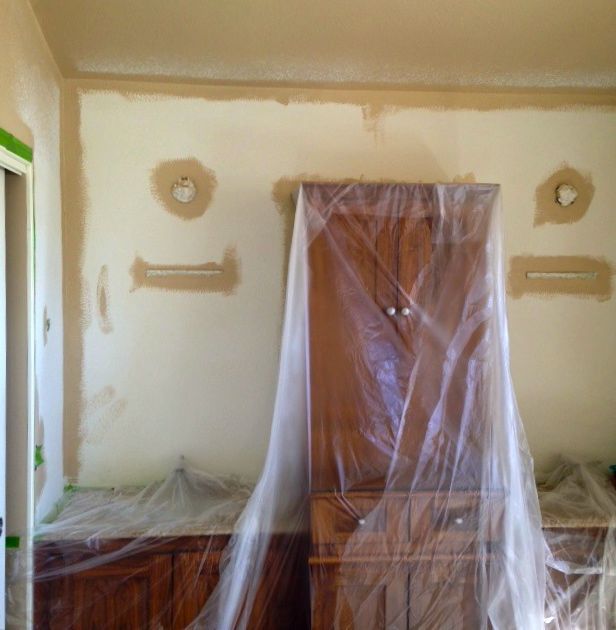 I don’t have any pictures of the original work but this one shows the current work in progress. Here I had removed the older, blue glass tile backsplash, repaired the drywall, and was just starting to repaint. Lucky for us, Home Depot was able to color match the paint from a section I peeled off above the center cabinet! So after the drywall was replaced we called in a professional to skim coat and match the texture from the other walls.
 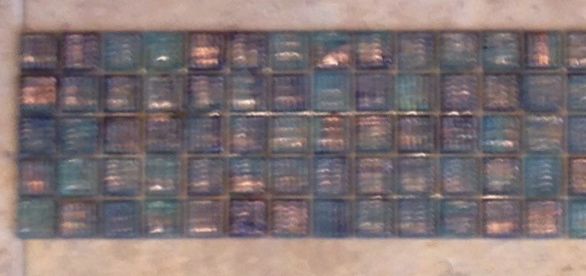 This is a picture of what the original glass tiles looked like. They’re okay but just not up to date anymore.
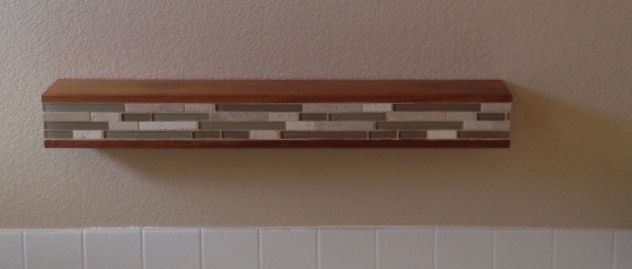 We selected a mosaic tile that consisted of 3/4″ wide pieces of glass and travertine stone. This was a new material for me to experiment/work with! Luckily, my across the street friend and neighbor let me use his wet tile saw to cut all of the pieces for the job. The first thing I attempted with this material was to re-do the Walnut and tile shelf that goes above the bathtub, it too had the blue glass tiles.
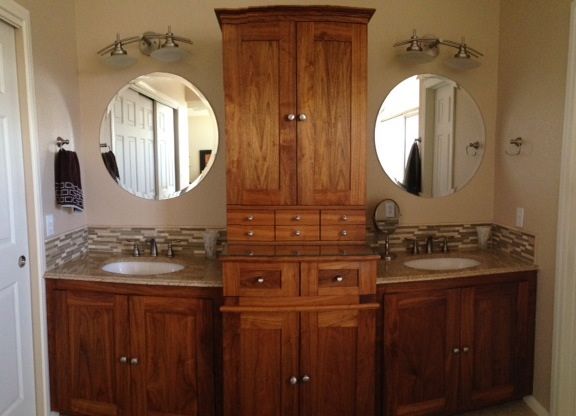
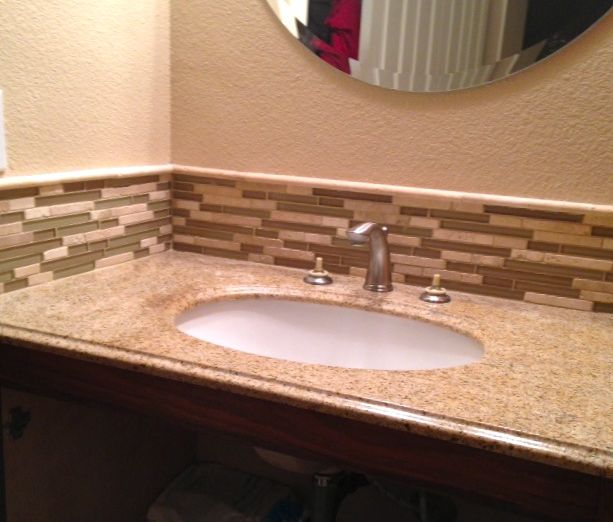 Once the walls were dry the tiling process began for the backsplash. One day to adhere them to the wall and dry thoroughly before grouting. The travertine also required sealing before installation. After the grout was pretty much set, the top cap was attached, again something I’d never attempted before. Corners mitered and all came out as we hoped. The doors were all removed and wiped down with my three part top coat that consists of pure gum turpentine, varathane, and boiled linseed oil. This finish is rubbed into the wood with small pieces of denim and wiped completely dry. Same process was used on the face frame and sides of the cabinets in the bathroom. The shower pan and surround for it and the bath will be installed next week. I don’t want to tackle that one! We’re going with cultured onyx panels to eliminate all grout lines and possible water damage. The final step to the update will be frameless glass doors for the shower. Here’s a panoramic shot of the bath taken with an iPhone, it’s a little distorted but you get the idea:
Tomorrow it’s back to work on the side door for the shop/garage. Haven’t started to blog about it yet but it’s a project that has been on my “to-do list” for quite some time.

Looking Great John, Love your cabinetry!!
LikeLiked by 1 person