
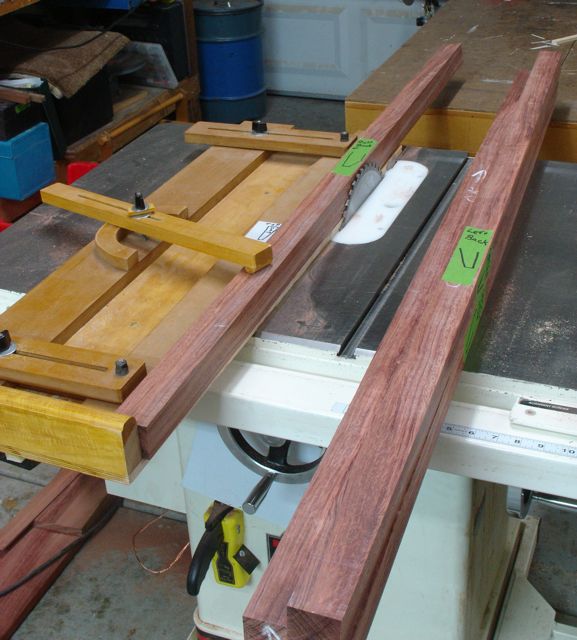
Tablesaw Taper Jig
The wood used for the Mechanical Cellarette is Bubinga which I’m learning is a pretty challenging material to work with. The legs are approximately 1 3/4″ square and the initial plan was to taper the insides of them with the bandsaw then plane smooth. On my sample piece, planing that band sawn surface to an acceptable finish proved to be rather difficult due to the inter-locked grain. Even a freshly sharpened Jack Plane with a very tight mouth couldn’t achieve the finish I was after; time for Plan B which was to use the tablesaw and a tapering jig. This left a much smoother finish, one that I was able to smooth by taking the thinnest shavings possible with a smooth plane. Once they surfaces were acceptable, I used the traditional marking system to identify which leg goes where. I also use machinists letter stamps for a backup. The grain pattern of Bubinga is quite vivid so I chose the best faces for the show surface.


Now that the legs have the taper complete the next step was to fit them for the brass leg tips from Lee Valley. These will add a traditional look to the piece. My client liked the appearance of them in the plans so they were chosen for the project. These are an old brass finish and the only instructions given is that they attach with a single brad into a friction fit. That’s the extent of the information given so it’s up to the craftsman (me in this case) to figure out the process. They measure 1 5/8″ tall and the width at the top is 1 3/8″. When I laid out the taper it was done so that the leg would measure 1 3/8″ square at 1 5/8″ from the bottom. That was step one.

Determining Tip Angle
Now I needed to determine the degree of angle inside of the tips. I first tried to hold the sliding bevel square inside the cap and set the angle from there — not acceptable! I’m currently teaching a hand dovetail class so chose to use this system to set the bevel, it’s the same way you’d set one for laying out the tails. It begins with a vertical line drawn up 1 5/8″ which is the length of the tip. The difference between the top and bottom of the tip is 1/4″ (1 5/8 vs. 1 3/8) so I marked 1/8″ to the side of that vertical line. Now the bevel is set by lining it up at the bottom of the line and the mark 1/8″ to the side. You can be sure I made a practice piece on some Poplar to make sure this worked before I began work on the actual legs. You may notice a couple of aids I used to accomplish this in the slide show. First of all, I absolutely love my Black Diamond ReVolt headlamp I got from REI with gift certificates for my recent birthday! I can see the lines not only for hand cutting joinery but also on the bandsaw. Another aid I used was to put green painters tape on the boards and pencil the cuts on it. The wood is pretty dark and I find that green tape shows pencil lines better than the traditional blue painters tape. Last of all, to keep the small cut off pieces from being sucked into the dust collector I added a temporary zero clearance fence to the bandsaw.
Now that the legs are complete the next step is to make the top. I’m building the casework after the top is sized to make sure of the dimensions. I picked up two pieces of Italian Marble that measure 18″ square that will be inlaid into the top after it’s completely finished and installed.

Pingback: Mechanical Cellarette Complete | Woodworks by John