
I’m often kidded by my neighbor who tells me that if retirement means being as busy as he sees me all of the time he’s not so sure he wants to retire!! Well, first of all; Diane and I don’t like the word retire because that sounds like you’re completely out of the game, sitting on a beach and drinking cocktails with little umbrellas in them — how boring is that? It’s more that after 31 years of doing a “day job” now I have the opportunity to pursue all of the things I couldn’t get to before. For me that’s primarily building furniture, picture frames, and boxes to support this habit.
80 Feet of Seconds Molding
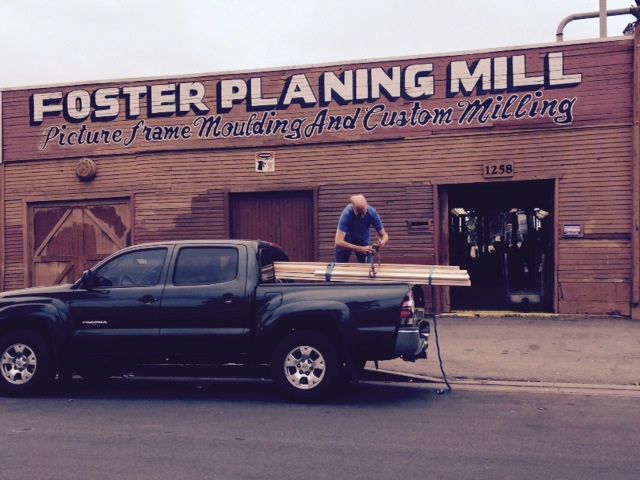
You may remember that towards the end of last year, we went to SoCal and bought a truckload of picture frame molding from Foster Planing Mills seconds selection. I’ve begun work on one of the profiles from that trip so thought I’d share that with you. Diane recently completed a painting activity referred to as 30 in 30 where she painted one painting every day for 30 consecutive days. She did them on 8″ x 8″ panels so that was my incentive to make a few frames. I had enough of one molding to make two 8×8 frames plus another 12×12. That left me with about 6″ of molding to experiment with!
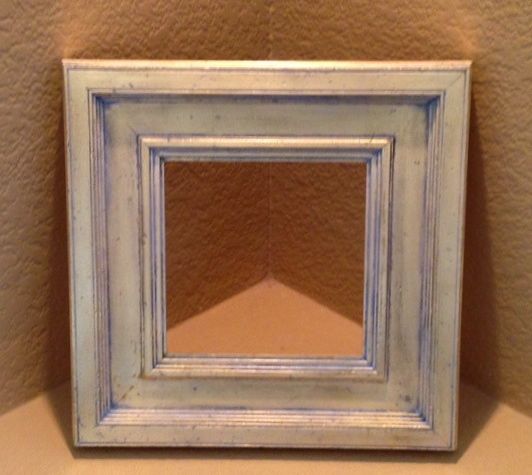
Distressed Frame 8×8
The first one to be completed was distressed using a bunch of nuts, washers, cotter keys, etc. that are on a cable. Just wanted to beat up the surface a bit so that toning would show up. I must admit that this is always a bit of a problem for me — beating something up to look old but that’s the routine for framing. To tone this particular frame casein paint thinned with distilled water was used. In this case, Payne’s Grey and Titanium White created the patina you see in the distressing and steps of this frame. Kind of replicates years of accumulated dust.
The other two frames are carved. Diane is pretty accomplished at drawing so drew aleaf motif into the corners of the 8×8 frame. Now, if it were me there would have been a template to trace. For me, carving is a challenge but on this frame there is only a small area to carve in, about 3/4″ in width. Many ways to tackle this but I’ve found that using the customized, golf ball handled knife helps me maintain control over the piece. I talked about it in this BLOG a while ago.
 Here are the tools used to carve the leaf motif, from left to right:
- #7/14 gouge
- #6 60 degree V
- 2a/8 right hand
- 2a/8 left hand
- 3/6 Fishtail gouge
- Golf Ball skew
- #8/6 gouge
I’m a definite novice when it comes to carving but for the most part, enjoy the process. Just like any other aspect of woodwork, you can ruin the entire project anywhere along the line with a slip up or incorrect measurement. There’s a lot of truth in that saying “measure twice, cut once”. That being said, it’s up to the craftsman to disguise whatever mistakes inevitably come into our work. Without a doubt, few people are as critical of our work as we are! Now that you have an understanding of the tools I used for this frame, here’s the process:
You probably notice the gap on the miter joint, that’s partially due to these moldings being in the “seconds” pile at Foster. I noticed the profile didn’t always match up exactly and the backs were a bit uneven. Clay should take care of that. Also, just have to mention how much using that Black Diamond headlamp helps these old eyes see what I’m supposed to be cutting!
Next up is the gilding and toning process for these frames. It’s a very difficult profile to leaf due to all of the steps leading to the panel. I may attempt to make a YouTube video of that process — stay tuned!

Pingback: Painting News… | Diane's Painting Blog