
I’m a bit behind because this latest Etsy order is already packed up, shipped, and delivered. Matter of fact, the client gave me a great review which is really what it’s all about. When I taught I would tell my students that the money for a project was really secondary because that is soon spent on bills, tools, going out, etc. On the other hand, the satisfaction of knowing you did a good job will last forever. As you may imagine, that was a hard sell to teenaged students!
Here is a picture of the three boxes. It’s always interesting to see the differences in the same species of wood, these are all Radiata Pine. The one on the right is the original box that was sold. My client wanted another similar one and that’s the one on the left. As is my habit, I made another one of a similar size for the store and that’s in the center. Really illustrates why I prefer to buy all of the lumber for a furniture piece at the same time and try to get related pieces out of the same board.
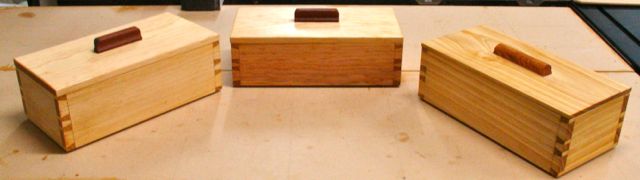
Three Dovetailed Boxes
Both of the boxes that went out had a sliding tray for added storage. These have mitered corners with a bottom set in a groove. I recently upgraded my saw to a SawStop with a sliding table so here’s how that is set up for making a mitered box:
I went into more details about making this jig to fit the sliding table arm. If you’re interested you can find that information on this BLOG. The next jig I plan to make for the SawStop is one to do finger joints. That should be coming up soon as I need to increase my inventory for the upcoming Summerlin Craft Fair this October.
The final details for these boxes had to do with attaching the handles to the lid. Since I recently gave a demonstration for our Sin City Woodworkers group on hand cutting mortise and tenon joints I thought I’d try to make a video of it for the blog. It came out okay but I’ll apologize for the quality in advance — like to think I’m a better woodworker than videographer!
Since I’m not sure how to splice two video’s together, the first part is only about laying the joint out using a two pin mortising gauge:
This part shows the actual cutting of the joint. To gauge the depth of the mortise I’ll put a piece of tape on the mortise chisel, 3/8″ in this case. Many woodworkers would be tempted to use a plunge router and fence but honestly the hand process took about 5 minutes and, in my opinion; is much more enjoyable. No loud, screaming router and flying dust that needed to be cleaned up afterwards either.
There you have it, the work is done and the boxes have been sent to their new owner. I think it must just about be wine time!
