
Remember I once referred to myself as wanting to be known as a “boutique framer”? Maybe a bit overly ambitious but it’s something that has evolved as much out of necessity and as a challenge to see what I can accomplish. There are few places that carry or mill custom profiles, here in the west Foster Planing Mills comes to mind. I’ve used them several times and they once created a custom profile for Diane and I. Also visited them in Los Angeles to check out their seconds area where they have a selection of moldings that are discontinued or left over from other production runs — great prices! You can order any length you need but at $2.00 – $10.00+ per foot plus shipping it can get to be a bit much! Here in Phoenix there is Barger Molding that has milled a hundred feet of another custom profile but they don’t stock moldings like Fosters does.
So, what’s all this leading up to? A commission for two more frames that I thought I’d share with you. You may recall that for me it’s all about the process. The profile for one of the frames is similar to the Christine Profile but thicker to accommodate the painting which is on 1/2″ thick Gatorboard. What I really enjoy is knowing that a project started with what you see at the left picture and, after a number of hours culminated with what you see on the right.


Flattening One Face
Unfortunately no one carries any 6/4 Basswood here in town so buying the 8/4 meant a lot of waste. I do need that thickness for the other frame so not a total waste. The lumber was purchased at Timbers in Mesa and I ask them to sweeten one edge since I don’t have a power jointer — my #7 Stanley works well though; yes. I could do the whole process with it but sometimes it’s worth a couple of bucks to have them start it. The edge they gave was fairly square but nowhere as smooth as a hand plane will get it. As you can see in this picture, the board needed to be flatten which was done with my shop made scrub plane and winding sticks. Now they could be run through the power planer to the required thicknesses. I won’t bore you with the step by step details of milling this profile but basically after the stock was brought to thickness it was first ripped to width. Then the sight edge is cut on the router table followed by the two passes to route the grooves. There is also a slight chamfer on the outer edge which is initially cut on the tablesaw then planed smooth after assembly. The frame for my client is only 4″ x 6″ and so not to hide too much of the painting behind the rabbet it’s only about 3/16″ deep. When routing grooves you’ll find that one side may be rougher than the other which is due to the bit cutting against the grain on one side of it and with the grain on the other. A tadpole sander is the remedy for that.


While machining the wood for my client I also machined enough in 1 1/2″ thickness for a 20″ x 20″ frame for Diane. The time factor for much of this type of work is related to machine set up so I like to make more of a molding than what my client needs at the time. The goal is to eventually have enough custom molding that I’ve made on hand to frame someone else’s work. My luck I’ll be 8″ short and have to start fresh anyway!

Cutting Miters, large frame in foreground
Now it’s time to miter all of the pieces which is accomplished with the jig I’ve made for the SawStop. Frames are joined with a glue and a #20 biscuit in each corner for strength. Although this takes more time than using V-nails pneumatically driven into the bottom I’m convinced my frames will stand the test of time and not separate.
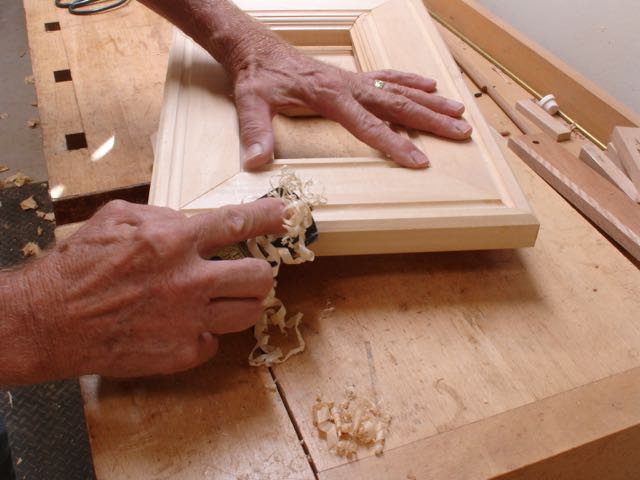
Fine tuning the chamfer
Once the frame is removed from the clamps (overnight) the final step was to smooth out the chamfers and do any touch up sanding. The last step done today was brushing on a coat of traditional red burnisher/sealer. This will be burnished and top coated with Japan Black. The painting for this frame is a nude on a predominantly red background. The Japan Black will be rubbed back to expose the red clay in a hit or miss fashion to replicate what many years of age and handling would have naturally done to the frame.
