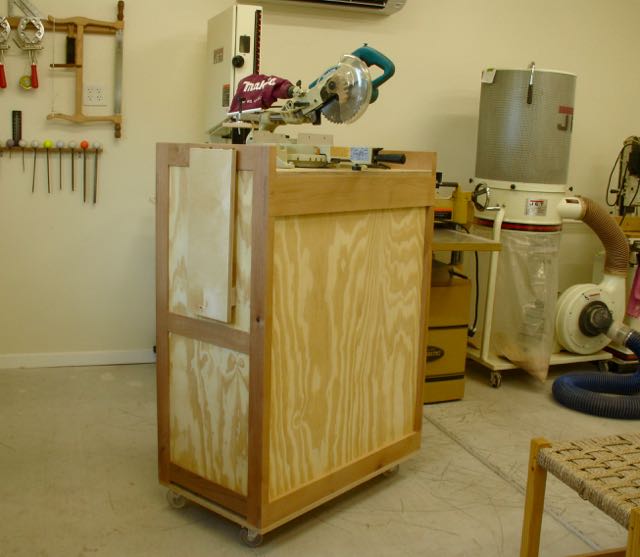
 This was one of those projects I’d been meaning to get around to for quite some time but it seems something more interesting always came up! I don’t use a “chop saw” too often in my work so maybe that’s why it’s been on the back burner. Years ago I decided that for my work a 10″ or 12″ sliding miter saw just wasn’t needed. When the 10″ Hitachi I used to have finally gave out it was replaced with this Makita 7 1/2″ model that I really like. Back in the Las Vegas shop there was a dedicated station for it but since moving here it’s been mounted on a piece of plywood and clamped to the workbench whenever needed — a real pain! The unit you see on the left will make using it quicker and easier for sure.
It’s mounted on Harbor Freight urethane wheels which roll quite nicely. The two in front lock. Construction was pretty straight forward using leftover Alder from other projects. Honestly, it was a challenge taking the random width and thickness stock I had and mill it to somewhat uniform dimensions to make the framework. Basically it’s panel and frame construction with 1/4″ Douglas Fir plywood from Home Depot. There wasn’t enough material to make a separate unit for the front so assembly was kind of tricky, those crossmember are lap joints and glued/clamped together while the plywood is held in place by grooves. The finish is also some left over General Finishes EnduroVar in a satin, 3 coats. That was from the laundry sink project so should be more than adequate for this shop cabinet. In keeping with my “whole world is my spray booth” philosophy the finish was sprayed outside. It’s been in the mid to upper 90’s here so drying time was short!


The final step was to figure out an easy way to make extension wings. The top of the stand is that 3/4″ coated Baltic Birch plywood so using that for the wings made sense. They are simply hinged to the sides which extend from the plywood about 1/4″ less than the table height of the saw. To support them the remaining scrap of the plywood is used, you’ll notice a cleat screwed onto the bottom of the wing. By clamping a straight edge to the saw table and then clamping the wing to that all I needed to do was measure how long the support needed to be. The support sits on the horizontal member of the side and under the cleat on the wing — picture’s worth a thousand words:


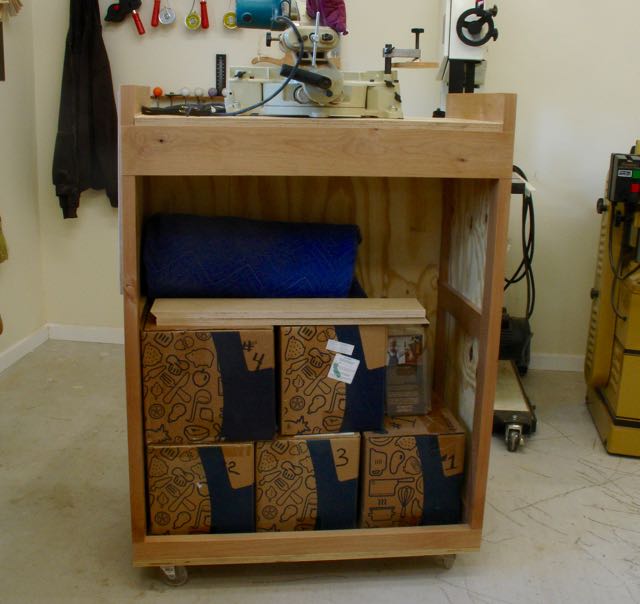
Storage capabilty
Besides needing a stand for the miter saw another thing needed was a place to store the boxes I have on my Etsy Store. No sense leaving them in the garage and the extreme temperature variations we have. Now they, and much of the packing can be kept in boxes in this unit. It’s all good now — next projects are to make some more boxes as my inventory is pretty low. Hopefully that’ll be done before the hoped for and anticipated Christmas season.
