
Resulting Cut-off
About three years ago I replaced my Jet tablesaw with SawStops Professional cabinet saw and opted for the sliding table. This meant changing some of the ways I approach using the tablesaw but for the most part I’ve really liked this feature. After doing the installation of the Walnut Bookcase that like has changed to love! Most of my furniture work is free standing, much easier; you just finish it and deliver it to the room it belongs. Built-ins add the challenge of dealing with those walls, floors, and corners that inevitably tend to be out of square. During the initial meeting about this book case I noted that the corner was a little bit out but figured that between a little planing and a scribe strip it would be a minor problem; well that proved to be wishful thinking on my part. Maybe not the most exciting blog but allow me to share with you what happened and how it was solved. This picture shows the resulting cut made with the slider — nice!
Bookcase Installed
Sorry about the parallaxes in this picture but the bookcase is installed in a small space at the top of the stairs. It’ll help explain what’s happening here. The case is about 30″ long and 14″ deep. After cutting away the 4″ tall baseboard it was moved into position. Surprise — the upper inside corner was just slightly out of square which would be easy to conceal with scribe strip. It also fit nicely at the bottom by both ends, however; the pony wall leans out towards the stairwell and also out at the inside corner! Rather than cutting the inside corner of the top to match the walls I found that the back edge was the one that needed cutting! This is a solid piece of 1 3/8″ thick Walnut and to plane that would have been quite a chore. I left the bookcase in place and decided to wait until the top was sized to attach it to the studs. I had brought a piece of foam core to make a template to see what would fit. Talk about stress time, the material alone for the top was $120.00 which doesn’t include the time it took to laminate the pieces together, finish, etc. so couldn’t afford any mistakes. I briefly thought of hand planing the whole thing but decided that’s what the SawStop it for.
The top was left longer than required so the first step was to cut it to length. You know that expression: “measure twice, cut once”; well with all that was at stake I measured, checked, and double checked — twice! First was to set the sliding table to match up with piece of foam core, surprisingly this was only about 91°. This was confirmed by raising the blade and running that foam core with power off. A second check was then done with the wood, I knew there was a 1/2″ difference in the width from one end to the other. Here’s a photo essay of the process:


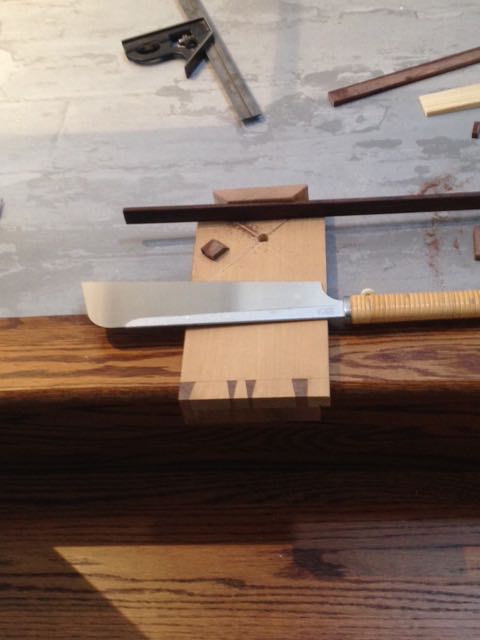
Cutting scribe strip
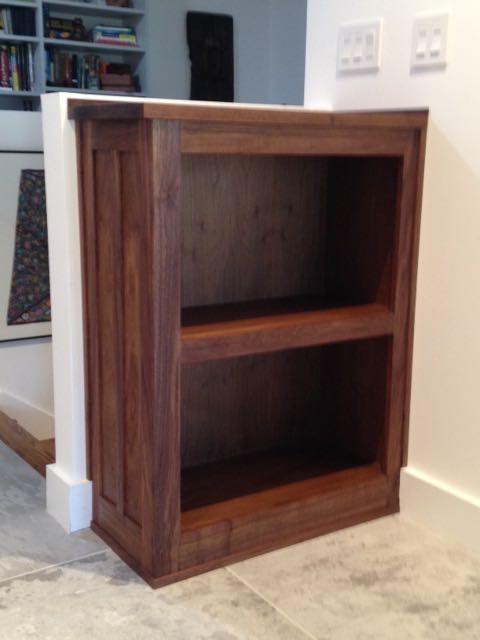
When I took the top back to the job the second day my client had given me a key since they would be gone. Nervous anticipation doesn’t begin to describe how I was feeling and honestly was glad they weren’t there in case my calculations were off. Yes, success — the top fit just as I had hoped. After attaching the bookcase to the studs and attaching the top the scribe strips were cut on their stairs using a razor saw and bench hook — old school. Once done I texted the clients with a picture of the unit in place. Later that evening they texted me the picture you see here with the bookcase already filled with all of their art books. I think that means they were excited to get it!

Clients Picture
