I recently accepted a commission to do a series of picture frames for a well known artist who also runs an Atelier here in the Phoenix area. The profile he was after is a contemporary one that is deeper than it is wide so definitely not a “stock profile” you could find locally. Since it doesn’t have lots of curves, beads, or coves it can be made with a combination of hand plane work and tablesaw. I’ve been asked to do five for him, they will be finished in black and suitable for either panel or a canvas up to about 1 3/4″ thick. The work has progressed nicely so I’ll leave you with a photo montage of the process. It all began with 8/4 Basswood that was purchased from Timber Woodworking in Mesa. They had a good selection to choose from, this time I bought more than needed for this project — Basswood can always be used!


I did have them “sweeten” one edge which isn’t always square but it does make the board safe to run against the tablesaw fence. The first step was bringing them all to 1 1/2″ thickness, very little work with the scrub plane to flatten one face. Showing off a long shaving from the #7 Stanley Jointer plane. Just a side note, I posted a picture of it on Instagram and learned from a collector that it’s dates to pre-WWI — always thought is was more like the 1930’s. Love this plane, the process is to create one working edge to run against the rip fence. Since the final width of the profile is 2″ I allowed about an eighth of an inch for planing. The wood was over 8″ wide so after each rip the jointer plane prepared the edge for the next rip. Made about 60′ of this material which was then cut to rough length for each of the frame sides.
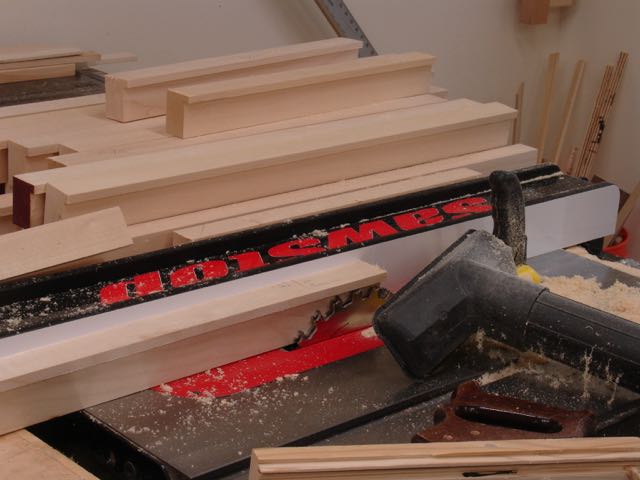
Dado head to cut rabbet
The next step of this process is to create the rabbet the paintings will sit in. At 1 11/16″ by 1/4″ this one was unusually deep. I attempted to make that cut in one pass on a trial piece and although it’s possible decided I’d rather make it a little easier on me and the machinery and accomplish that with two passes. Lots of sawdust created, clamped the shop vac close to the blade to help control it all.
Now that all of the pieces are cut to rough length and have their rabbets cut it’s time to miter them. A recent purchase was a Tenryu Silencer 72 tooth cut off blade. I’ve always liked their Gold Medal series and this blade cuts cleanly. I’ve been meaning to re-do the miter sled so this gave me the incentive to do so. By the way, the purpose of the weight is to keep it from lifting up when there is a longer piece of wood being cut.


The final machining step was cutting the slots for the face frame sized biscuit used to reinforce the corners. Since this profile is 2″ long it was necessary to provide some type of caul to spread the clamping pressure evenly. It’s hard to see in the picture but there are some 2″ tall pieces of UHMW polyethylene that worked perfectly for that. Glue won’t stick to it and I was able to snug up the clamp and then slide it to center the pressure and close up the miters. Two of them are now assembled and glued, they’ll dry over-night and then clamp up the next two tomorrow.


Pingback: June Frame Projects | Woodworks by John