
Perhaps you’ve read my two previous blogs about the Kumiko process or are one of the Instagram followers who have fallen down the Kumiko Rabbit Hole — thanks HillbillyDaiku! If you too have fallen down that hole you know how addictive this can be. I’m actually looking forward to just “cutting some dovetails” for the box that will hopefully showcase this lid! As I’ve read through the various blogs and Instagram there seems to be quite a bit of interest in technique — hand tools only, power tools only, combination, etc. so thought I’d share mine and add to the mix. As always, I welcome your comments so I know I’m not just talking to myself!
I’m primarily a hand-tool guy using power as my apprentices. The wood I’ve chosen to use is Basswood, it’s straight grained, works well, and I have many odd sized remnants left over from my custom picture framing work. I decided to make my Kumiko pieces 5/8″ wide so the first step was running the selected pieces through the planer to get them all uniform. For the thickness I went with 3/16″, seemed to fit my vision — no other reason! The first step was to hand plane a working edge on each piece (Picture #1), then it was taken to the bandsaw and cut slightly over-thick (Picture #2), that was followed by hand planing in the sled to the thickness (Picture #3). The sled was inadvertently made slightly more than 3/16″, actually 5cm which turned out to be a good thing for calculations!


This was just repetitious work to get a bunch of Kumiko stock, plane, rip, thickness, plane, and repeat. All of the plane shavings go to a ceramist who uses them for her Raku pottery.
Mind Numbing!
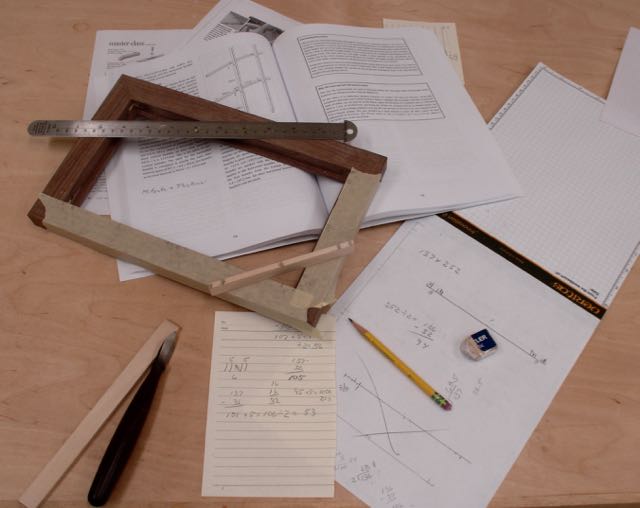
The next step involved doing the calculations for the Asa-no-ha design and to complicate things I decided to go with a double one with a space in between. OMG what a calculation nightmare, honestly several hours to figure this one out! Now I’m sure it could be done quicker and easier on some sort of computer program but did I mention I’m primarily a hand tool guy? I found that it’s best to actually lay it out on a piece of wood after the paper/pencil work. Here’s where having the thickness be 5cm helped. Much easier to do these calculations using metrics. When I taught junior high woodshop there was a failed push to change the USA to metrics. What I taught and still believe is that if you’re going to use metrics then use metric scales; never try to convert metric to Imperial measurements. When you calculate the pitch (from Desmond King, Book 1 page 78) metrics are the only way to go — ever try to evenly divide 1/2″ by 3? The other thing with the Kumiko work is to use a marking knife and dividers, your pencil us too thick and inaccurate.
Fine Tuning of Shooting Board
Cutting the pieces is done with the Japanese saw and a shop made miter box. Each piece is squared up and fine tuned on this shooting board with a block plane.
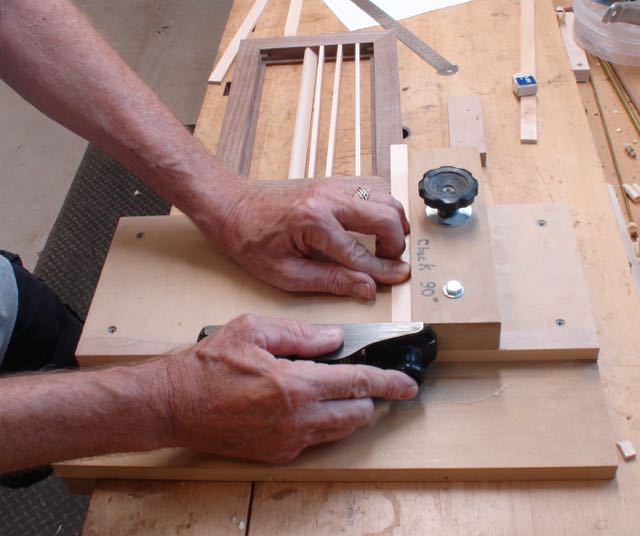
So, the next step is making your lap joints. There’s a lot written about that process. Without a doubt a tablesaw is quick and accurate but then you’re left with a kerf of 1/8″ or so — too thin IMHO. So, how about a 1/4″ dado — too thick IMHO! I use Dovetail saws for most of my work but found using a Japanese style saw works better for this. My jig allows me to clamp the pieces together and cut them at one time. Those pieces that are screwed to the base of it are about 5/16″ thick so when the saw hits that you know you’re at depth.


Care needs to be taken after your initial cuts to cut on the correct side of the line, I mark that side to be safe. Once the first side of the lap is cut a scrap of the wood is used to set the thickness (Mitsuke), hold it tight against the square and slide if until the initial kerf is just covered, scribe that and cut. Remove the waste with a chisel and fine tune to fit. I’ve found that leaving a piece of Kumiko in each joint after it’s cut helps hold everything in place while cutting the rest of the lap joints.
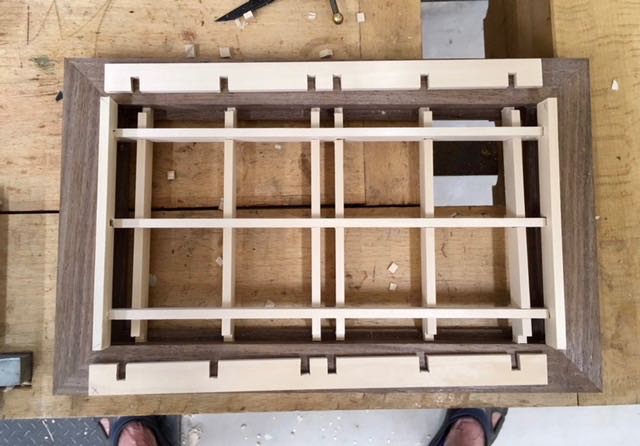
Lid looking for a Box!
Let me leave it at that — getting too long winded! That’s my technique and for sure not the only way to go about this. As for cutting the rest of the pieces that was shown in my two other blogs about this Kumiko addiction. My preference is using a 1″ wide chisel although I see many others using a plane — tried that with a low angle but seems too large of a tool for such small pieces. Here’s the lid so far, those outside pieces will be mitered and hold it all in place. Now …….. on to the box!

Thanks for the info. I’ve been wanting to try this ever since seeing Mike P. article in fine woodworking. Looks tedious though
LikeLike
Tedious isn’t the only word, also addictive but rewarding if you’re into the process more than the final product! That seems to be how I’m wired!
LikeLike
Pingback: Latest Frame Commission and Box Done | Woodworks by John