
After posting some pictures of this project on Instagram and Facebook a number of followers asked for details so here’s a post explaining the process. Here’s a visual so you can see the before and after side by side:


As you can see, pretty obvious why I wanted to replace the saggy, draggy, peeling one!! The size is approximately 5′ square and commercial gates of that size priced out at $800-1100.00. All things included (welding frame and materials) there’s less than $450.00 invested — we don’t worry about time. Lowe’s had kiln dried, 1×4 redwood pieces which were used for the shiplap and I selected the lightest weight and straightest premium Redwood I could find.
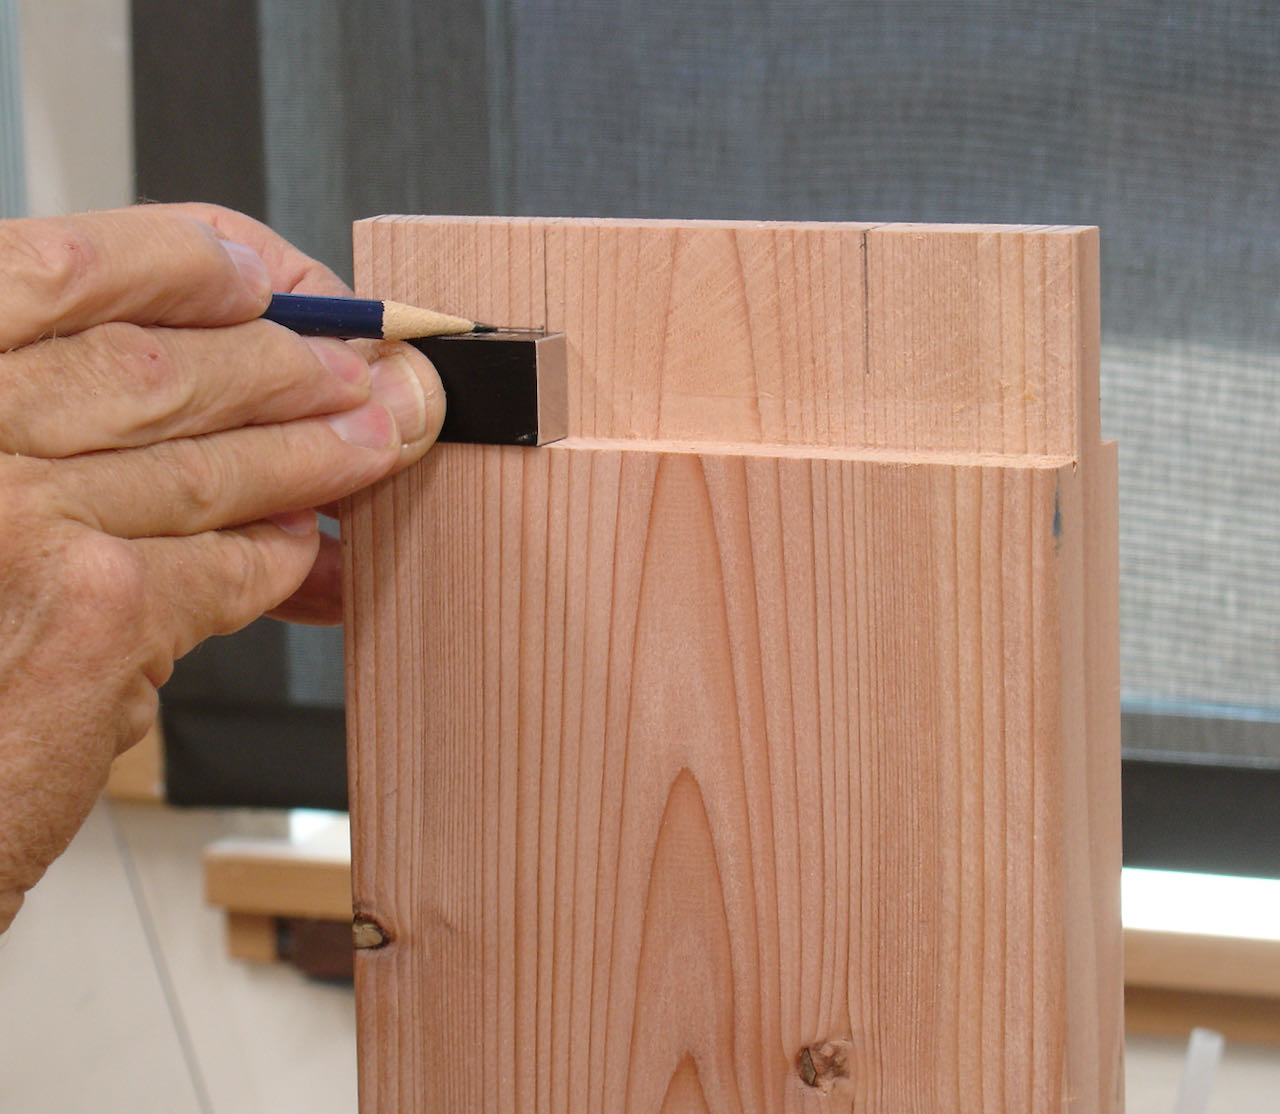
Work began with the frame which is mortise and tenon construction. All pieces were first surfaced to 1 3/8″. The tenons go the full width (5 1/2″) and haunched to prevent any cupping. The haunch is 3/4″ and 1 1/2″ long on each side. That leaves a tenon 2 1/2″ wide and 1 1/2″ long. I always cut the mortise first, to get a consistent depth for the haunch you can use a gage block to limit the depth. The left picture shows the sequence; the 3/4″ x 1 1/2″ mortise was cut for the haunch then the gauge block (pointed to with pencil) is removed and the remaining 2 1/2″ was cut to full depth.


The next step is cutting the tenons which was done on the tablesaw with a tenoning jig.
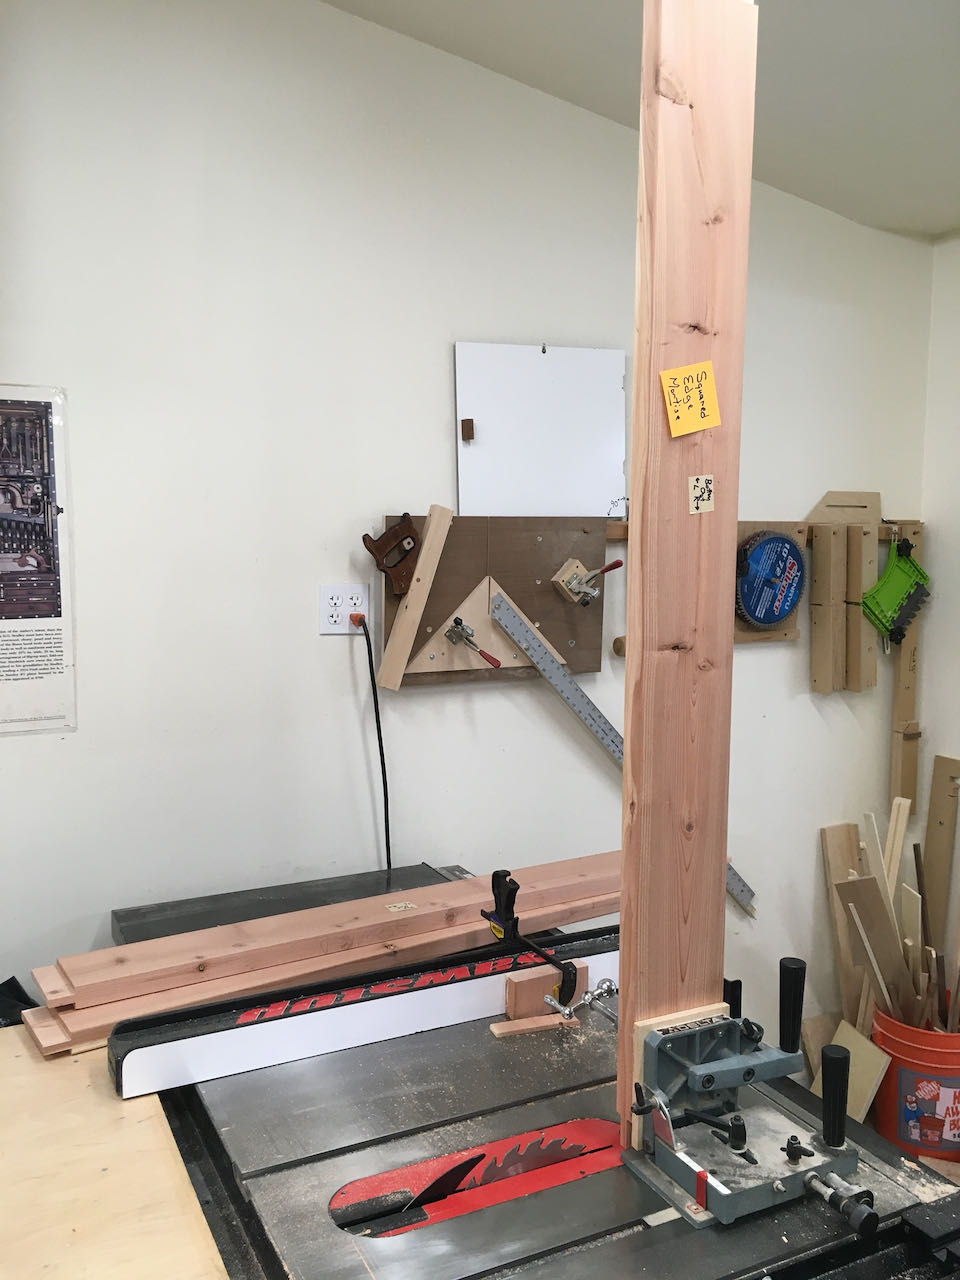
Once they were all cut the haunch needed to be laid out and cut, again I used the gauge block to mark it out then a Japanese razor saw for cutting. I generally cut the tenon slightly over-sized and then use a rabbet block plane to fine tune the fit. I learned though that Redwood doesn’t plane well.
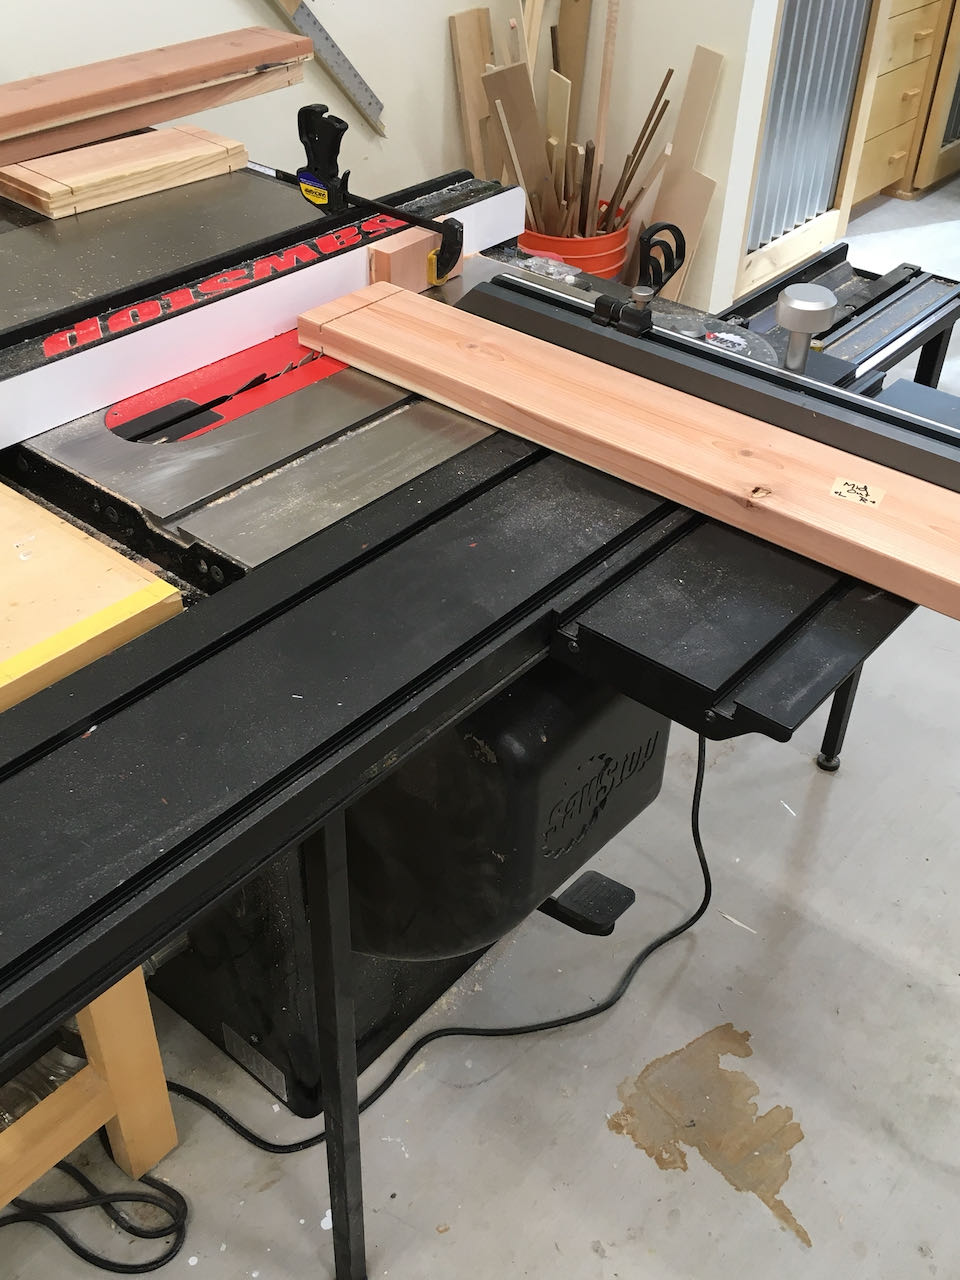
After cutting grooves for the shiplap pieces (dado on tablesaw) it was time to create the shiplap pieces. I purchased 8′ stock and cut each into 2′ pieces. Then one edge has a 1/2″ rabbet cut, flip the board and cut a 3/4″ rabbet on the opposite edge which will give you a uniform 1/4″ space between each board. The final step was fitting them to the crosspiece to calculate how much the end pieces needed to be trimmed to fit the space and leave a bit of room between each piece for expansion.


A patio table I did some time ago was constructed similar to this. The process is to clamp the entire assembly together but only apply glue to one side. After that dries overnight, loosen the clamps and remove the side that was assembled dry. Now each of the shiplapped pieces are inserted before applying glue to the other mortise and tenons and once again clamping overnight. A coat of Thompsons Waterseal was applied to them before assembly.
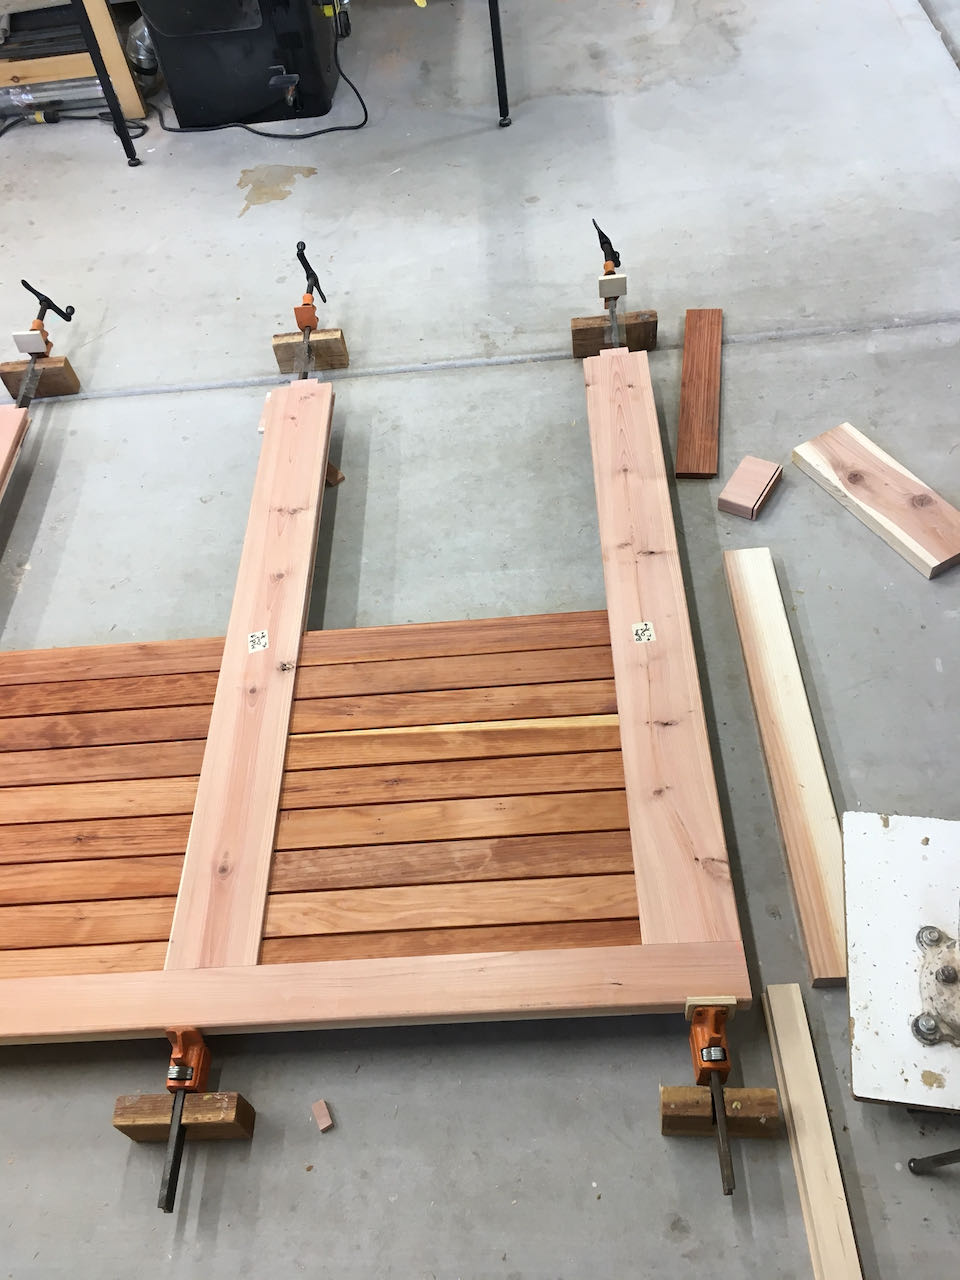

The picture on the left shows inserting the shiplap pieces after half of the panel was glued together, on the right is the completed assembly. Sure glad I’ve been dragging those 6′ Jorgensen bar clamps around for the past 30 years or so!

Here’s a view of the back of the gate, notice there are two pieces of Redwood at the top of the panel. The top one was glued/screwed to the top of the panel and rests on the metal framework. The bottom one is screwed to the top and essentially wraps around the metal frame. The entire panel was finished with Thompson’s waterseal first. The back of the hinged side needed to have mortises chiseled out to clear the hinges and nuts. Screws through the metal framework of the gate secure the overlay to it.
All in all, this was a very rewarding project. I was a bit concerned about the weight and added a wheel for support. I’m able to span 5′ with my arms and easily carried it from the shop to its location. Diane helped hoist it onto the metal framework and it’s done. Let me know if you have any questions or thoughts about this project — they’re always welcome.
