
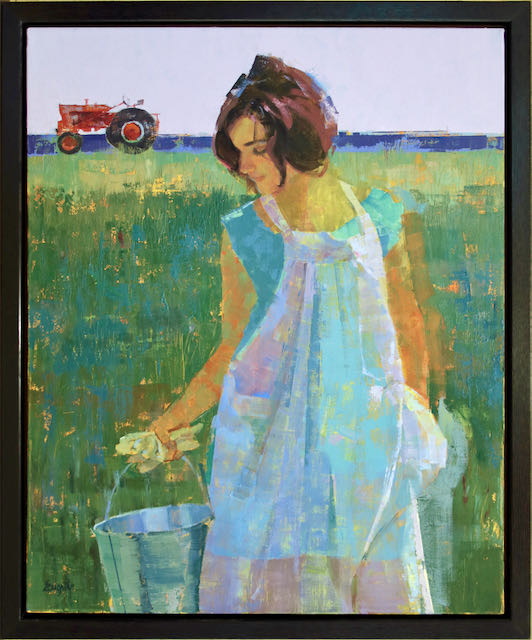
Once I published a picture of this project the messages started coming in: “what in the world is Roasted Oak?” Allow me to answer that first before I blog about this frame and painting by Diane Eugster. Roasted Oak is wood that has been placed in a kiln for an extended period of time so that all of the sap and sugars caramelize the wood and essentially turn it a dark brown. I’ve also used poplar for a frame that was treated the same way. It was purchased from Woodworkers Source here in Phoenix, here’s a LINK explaining the process. When you are cutting this wood it smells like you’re cleaning out a fireplace! The color goes completely through and if you look closely at the finished product there is a very slight hint of brown in the grain of the wood which warms it up nicely. The finish is Osmo Polyx Oil #3054 which is wet sanded into the surface. It’s the same product I use for my furniture work.
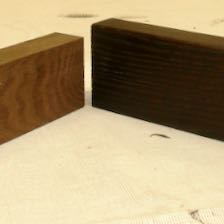
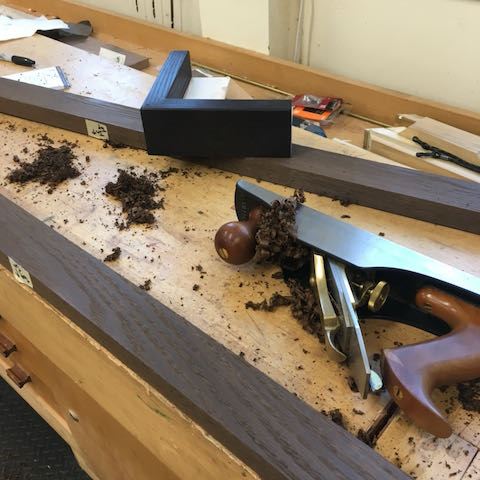

I added these pictures to illustrate how the wood works and finishes. At left is a piece of the raw wood next to an oiled one. The center shows it being planed which it does nicely. At right you can see how the grain shows through and how (IMHO) how beautiful it is!
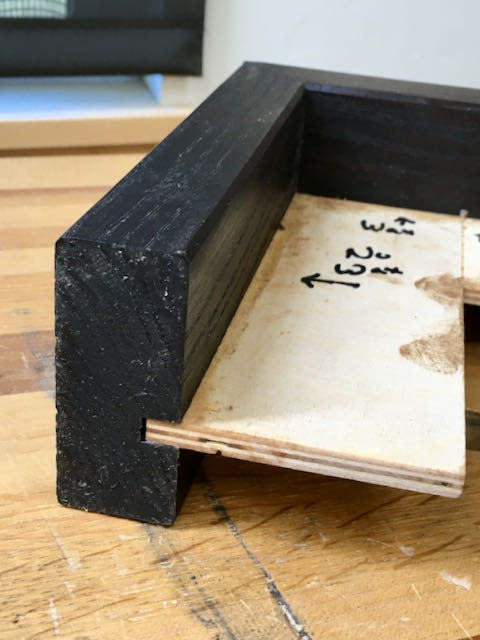
A question I’ve been asked quite often deals with how I make a Floater style frame. Many commercial moldings available are a simple L-shaped piece which presets the distance for the canvas to be mounted below the edge of the molding. My method is to cut a dado (groove) in the side of the frame located at whatever distance I need to accommodate the artwork. I’ll glue a piece of Baltic Birch plywood into that to mount the canvas or panel. You can see that in the photo at the left. Another advantage to this method is that the plywood piece reinforces the corner of the frame.
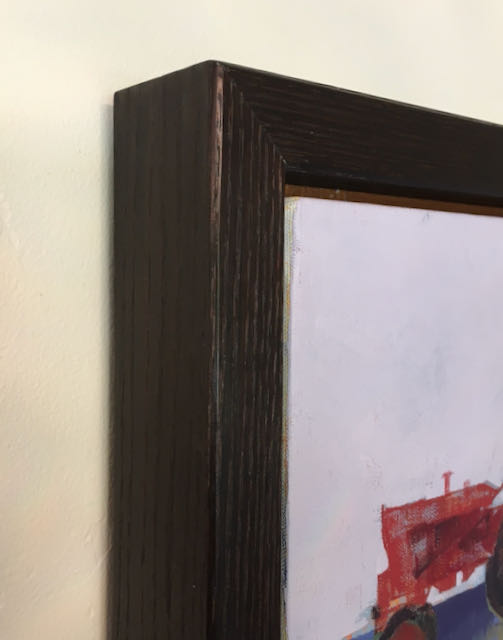
A few notes on the assembly. I was advised to use a polyurethane glue so Gorilla Glue is my go to for that. Each corner is also reinforced with a biscuit. During the dry clamping step the Birch plywood was cut to the correct size. Gorilla glue applied to the corners, assembled and then clamped, next the plywood pieces are glued into their place and left to dry overnight. The next step was cutting a slight chamfer on the inner and outer edge with a router. The inside chamfer was squared off with a chisel. The Osmo finish is applied with a brush and allowed to soak in completely before wiping dry. I used 320 wet/dry paper to complete the process and as you can see, it gave very nice results! Notice in the corner detail how that chamfer has a gleam to it depending on how the light hits it or the vantage point of the viewer.
One thing I noticed during the wet sanding process is that the resulting slurry is dark. Many times I’ll use splines of contrasting wood at each corner of the frame and this slurry would probably color the contrasting color of the spline — guess that’ll be the next experiment!! By the way, the size of Diane’s painting is 24″ x 30″ and it is oil on canvas and the size of the molding is approximately 1+” thick by 2+” wide. That size was determined by the width of the stock I was able to get.

Reading this was just lovely 🙂
LikeLike