

Here’s a picture of our door as it originally was. As you can see, the Arizona heat hasn’t been kind to it. Because of all the clavos and corner hardware attempting to sand/remove the finish while the door was in place wasn’t an option. Diane and I explored the possibility of having the door replaced but that ran into the thousands of dollars — not an option! We both like doing projects so our choice was to do it ourselves. From start to finish was about a week’s time but the results are well worth it.

Here’s the installed door after our DIY skills gave it a do-over; now it’s a definite focal point for our house. We used Jasco’s Premium Epoxy and Paint Remover and as you may guess, the claim that it’ll remove up to 15 layers of paint is a bit of an exaggeration! The first coat only removed whatever top layer had been previously applied. Diane and I each worked on the panels at the center first. We let subsequent coats of the paint remover sit longer than the recommended 15 minutes which helped. The first tools we used were plastic putty knives/scrapers followed by a brush with brass bristles. Didn’t take long to round over the edges on the scrapers and completely clog up the brushes. Thankfully those are relatively inexpensive and well worth replacing as needed. Once they got dull or clogged they weren’t very effective.
The door was placed on a pair of sawhorses in the garage which made it easy to work on. The front door was secured by cutting a piece of OSB plywood to size and then running long carriage bolts through some 2×2’s inside of the door frame. After removing all of the hardware and clavos it was time to tackle removing the finish. As recommended, we began the process on the inner panels. Brushed on the paint remover in one direction, let it sit for 15 minutes, then begin to scrap. Look at the before picture, notice how the lower 2/3’s of the door has really been beaten up by the sun? That area was only slightly easier to get clean. After scraping off as much as possible we used a brass, wire brush to remove as much of the old finish as possible. This process was repeated 3-4 times, the inside was tougher to remove since it hadn’t been out in the weather like the front of the door. Here’s a short slideshow of the project, I’ll describe what you’re seeing in the paragraph under it.
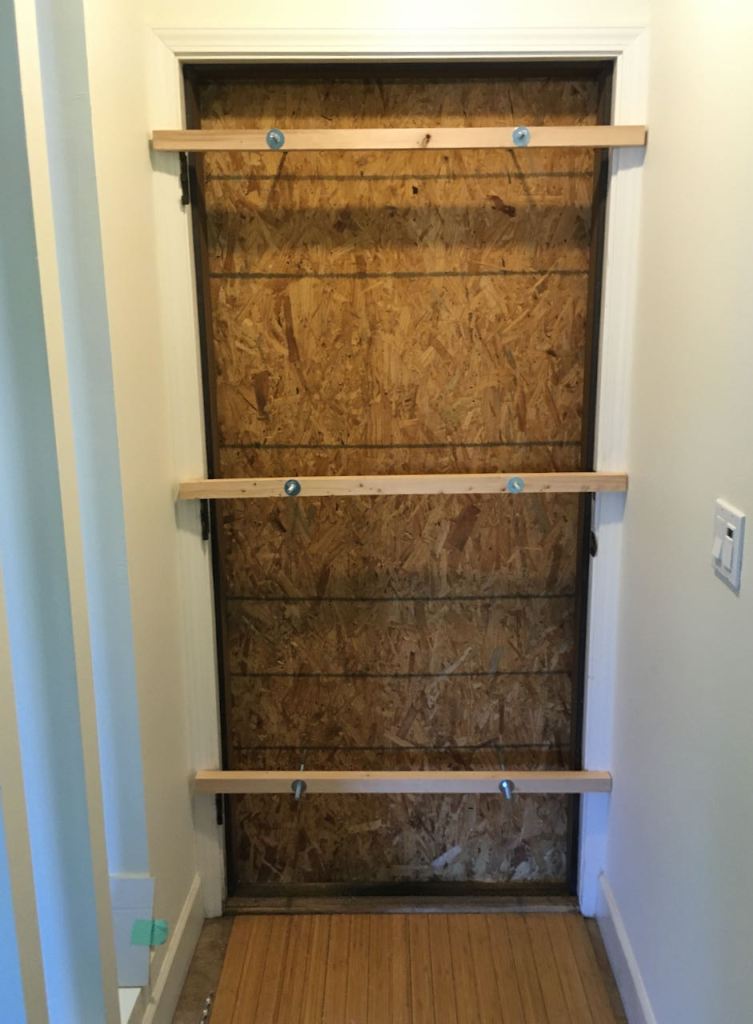

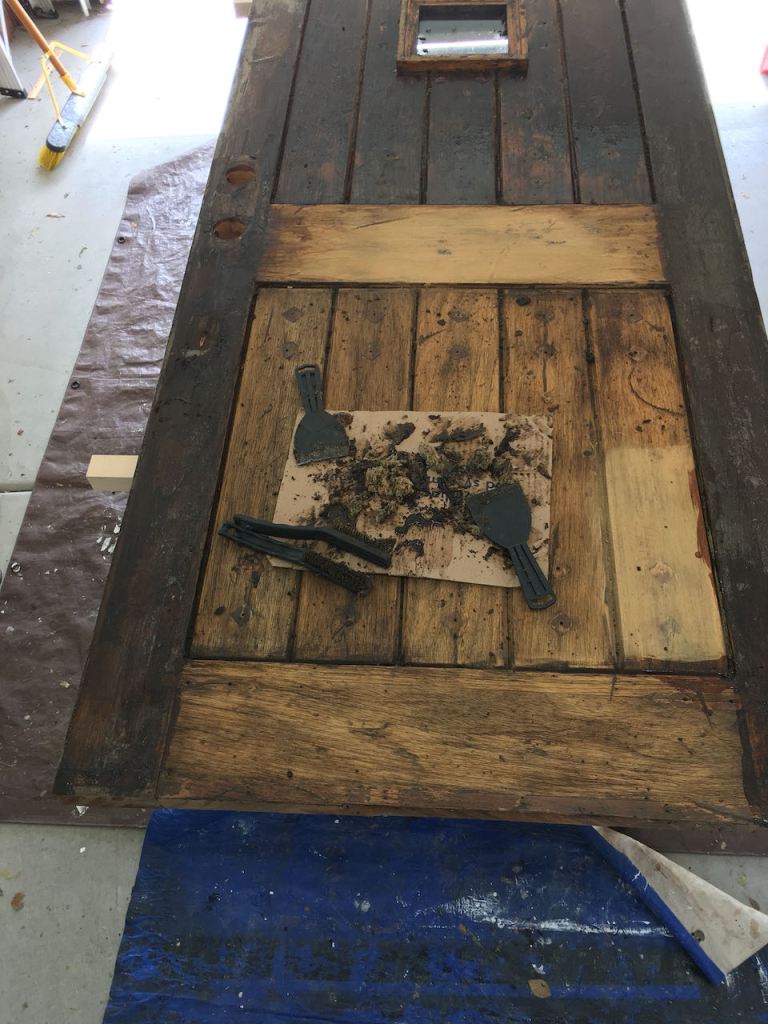

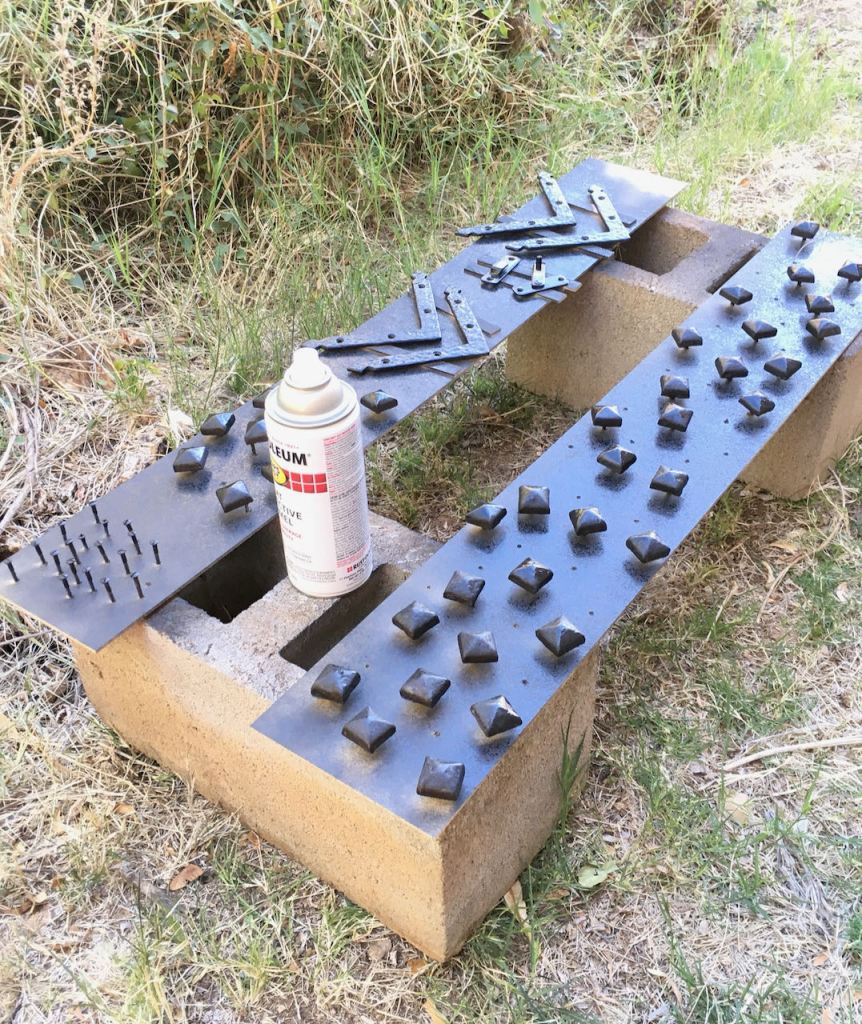
The first picture shows how the house was secured with a piece of OSB plywood using long carriage bolts that go through the 2×2’s and tightened against the door frame. Needed to create a temporary weatherstrip at the bottom out of some rolled up paper towel! The next two pictures give you an idea of the stripping process. I did some experimental sanding to see how that would look and judge how many times the stripper would need to be applied. Using brass brushes after getting most of the “goop” off with the scrapers worked really well. Most of the surfaces needed 4 applications of the paint remover. The final picture is of the hardware which was cleaned with steel wool and denatured alcohol and then sprayed with Rustoleum flat black.
Next up was sanding and yes, my furniture work rarely sees sandpaper since I prefer a hand planed surface but this project is different. When using an oil finish you don’t want to go to a super fine grits like 320 which I saw someone do on a video. That polishes the surface too much and the oil won’t penetrate very well. For this project, 150 grit was perfect. I’ve never been a fan of surface coatings and a project like this that’s exposed to the desert weather that can range from below freezing to 120° plus a surface coating is lucky to last a year! For that reason I chose General Finishes Exterior Oil. Application is to apply a fairly thick coat with a brush, allow it to penetrate for 10-15 minutes and then wipe it completely dry. Very important that the surface is completely wiped dry. We’d let one side dry a few hours, flip the door to do the other side, and then repeat the next day for a total of 3 coats.
After re-installing the clavos, corner braces, and hinges my neighbor helped me re-install it. Also re-hung the “speakeasy” door using a piano hinge. The original hinges were pretty chintzy! The door handle and lock had a dark, antique finish that was pretty much destroyed by the sun. It was replaced with a brushed nickel set from Schlage which gives the door a contemporary flair. I’m sure the door will need to be refreshed every year or two but it will be as simple as wiping on a coat of oil with either a rag or nylon scrubby then wiping completely dry. It won’t stick to the hardware, won’t need to be sanded, and can easily be done with the door in place.
Safety Note: If you’ve never worked with an oil based finish it is very important that you put your rags in either an airtight container (which you probably don’t have) or do like I do and soak them in a bucket of water. After soaking lay them out to dry and discard in the trash. Spontaneous Combustion is real, I know from personal experience!

Was really happy with how it turned out, and was fun working with John on this.
LikeLike