

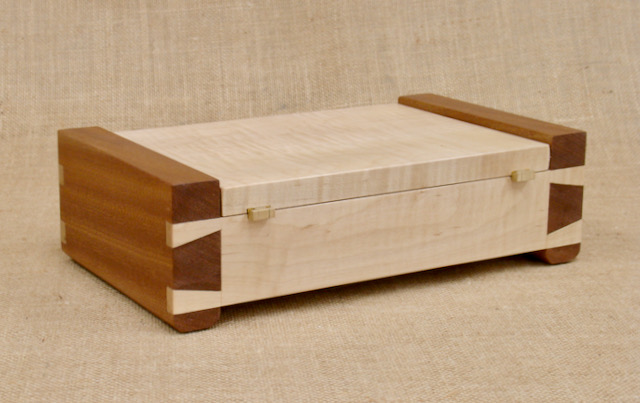
The subject of making a custom cigar humidor recently came up when I was talking with the owner of Creative Gateway Gallery. They have galleries in Scottsdale, Phoenix, and Sedona. He mentioned that cigar art was popular and suggested that perhaps designing and building a humidor based on my box technique may be a good addition for the gallery. This led to me to doing some research, online and talking to owners of cigar lounges. A requirement for a humidor is that it’s lined with Spanish Cedar which is the best material to control the humidity requirements of cigars and also that the box has a good seal. It’s up to the owner of the humidor to “season” the inside and maintain the humidity. What you see in these pictures is the result of that, my interpretation of that traditional humidor. I used a piece of Curly Maple for the top, front, and back and ribbon grain Sapele for the sides. Hand cut dovetails are both decorative and allow for strong box construction.
My typical construction for this is to first cut a rabbet on the ends of the front and back piece which matches the thickness of the side pieces. Generally this will be 1/4″ which allows me to cut a 3/16″ groove without cutting into the tails, that groove is to inset the bottom. Tools used for this joinery is a skewed rabbet plane (on left) and a small plow plane (on right). Besides being safer than power tools, woodworking with hand tools is much more satisfying than using power tools. The dovetails are then laid out and cut using a combination of dovetail saws, chisels, and a mallet.


After the dovetails are fitted it’s time for assembly. A plywood bottom is inserted into the grooves prior to glue up with Old Brown Glue, my glue of choice for this type of work. Setting the bottom into grooves helps create an airtight space. A cedar panel will be added. After planing and some light sanding the box is ready for shellac, about 8 coats. Notice that in the right hand picture the inside of the box as well as the underside of the lid have been taped off to prevent getting any shellac on the inside of the humidor. Although it’s a relatively benign odor which shouldn’t linger I didn’t want to take any chances that it could affect the cigars. Traditionally the Spanish Cedar lining is left unfinished. The lining is mitered in the corners which locks it in place. After cutting the pieces slightly oversized with a saw they are mitered using a shooting board and plane as shown in the picture on the left.


I found a piece of Spanish Cedar at Woodworkers Source that caught my eye because it seemed to have what’s referred to as a “fiddleback” pattern. It was 4/4 so after resawing it I was able to get 5/16″ thick pieces for the sides and laminate them for the top and bottom. No finish on these but look at the beautiful grain pattern after using my smooth plane on it — stunning!

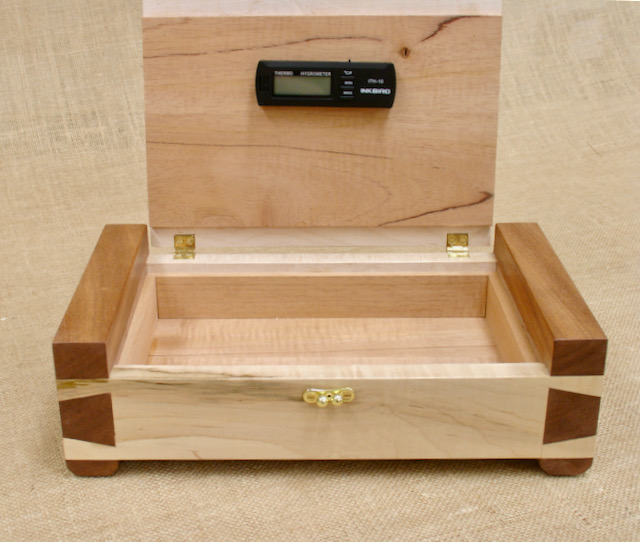
To complement this humidor only the best hardware would suffice. That would be the brass stop hinges recently offered by Horton Brasses. These are small stop hinges and seemed to be the perfect choice for the way I designed this project. The latch I chose was a ball type that will secure the lid and create the airtight space a fine cigar needs. After adding a Hygrometer to the inside of the lid this humidor is now ready for seasoning by whoever buys it, I think it’ll look great on their desk.
