
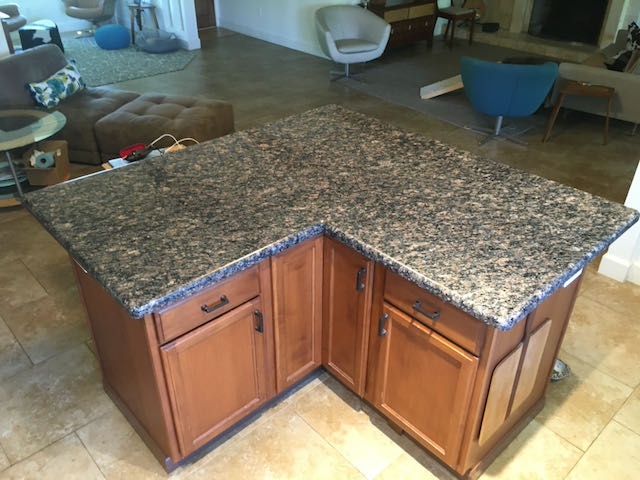
After living in our house for 5+ years we thought the kitchen could use some changes, although functional it felt as if it were a dark area even though there is a window above the sink. When you walk in the front door the darkness is what you’d notice first. The cabinets are dark and the black granite; well, it goes without saying is positively dark!
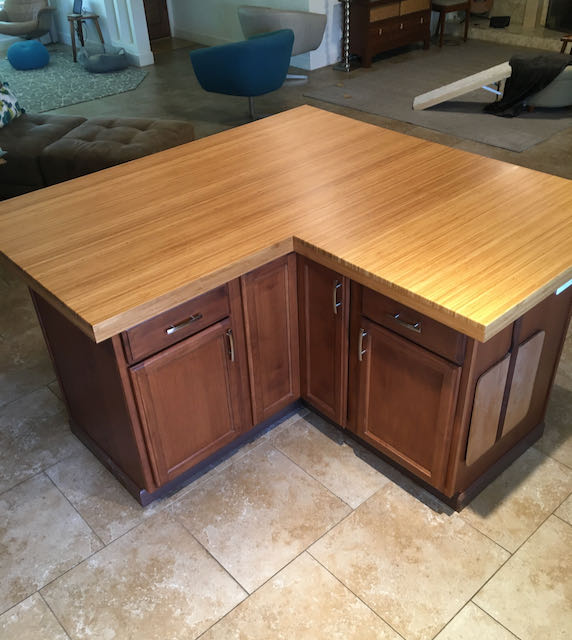
We use the island as our place to eat breakfast, use computers, and also food preparation. Although beautiful, granite is a very cold surface to work on while using computers so that was another slight negative. Replacing all of the counters wasn’t an option, from experience if you attempt to remove them chances of damaging the cabinets is a possibility and I really wasn’t planning on a complete kitchen remodel. So enter Bamboo, Woodworkers Source here in Phoenix has been advertising it so thought it was worth looking into.
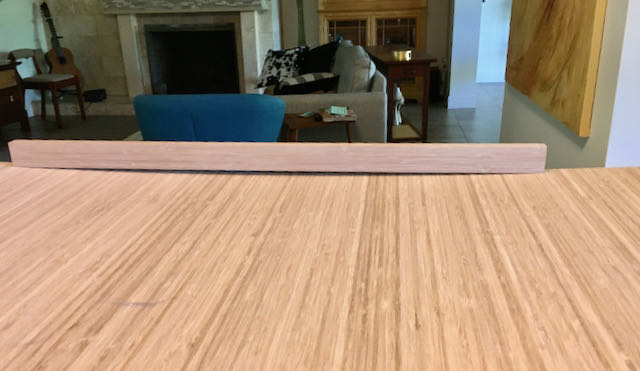
It’s available in 8′ pieces measuring about 9″ and 12″ wide. It’s also offered as a 4’x8′ sheet. My first step was to buy a 9″ wide piece and make a mock-up. The plan was to simply make the L-shaped piece to fit over the top of the granite. I used Osmo Polyx in a satin for the finish. I was happy with the method, finish, and color of the finished mock-up so the project was a go. We purchased one 4’x8′ sheet and 2 of the 12″ wide boards. One purpose of my blog is to share what I’ve learned and the 4’x8′ sheet needs to be kept flat!! I’d leaned it on edge against the wall, when I was ready to start (about 1 1/2 weeks later) I cut it to approximate length and Diane and I brought it into the house and laid it on top of the island.

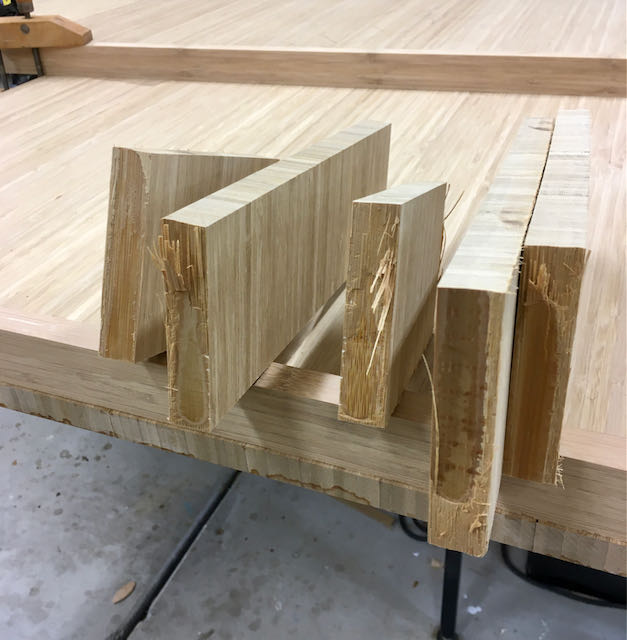
It warped big time!! I called Woodworkers Source and they were willing to exchange the sheet but since I’d already cut it that wasn’t an option. Decided to let it lay to see if it would relax flat on its own but also sprayed water on it and clamped a straight edge across both edges. The parallel clamps were put on without a lot of pressure and I’d tighten them every couple of hours. I did hear some cracking but nothing major. It makes sense, if you look at the right hand picture think of a round piece of Bamboo being sliced into “planks”. Some of them will be more of a C shape and only make contact on the outer edges. I wasn’t concerned about the piece bowing once it was installed because of my plan for building it.
Construction was typical so I won’t bore you with the details. The granite wasn’t square so I scribed it in place and used a small trim saw with a straight edge to cut it. Jointer planed to smooth the cut and then edged it with 1 5/8″ wide strips of the Bamboo. This was glued and screwed into place.
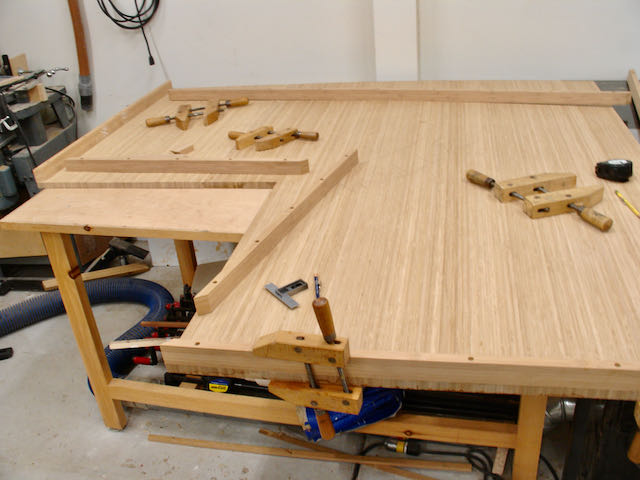


The first step was to cut the banding and pre-drilling and countersink for the screws. Pieces were clamped in place and a screw was inserted into the hole, tapped with a small hammer to locate it, then pre-drilled before applying the glue. To guarantee a good joint it they were also clamped, old school style!

Before flipping the piece over the bottom was prepared by using a cabinet scraper to remove the glue and surface the joint, sanded, and a small round over was done to the outer edge. Two coats of shellac were then brushed on so that both surfaces will be sealed and not absorb moisture — want to prevent any warping since the plan is to simply lay this over the granite.

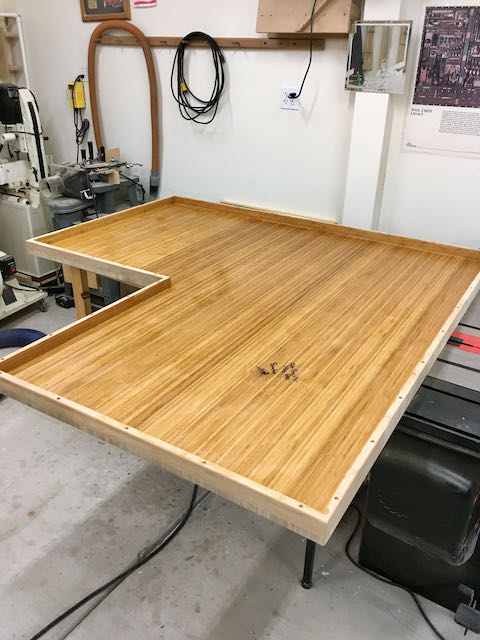
To finish the top the process was the same as the bottom — scrape off glue lines, sand, and round over the edge. Three coats of the Osmo Polyx satin finish were hand rubbed into the wood using a white, nylon scrubby. I allowed 24 hours drying time between each coat. My neighbor helped bring it in and my fingers were crossed. I’d broken that rule of dry fitting, this piece was much to large and awkward for Diane and I to do that! Thankfully, it dropped right on and fits like a glove. There is no movement and if a future owner prefers to have matching granite it’ll simply lift off!

This is beautiful John, really takes the kitchen to a new level!
LikeLiked by 1 person