
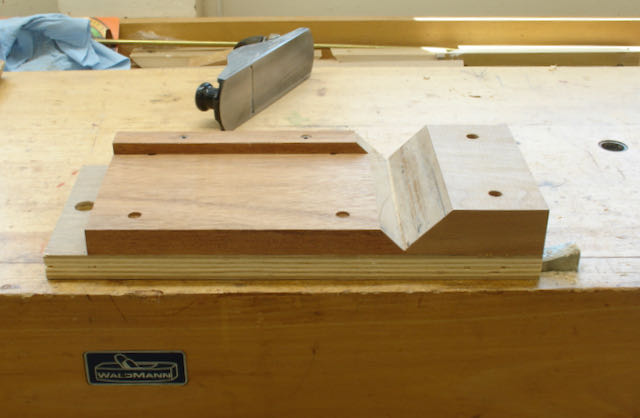

If you’re not familiar with shooting boards you may wonder what the heck a Donkey Ear shooting board is! For hand tool woodworkers a shooting board is something used with a handplane to true up miters, ends, and edges after they have been sawn with either a power or hand saw. In my work they are used for moldings and boxes so I generally only need a block plane with them. My original is shown on the left and it wasn’t very accurate. I had heard of Donkey Ears and found this video by Bob Rozaieski on YouTube I decided to make one for my work and share it on my blog. The only change I made was to make it so that it could be held on the workbench between dogs, his design had a cleat that clamped into the vise. I had some of the Bamboo left from the kitchen island project so that’s what I used. He stressed that getting the 45° exact on the base piece is critical. Admittedly, pre-drilling the screw holes and holding it all in place was a bit of a challenge. The big advantage to this style is that you’re able to work moldings in both directions which is critical when working around a corner. For this blog though the goal was simply making dividers for the inside of a box.
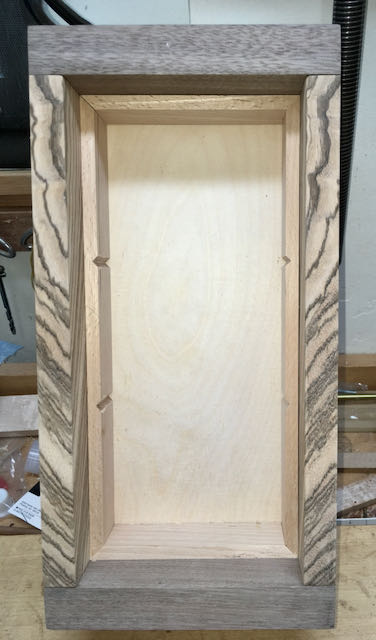
The picture at the left shows the inside of the Valet box, notice the pieces that are inserted. They’re about 1 1/4″ wide but were made from a wider piece so that any tear out from shooting the miters on the ends could be planed off when they cut to final size. After they fit, I used a V-bit in a small router to cut the slots for the dividers. After that they were ripped to the 1 1/4″ width. Other than dividing the bottom of the box there will also be a sliding tray that sits on top of them. The next step was fitting the dividers.
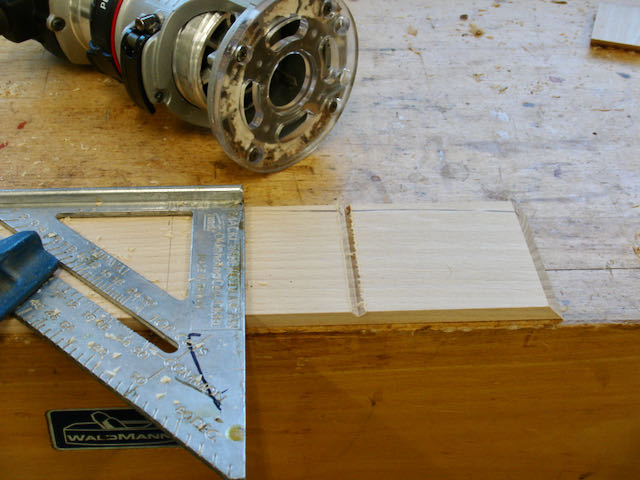
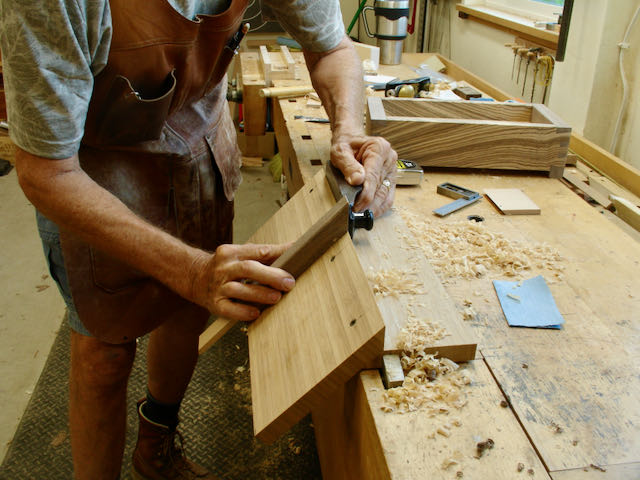
This began by taking a long piece of the Beech and using the Donkey Ear shooting board to create a V that would fit snugly between the side pieces. The depth of the V slot was marked on the end of the board which was then mitered. This piece was long enough to make both dividers. The extra length makes it easier to hold.

Some things I’d like to point out here. With this style of Donkey Ears it was much easier to hold the wood while mitering the ends. I used a practice slot from the router to check the fit. The next hurdle was measuring the length needed. Too small for even a 6″ ruler so thought to use an inside caliper and then laying that out on the wood. The piece was then cut to length and the ‘V’ was mitered on the opposite end. I think the technical term is “fiddle fart around” until the fit was what I wanted! I “eyeballed” that to get it as even as possible. It’s a snug fit so no glue will be needed once the valet is complete.


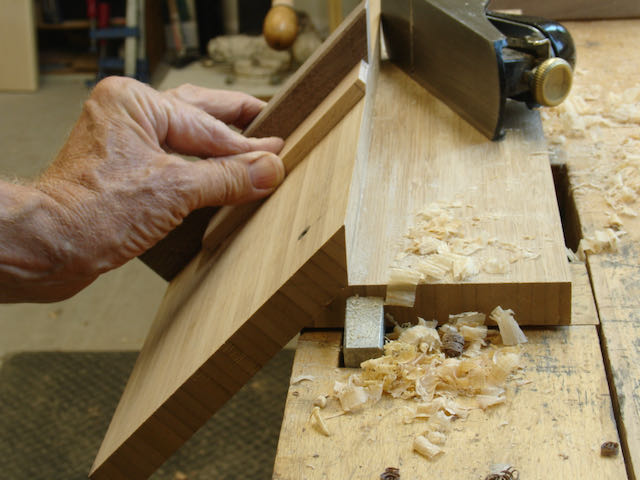
Using my left hand to guide the plane and my right hand to hold the wood gave me good control. The only odd thing, probably caused by the way my hand contacted the plane, is that the depth of cut changed. Seems as if the palm of my hand loosened the depth adjustment and until I figured that out is drove me crazy! Sure, a CNC machine or a matched set of router bits could accomplish this task in minutes rather than half a day but there no challenge in that so why bother?
So there you have it; to my eye, the ‘V’ has more appeal than a simple dado and butted divider. Once the box is completely finished I may put a spot of glue on the longer side pieces before fitting in these dividers. Hope it made sense to you, if not feel free to ask me a question in the comment section.

Pingback: Wood or Plastic: What’s your Choice? | Woodworks by John