
A very popular style of framing a painting these days is using what’s referred to as a “floater” frame. Traditionally used for thicker canvases but it’s also popular for any other size paintings. From what I’ve seen, commercially available molding is usually a simple L-shape slightly deeper than the thickness of the canvas that the art work sits in. As a furniture maker, the method I use is different and if you have some experience and tools you can use this method for your work so I’ll share it with you.
If the frame is to be painted or gilded I’ll use Basswood, some of my clients prefer hardwoods such as Oak, Mahogany, Walnut, etc. and the process is the same except I add splines across the mitered corners after mitering and joining them. These are for strength as well as an added design element. For this blog I’ll be using Basswood, usually 1″ or so thick.
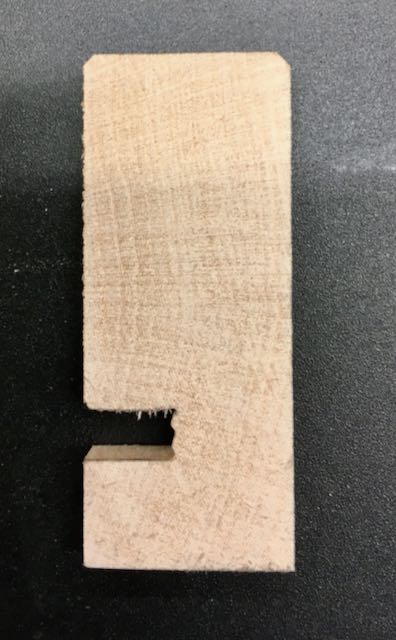
Here is the general profile I use. This frame is for a 1 1/2″ thick canvas and is about 1″ thick and 2 1/4″ wide. The groove is cut first and is the thickness of the 1/4″ plywood used to support the painting. The top of the groove is 1 9/16″ from the top. You could use a dado head or router bit to cut this but in my experience it’s just as quick to set the height of your blade and then make 2 passes on the table saw. Since plywood thickness may vary it’s better to do it this way but do use some scrap to make trial cuts. Next step is to miter these pieces but before I do that I prefer to knock down that sharp edge by cutting a narrow 45° cut on those edges. Now you can miter them to fit the painting — don’t forget to add about 1/2″ to the canvas size which will give a 1/4″ reveal all around the art.
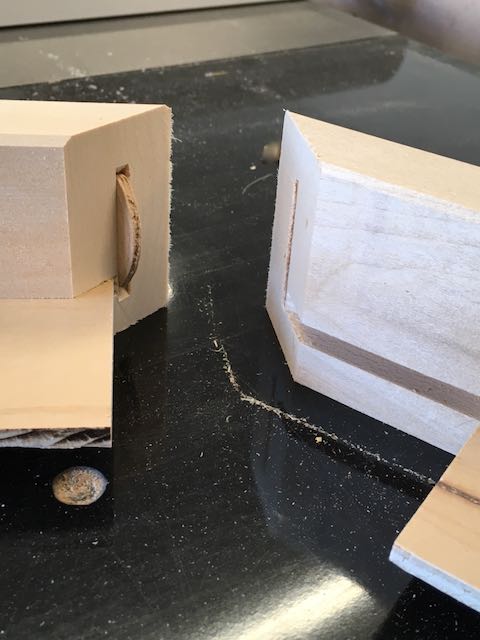

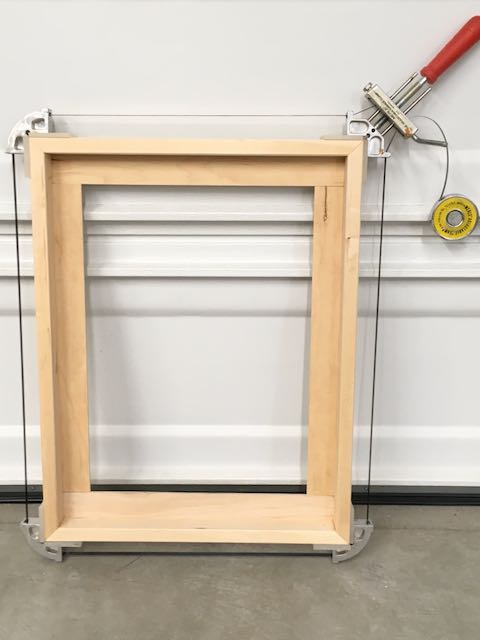
After the pieces are mitered my preference is to use face frame size biscuits in the corners. If you have a biscuit joiner it’s worth the extra step since the biscuits will stabilize the corners and prevent them from slipping during glue-up. The plywood not only supports the art work but also reinforces the corners! On two of the frame legs the plywood is full length so that it inserts into the adjoining leg, see the picture on the left. That will glue into the leg of that piece and give you a very strong joint. The other two legs have the plywood filled in between tightly which gives a square and strong frame. I always glue and clamp my frames overnight.
To mount the canvas I’ll drill an appropriate number of holes through the plywood with a 1/4″ bit. That hole is slightly oversized to allow some “wiggle room” to square the canvas with an even reveal all around. Use a #6 pan head sheet metal screw along with a #6 flat washer for attachment. I use 1/4″ MDF for spacers and predrill the holes in the canvas. You can use whatever method of finishing the frame you like, lately Japan black with some burnt umber mixed in has been my choice. Occasionally I’ll gild the front edge so I’ve added a short video of that in the next paragraph.
One additional step for when the edge of the frame is gilded, either water gilding or oil; is to create some sort of detail to separate the two elements. Without this, it can be a problem getting a clean edge. I’ve used a shop made scratch stock but now that I have a small plow plane (Veritas) from Lee Valley the technique has been refined. I also purchased the beading cutter set which is great too for creating my own profiles. Here’s a video I made of the process, usual disclaimer — I’m not a professional cinematographer!
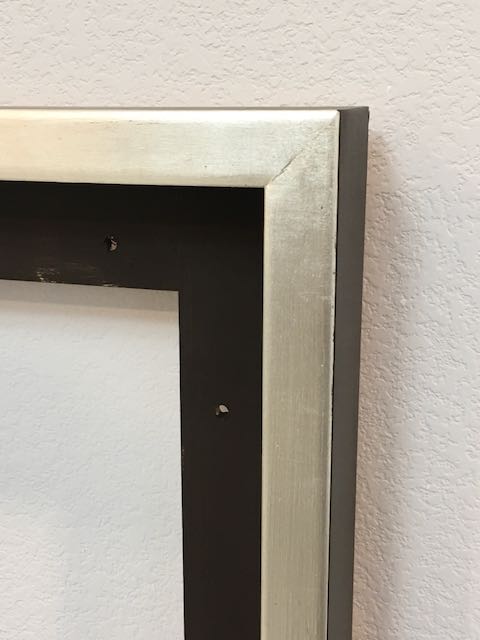
Here’s a picture of how that process turned out. Notice the mounting holes for the art work. If you decide to use this method and run into something that you’d like to clarify feel free to contact me through my website.

Hi John, I greatly enjoy and appreciate your posts. I use basically this process for making floater frames (though that plow plane addition is new to me, and very nice!), except I don’t have a biscuit joiner. If you didn’t have one, would you buy one just for frames? Not having one, it’s hard to know how much of a difference it would make.
LikeLike
Hello Christopher, I wouldn’t buy one just for this application. I mentioned that I used to use what’s referred to as a scratch stock. Many years ago I did a demo at our woodworking group showing how to make and use one of these handy little tools. Here’s a link to that blog which shows how can make your own! I use old saw blades for the metal and I think you’d enjoy making and using one yourself! Here’s the link, hopefully it’s still good: https://www.blogger.com/blog/post/edit/8508188217052237867/2605421285251744318
LikeLike
Read that wrong, thought you were wondering about the scratch stock; not the biscuit joiner! Gluing end grain like miters is weak, not enough long grain. I always use biscuits to reinforce miters. You could also cut across the corners for a spline after assembly but face frames are fairly thin so not much space for one. It’s an added step but I believe it’s worth the strength and peice of mind it gives me.
LikeLike
Thanks, I was indeed asking about the biscuit joiner, but that scratch stock is a great solution to a problem I’m sure I’ll run into someday! I have the same thoughts on the splines; I add them when it seems like there’s space and need, but if the frame is small there’s either not enough room or it adds such a small amount of strength, and sometimes when there is space they just don’t work aesthetically (I made a frame out of curly maple recently, and I just couldn’t bring myself to cut it for splines!). Sounds like a biscuit joiner might just be in my future; a small price to pay for added peace of mind. Thanks for the reply!
LikeLike