

16 1/2 ” tall x 15 1/2″ deep x 40″ long

This is about the fourth or fifth seat I’ve ever woven and I always get so involved with the process — love watching things come to life! In our new home we needed a bench for the entry hall where you could sit to take off or put on shoes. I’ll talk about making the frame later on and will focus on the process I used to weave the seat first. Traditionally, Danish cord seating uses L-shaped nails to hold the cording in place but in Fine Woodworking there was an article by David Johnson where he demonstrated a way to weave it without using the nails. That was the way that the warp (front to back weave) was created. It involved a number of different knots and splicing in new cord was an interesting process but on the long rails of this bench easy to accomplish.
For the weft (side to side weave) I ended up using a technique demonstrated by Ed Hammond on a YouTube video. I’ve always liked the look of that double side rail weave. Rather than using knots and splices he uses staples to secure the cord to the frame for the weft. I believe his warp is traditional with the nails. There would have been so many splices for this project I could see very quickly that it would become a hassle! With the warp you’re only using a single strand of the cord, for the weft you use a pair of cords. To keep splices to a minimum it’s best to use the longest piece you think you can handle, I began with about 90′ of cord so doubled up means I was weaving with 45′ at the beginning of the process. Here’s a picture essay of the process:


A neighbor asked how long this process took me, my standard reply to this common question is that I really don’t keep track of the time it takes. It’s really about the process and enjoyment I get from the results even when making custom pieces for others. The weaving process is challenging, I’ll admit to having to take out two different courses because I missed a warp and had the weft going either under two or over two rather than over/under/over/under etc. If you’re at all interested in weaving a chair seat I’d suggest you take it on!
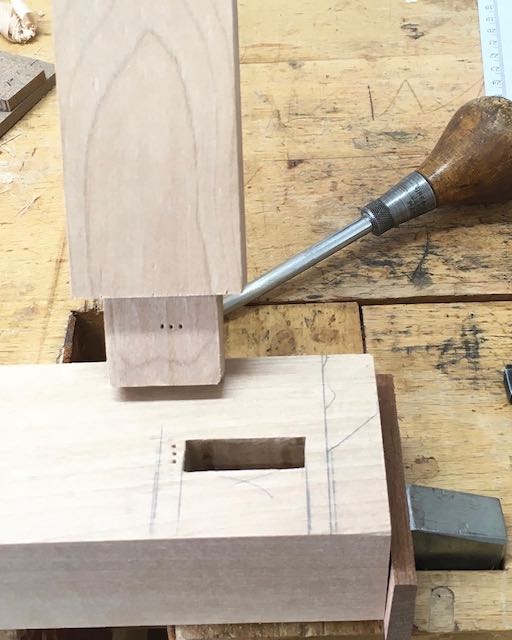
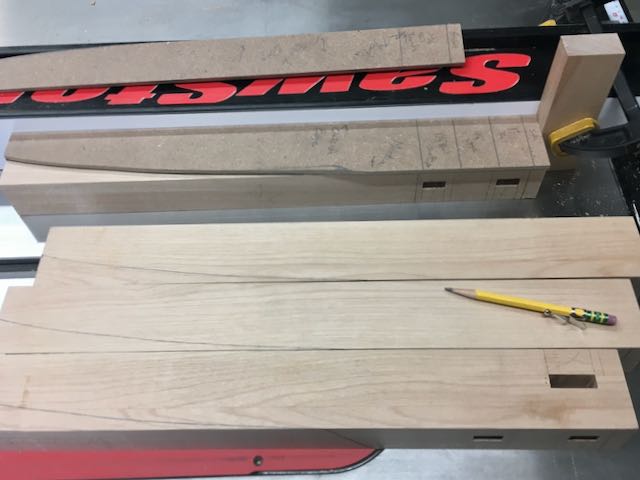
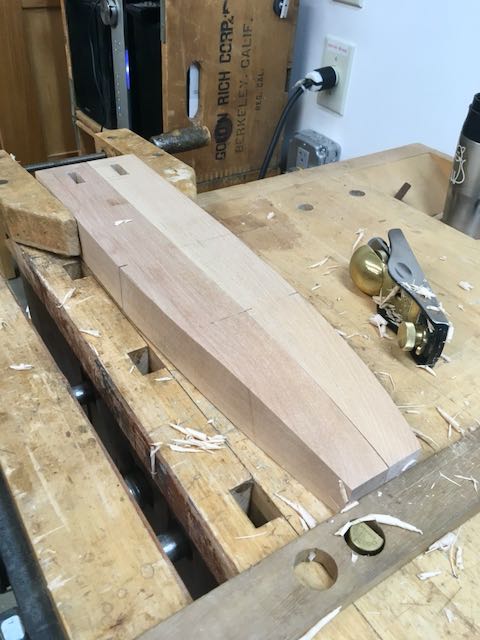
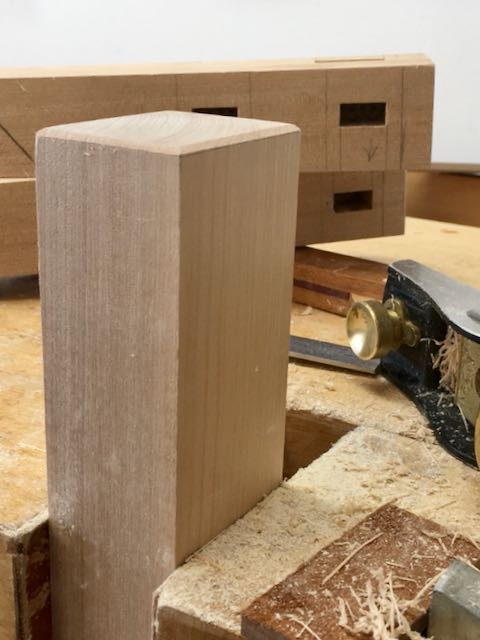
The framework for the bench is from a piece of 8/4 Birch lumber purchased from Peterman Lumber here in Las Vegas. It was built using my usual method of first using the table saw to cut pieces to approximate size then hand planing to required sizes. I use a hollow chisel mortiser and then tenoning jig on table saw to cut the tenons. They’re left oversized so I can fine tune with a rabbet block plane. The curved and tapers on the legs are first bandsawn, and again; finalized with a low angle block plane. The glue I prefer is Old Brown Glue and the finish is OSMO Polyoil. Once again, here’s a picture essay to clarify the process:


Now that this project is complete it’s time to do concentrate on a number of picture frames for Diane’s upcoming show at Meyer Vogl Gallery.

Pingback: My Battle with Birch!! | Woodworks by John