
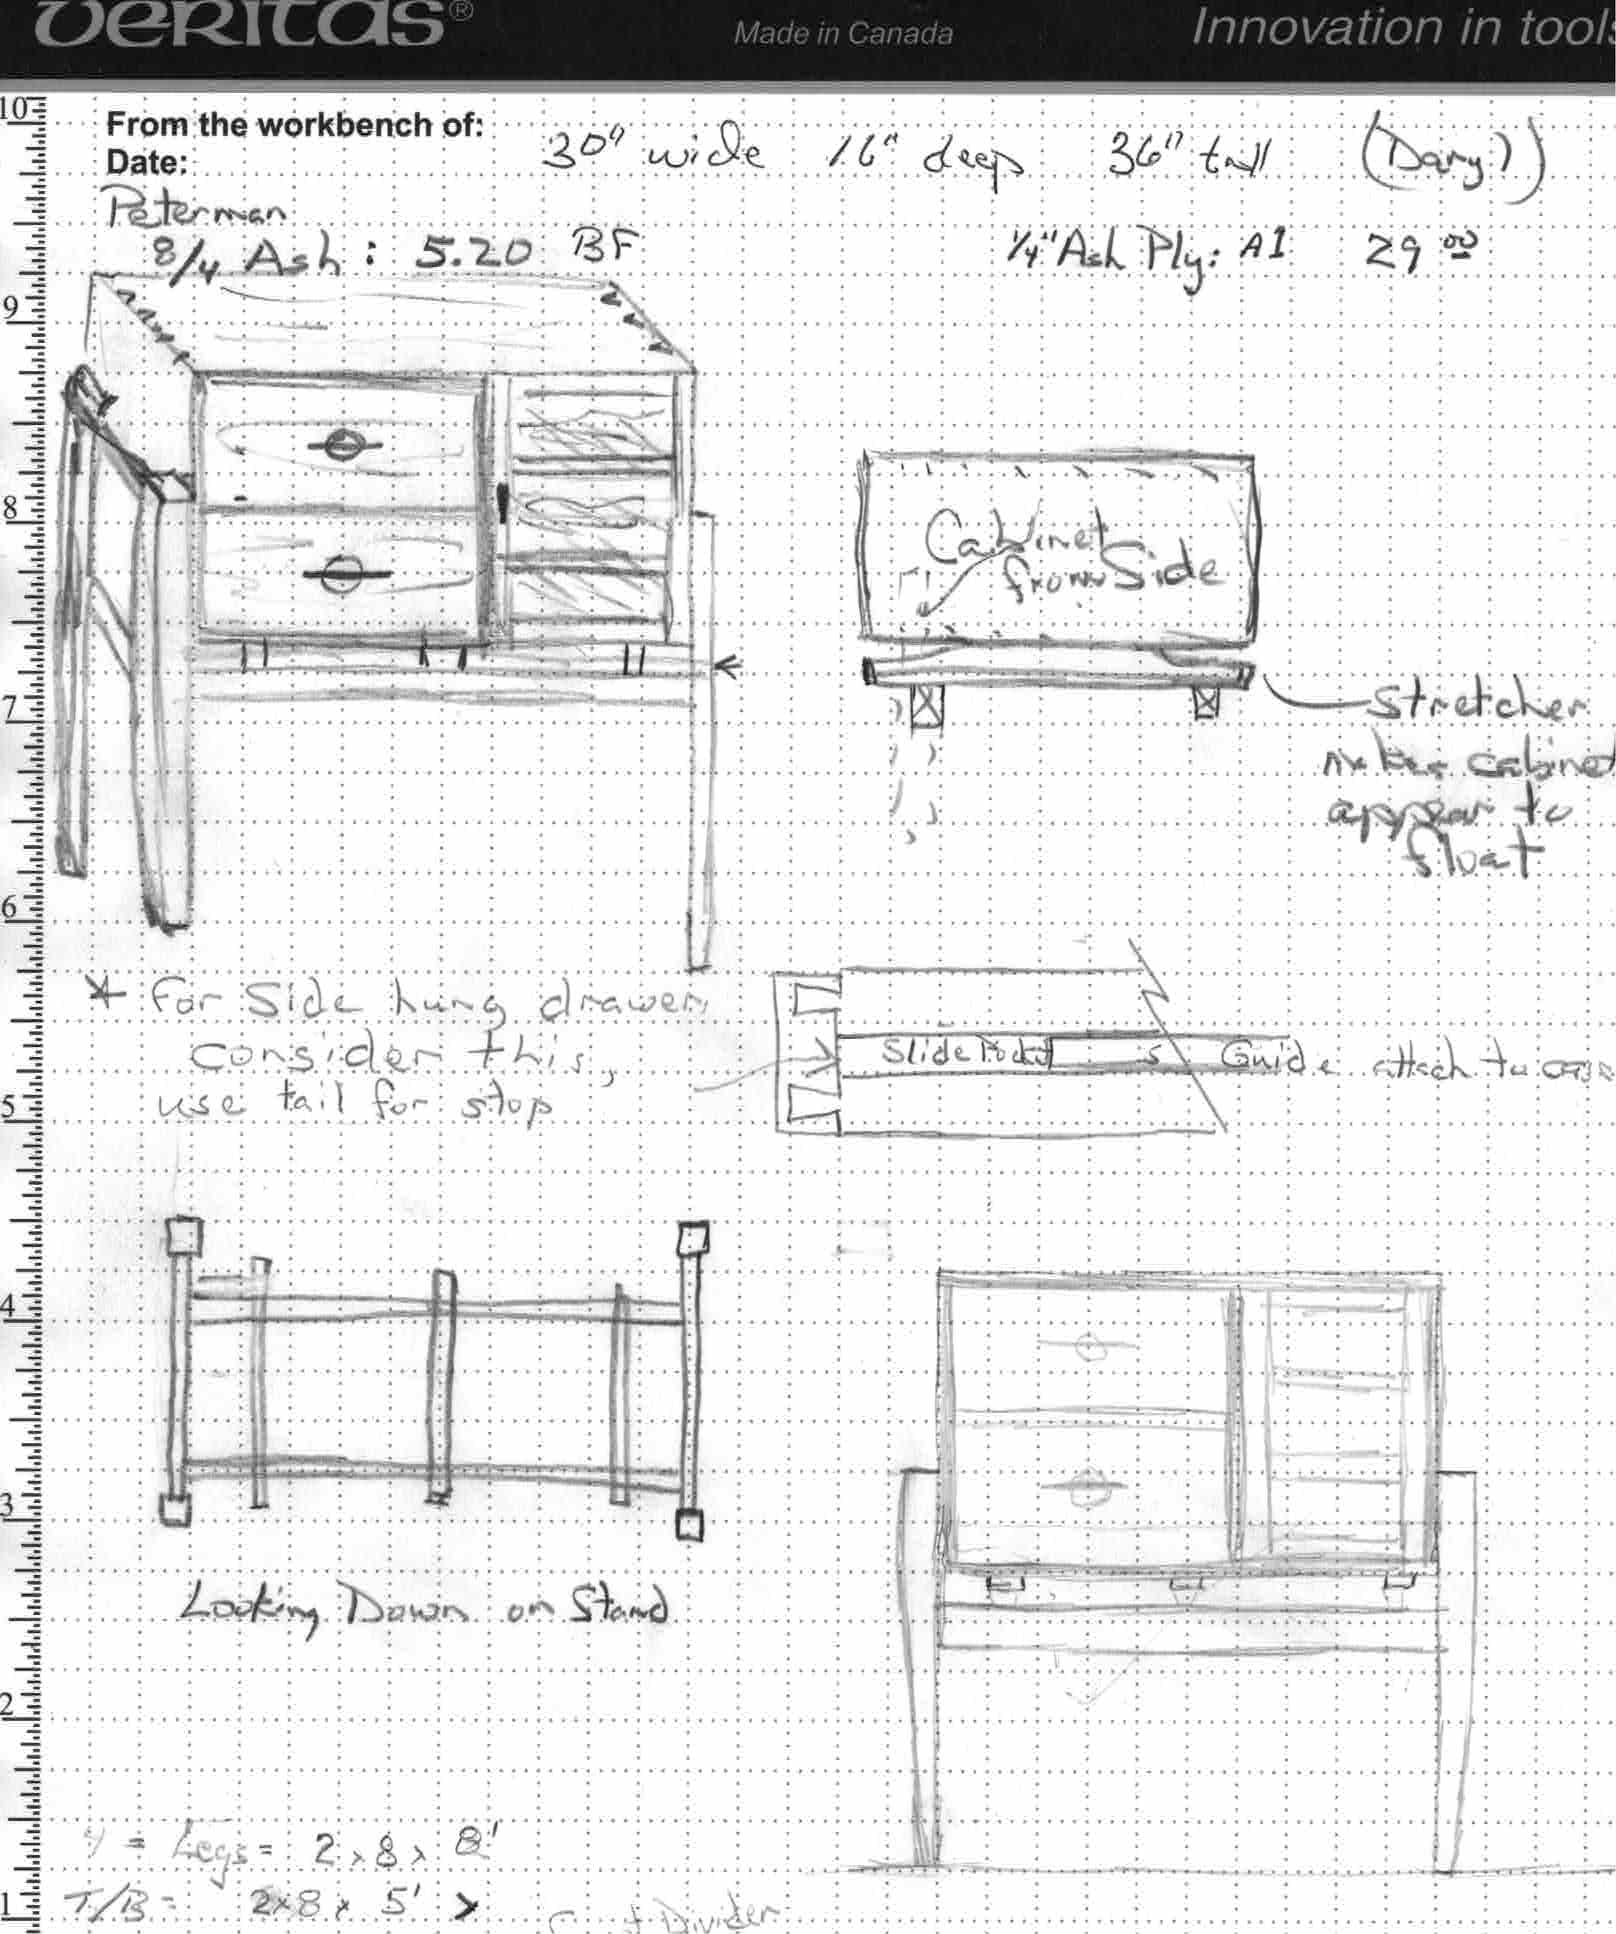
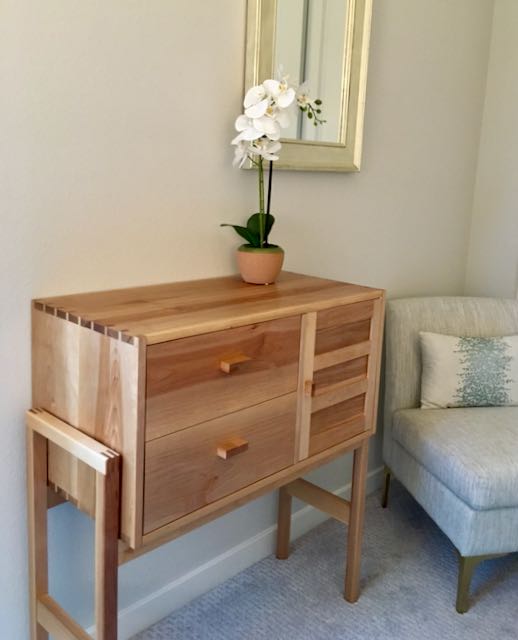
I really like this WordPress feature called Image Compare where you can use the arrow to compare two images. When I taught I always emphasized to my students the satisfaction they’d get by seeing the results of what they first imagined and sketched on paper to the finished product created with their own hands and initiative. Into my seventh decade and that satisfaction is what keeps me going!
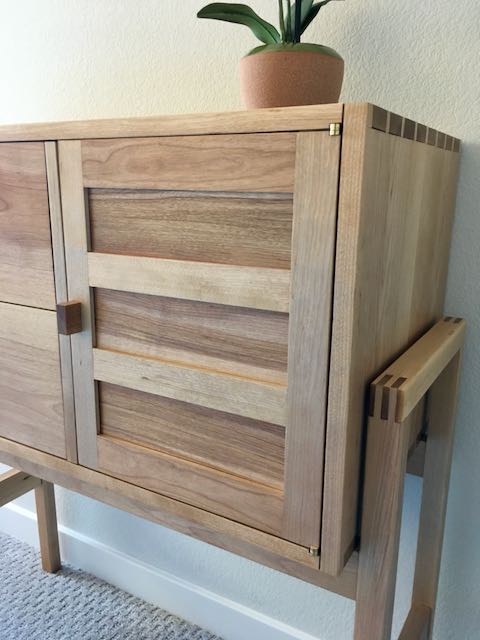
If you read my first blog about this project; My Battle with Birch you know what happened, if not you can link to it. In a nutshell, the panels cupped after laminating them together and that really threw the dovetail layout off. Luckily, I started on the bottom and figured out that by applying cauls and clamps when doing the layout and eventual assembly there was more accuracy. Looking back, I should have let the boards acclimate after resawing for longer but hindsight is 20/20 right? I did do that for the drawer stock and had much better results. All in all, this was a great learning experience and since it wasn’t for a client I felt more freedom to experiment with techniques I didn’t usually use.
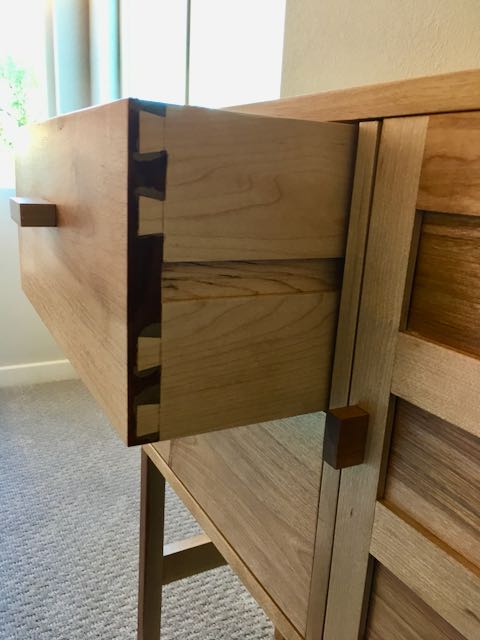
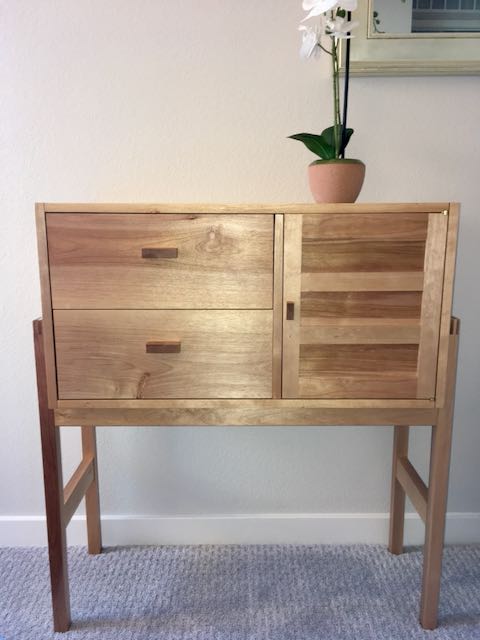
One technique I wanted to try was side hung drawers that used the drawer front as a stop. I’ve done them before where the groove in the drawer side was routed but didn’t go the entire depth of the drawer. When using the drawer front as a stop it’s easier to set the distance, it’s simply the thickness of the drawer front. The drawers are approximately 7″ tall x 16″ wide and 14″ deep. The sides are soft Maple. One odd thing I noticed about the Birch is that the Old Brown Glue absorbed into the end grain and didn’t clean up like it always has in the past.
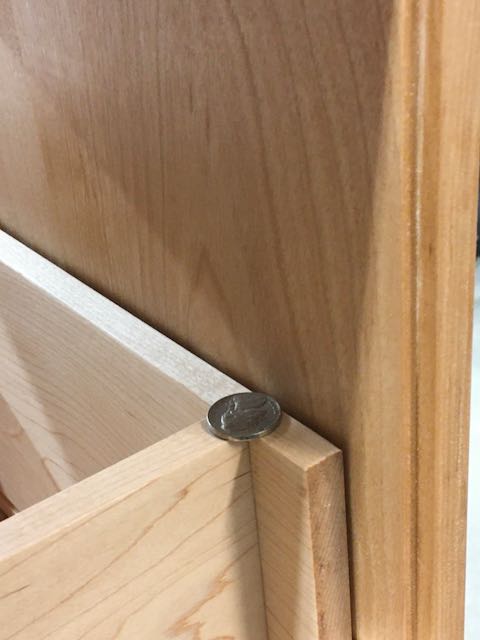
The method I used to get the spacing between the drawers is using a nickel or a dime, they’re +/- 1/16″. After placing the bottom drawer on the coins and putting the slide in the slot I measured from the bottom of the case to the bottom of the slide. Next a piece of MDF is cut to that measurement and the slide is attached with a couple of screws. As long as the MDF is square and the slide is held firmly against it you’re insured of the same placement on both sides of the box. At this point I’m concerned with the height only, not the setback. Once the height is good, I place coins on the lower drawer, put the top drawer and slides in place, measure and repeat the process with another MDF spacer. If the spacing between drawers if correct it’s time to attach them permanently, a small combination square is adjusted to the thickness of the drawer front and the slides are installed. A bit of wax and they’re good to go!

The final technique for this project was to use a double bridle joint on the stand. If you look at my original drawing you can see I changed from that. I have an old issue of Fine Woodworking Magazine featuring double bridle joinery and I decided to use that here. Already had the contrast of the dovetails so this seemed appropriate. It was issue #247 and after completing the work realized my rip blade really needed sharpening! Offset knife hinges from Brusso and the small, endgrain knobs add a bit elegance I was after for this piece. The finish is OSMO polyx #3043. Two coats applied with grey and white nylon scrubbies.
and Shop Made Knobs
Hopefully I’ll be contacted from a future client who likes this piece and would like their own version of it! Here’s an ironic twist — never thought I’d be the first one to use it, I got the dreaded Covid and am now quarantined in my own guestroom!!

That turned out great. I’d never even consider doing that many exposed joints in one piece. Much respect to you.
LikeLike
…also like the scale. Way more commodious a tiny, decorative bedside table but not a bulky chest of drawers.
LikeLike
Thanks, I followed your advice and stickered the drawer pieces for 2 weeks or so and that helped. Always a challenge to keep us going right?
LikeLike
Glad it helped. Yes, always a challenge. I’m working on my first attempt at a proper chair and I’ve had re-make 5 important parts and lost way too much time in the process. Just have to keep puttering along, I guess.
LikeLike
I know that feeling of starting over when building from wood. My wife is an artist and if she wants to change her work it’s fairly simply — just scrap it off and add more paint! Same with those who work with clay but with wood it’s hard to “put it back”! I have a friend who’s a woodcarver jokelingly tell me the small bird he completed started out to be an eagle!
LikeLike
I’m storyboard artist and it’s been all digital for a long time now. Now, whenever I make a mistake in a regular pencil drawing, I’m conditioned to reach for the “undo” button instead of an eraser. I think most of the time I lost in this project was agonizing over a patch repair vs. replacement. If anything, it’s taught me that I need to stop EVERY TIME I’m about to cut and ask myself “did I re-check my marks? Is it the piece I think it is? Is it oriented how it should be? Am I visualizing how it fits in the project?…etc.”
LikeLike
Love the piece John. Hope you get over the Wuhan flu ok
LikeLike
Thanks, appreciate that — taking the Paxlovid and fingers crossed in a couple of days I can go out in public and feel stronger!
LikeLike
Pingback: Danish Inspired Loveseat | Woodworks by John