
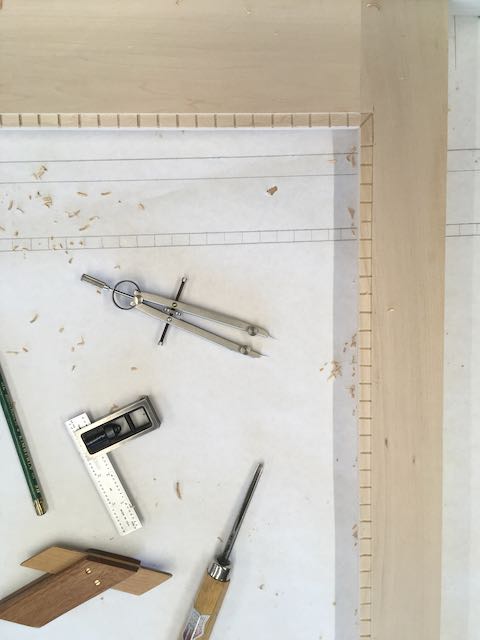
There’s a feature of WordPress I really like called image compare that allows you to see the final results and then slide the arrow to the other side to view the backstory. The backstory on this frame is the full size drawing made of it on the assembly table of my shop.


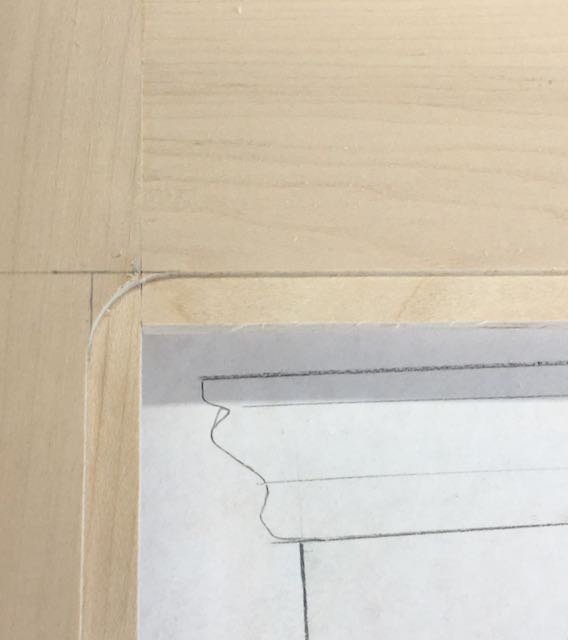
Although I’ve made tabernacle frames for other artists, this is the first one I’ve made for my wife and favorite artist Diane Eugster. The title of this painting is Heartbeat and it’s a 24″ square, oil on canvas. The goal was to design a frame inspired by tabernacle style that was still somewhat contemporary. Moldings can be made by hand using planes and routers but these were found at my local, so-called big box store. I prefer to draw these out full size so the moldings can be shown easily to get a true representation of how the frame will look.
The method of construction for tabernacle frames requires mortise and tenon joinery rather than the typical mitered corners found on most frames. The reason is that the side, top, and bottom pieces are not the same width. The bottom is the widest so I prefer using double mortise and tenons there to prevent any twisting. The material used is 1 1/16″ thick Basswood. Cutting the rabbet for the canvas to sit in is different than the process for a mitered frame. I use a typical, 1/4″ rabbet cut with a dado head on the tablesaw. The top and bottom pieces are rabbeted their entire length but not the side pieces. For the sides you need to start and stop the cuts on each piece. This is accomplished by drawing lines on the tablesaw showing the beginning and end of the cut. On each piece you also draw lines where the rabbet starts and stops. You need to slowly and carefully lower the piece down onto the blade (saw turned on) then advance it to the mark showing the end of the cut. At this point, the piece is carefully lifted up and off of the blade. Although this seems like a somewhat risky process if you pay attention to what you’re doing it’s not a problem. Since the ends of this cut are round due to the blade the final step is to use a chisel and mallet to square the ends of them.
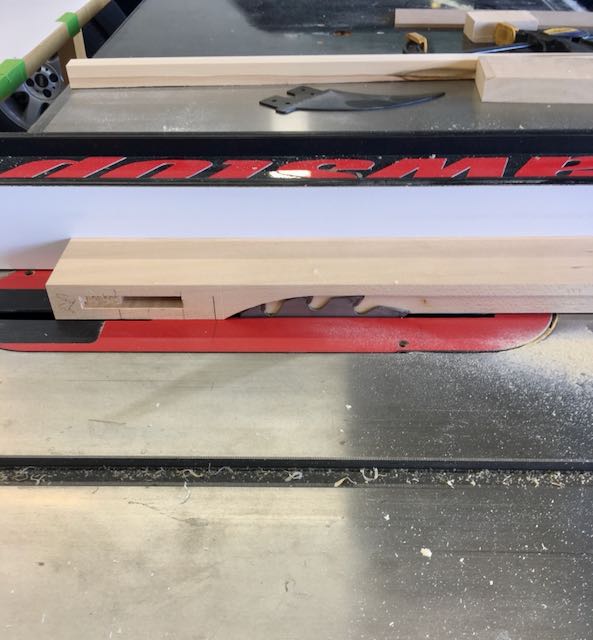
shown with power off
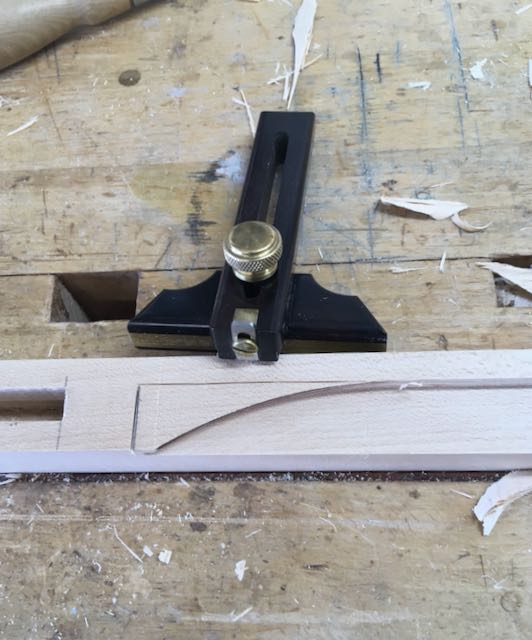


Now that the frame is assembled the sight edge is ready for carving. The first step was creating a shallow, 3/8″ wide rabbet with a router. Once again this leaves a rounded corner and requires some chisel work to square off. It takes a bit of math work and guesstimation to figure out the spacing for the grooves but once I was satisfied they were stepped off with a divider and chiseled with a Dastra #41/4mm small gouge. All that remained was some light sanding to soften the edges.

After completing the sight edge it’s time to miter and attach the moldings and top cap for the frame. The top cap is glued and screwed to the frame, the screw holes were countersunk and plugged. I use glue and #18 brads to attach the moldings and putty all of the holes and any gaps with Durham’s Rock Hard Water Putty, a product I’ve used for decades that many people have never heard of! What makes this product my choice is that it comes in powder form and you simply mix with water when needed – shelf life is forever! I’m guessing most of you have had the experience of finding that tube or can of wood putty on your shelf hard as a rock just when you need it, that doesn’t happen with this product. Once the frame has been sanded it’s time for the finish process which I’ve illustrated below.


gilded areas were taped off

The first step to the finishing process is to apply 2 coats of shellac to the entire frame. Before applying the rest of the finish I tape off the back — don’t like seeing any finish on the backs of my frames. The next step is the burnisher/sealer and once it’s dry and burnished the areas to be gilded were taped off. Two coats of a slightly thinned Japan black from Rosco is applied with a brush and allowed to dry completly. The frame needed to be taped off to oil gild the rope detail and the sight edge. These areas were also sealed with shellac after the size was completely dry. For gilding small areas like this I use quick size. The final steps to this process involved mixing a few drops of Mixol black into an acrylic, matte medium to minimize that overpowering composition gold. Wax and steel wool is used as a final step to get an overall warm finish.
If you need a tabernacle frame for one of your paintings or have questions on making one of your own please contact me through this blog.

The painting looks great in that frame. The amount of planning and decision making needed, make it clear why it’s not a more widely used construction. I’ve never considered gilding anything but that looks very cool.
LikeLiked by 1 person
Thanks Paul, I always say I like a challenge and tend to pick difficult ones! What part of the world are you in?
LikeLike
Hey John, I can relate. I admire people who can do hundreds of iterations of a single project, learning with each repetition but I’m more in your camp. I’m currently copying an Egyptian chair and for the last couple of weeks, the learning curve has been uncomfortably steep. I’m in Toronto. Where are you?
LikeLiked by 1 person
Hi Paul, I’m in North Las Vegas. I would think making a reproduction of an existing piece is difficult because anyon who knows it will spot differences. I like the so called artistic license I have designing my own work. Any questions I can simply say “hey, that’s how I wanted it to look”!
LikeLike
I’m working from photos I took at the Brooklyn museum and when you see the original chair, there’s a lot of asymmetry, so I feel a certain amount latitude in my interpretation. I want to feel like I’m capturing the character of the thing and I want to document the joinery but there’s no attempt to replicate every detail.
LikeLike