
There has been quite a bit of progress on the nightstands and to be honest I’m not sure I realize going in how much time these would take to complete. There are many steps, parts, and pieces to this design I came up with and I’m finding that the VG Douglas Fir has challenges of its own!

While the cases were drying and getting finished with Osmo Polyx I worked on the stands. These are also vertical grain DF but if you look closely you’ll see the grain looks considerably different. It doesn’t have the pronounced, linear grain pattern. These are now finished and were constructed using a double bridal joint at the tops and mortise and tenons for the stretchers. The units will be attached with screws through the bottom of each stretcher.
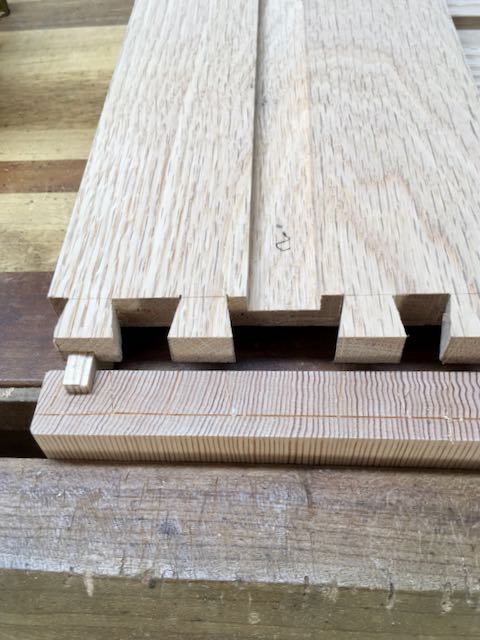
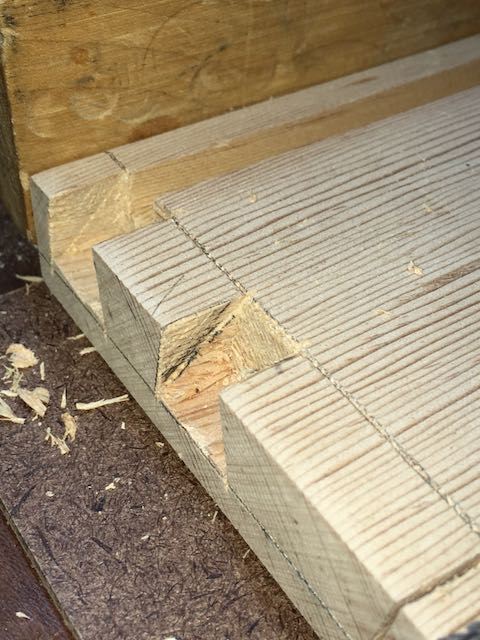
The first step to making all of the drawers was to size and shape the parts. There is a total of 6 drawers. The two piles in the lower left are the sides. They have a groove for the bottom, a dado for the back, and a rabbet for dovetails. The pile on the far right is the backs and the pile at the top are the drawer fronts which also are grooved for the bottoms. I leave everything longer than needed in case of mistakes or problems with the dovetailing and also had a couple of spares for the sides. The joinery is half blind dovetails for the fronts and pegged dowels for back pieces. I only messed up on one of the front pieces so easy enough to cut it off and make a second attempt. The grain in the Douglas Fir I is quite challenging to work with!

Now it’s time to begin cutting the dovetails. I follow the “tails first” method and cut the tails for both sides of the drawer at the same time. What follows is removing the waste with chisels and refining the tail. Now it’s time to cut the corresponding pins on the drawers front piece. The tailboard are carefully aligned, scribed and then cut. Your goal here is to have them fit “right off the saw” which I manage to accomplish more often than not! Volumes have been written about dovetailing so I won’t bore you with my methods. I’ll give you a pictorial summary.

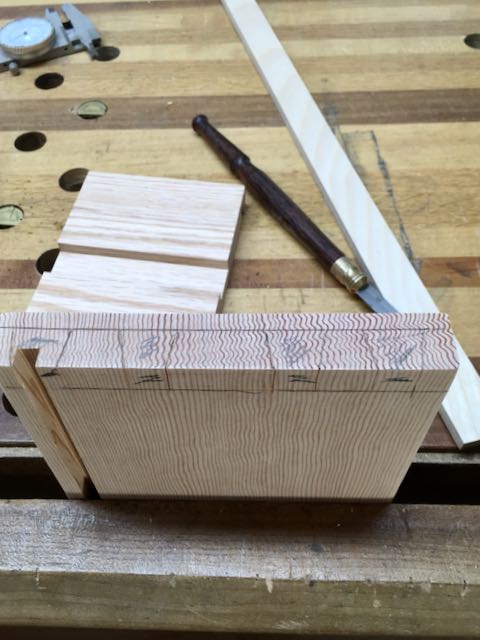

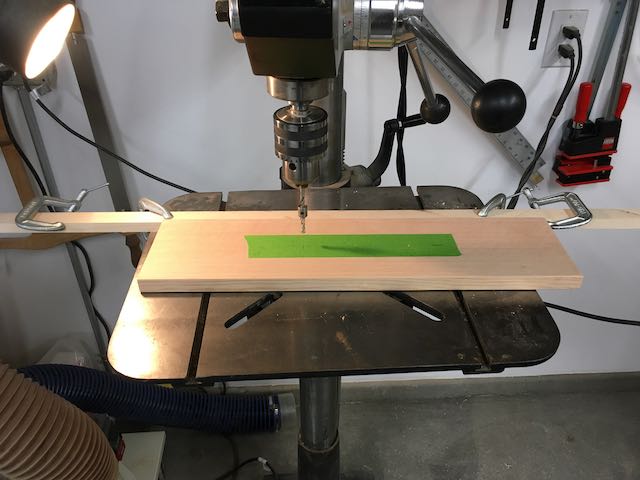
Before assembling the drawers the holes for the handles were drilled into the drawer fronts. They have 5″ centers so a simple jig was set up on the drill press to make sure they’re all located the same. The holes for the pegs that will lock the backs were also drilled before assembly. Due to space and clamps two drawers were glued up at a time. I used Old Brown Glue and allow them to dry overnight. The final step was installing the pegs for the back. This was done the next day, only needed to drill into the back piece and glue in the 3/16″ pegs which were made from Birch.


I feel good about how much has been accomplished so far. Work that still needs to be done is finishing all of the drawers, making and installing the drawer slides, and installing the black liner that goes inside each unit.
