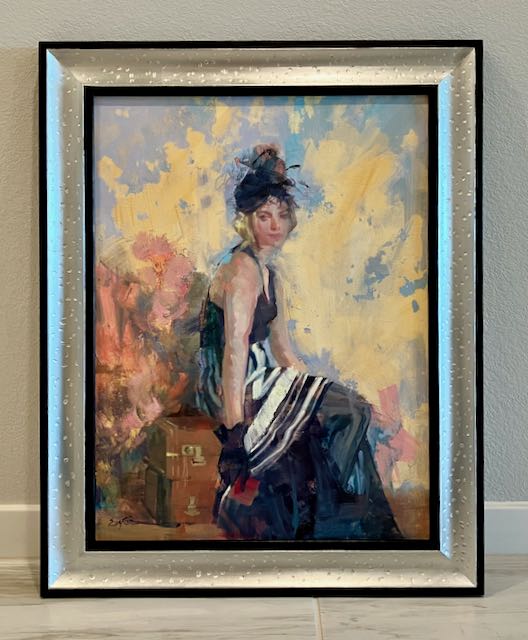
The title of this 18″x24″ oil on stretched canvas is The Parisian, painted by Diane Eugster. Since posting this frame and painting I’ve received a number of comments about how the frame was made and how long it took. It’s interesting to me how often people ask how long a project takes to complete so this was one of those occasions where I kept track of my actual work time. This particular frame took approximately 10 hours of actual work time. To be honest, I’m not that concerned about how long projects take; my motivation is more about meeting the challenge and accomplishment a goal. Many furniture projects take 50-80+ hours but my adage is that time is care, not the familiar one of time being money.
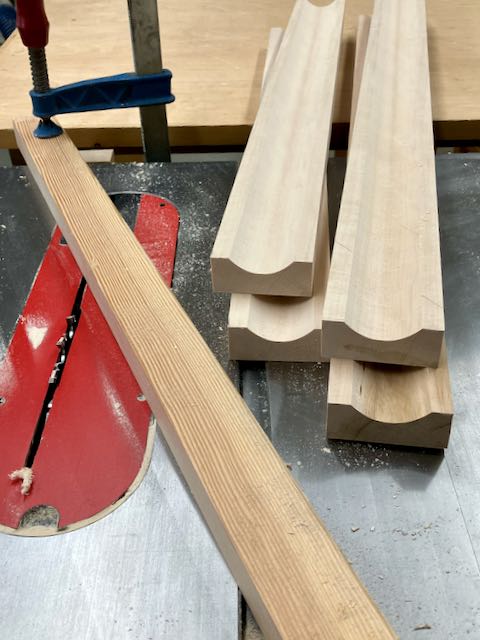
I used 5/4, rough Basswood stock for this frame and was able to mill that down to a finished thickness of 1 1/8″. These pieces were 2 7/8″ wide and left long to allow for the miters. The first step was to cut a cove in each piece using the tablesaw, followed by lots of sanding to remove marks left during the cove cutting process. To cut those coves you need to clamp a long straight edge at an angle behind the blade then cut the cove by raising the blade in small increments until your desired depth is achieved. I won’t go into the details of how you set this up but there are many sources on the internet — be warned; please use a credible source!
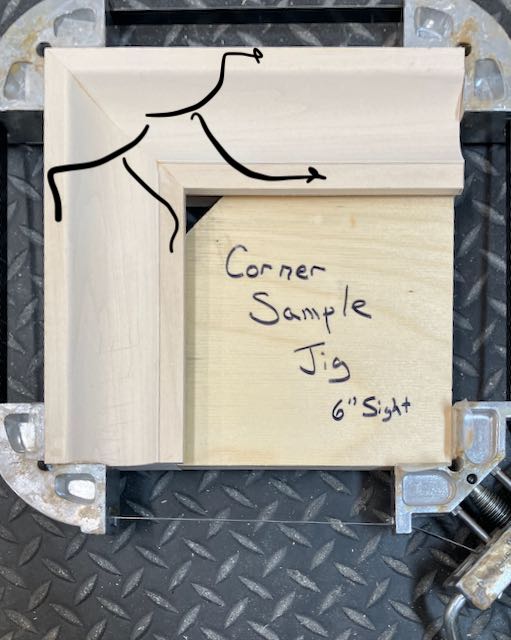
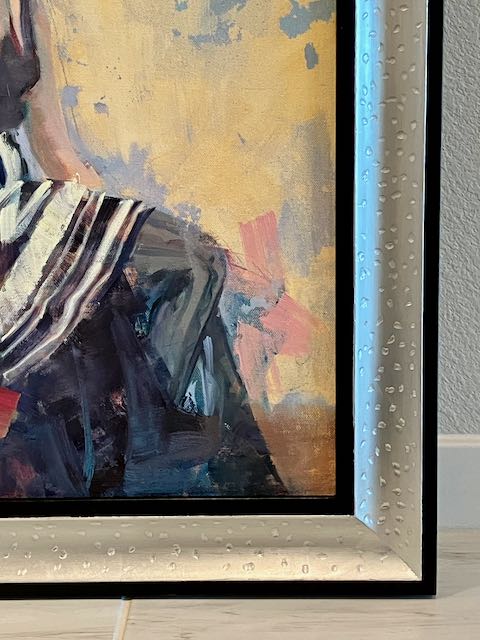
After cutting the rabbet I also cut a slight, 30° chamfer on the outside, back edge of the molding. This makes the frame appear to float away from the wall. A skew rabbet plane was used to form a shallow, flat area on both sides of the cove, I’ve marked those areas in the picture. These outline the cove and give a definite edge to separate the black Japan paint from the cove. Makes it easier to tape too! Lastly, the pieces were mitered, biscuit slots cut, and then glued/clamped overnight. I usually make a sample corner for new designs and you can see the details of the frame in it.
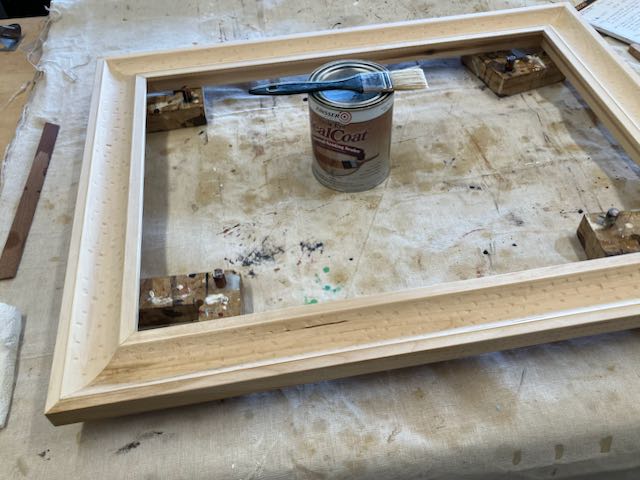
After assembly it was time to start texturing the coved area. I experimented with different gouges and decided to use a #7 sweep that was 10mm wide. This particular gouge had a long bend to it which made it easier to get to all areas of the cove. Do you realize how difficult it is to develop a truly random pattern? After doing a section I’d step back and look at it, then try to decide if there was a pattern or if there were too many or not enough cuts, do I need more, should there be less, etc. Finally I decided to listen to my daughters favorite phrase: “it is what it is” and let it be. The entire frame was checked over, sanded as needed and then I brush on a coat of Zinsser shellac seal coat to all surfaces which is lightly sanded with 400 grit paper before the final finish.
The finishing process was a succession of first taping off the cove to apply the Japan Black to the edges. When that was dry, the edges were taped off to apply the gray sealer/burnisher. That tape was removed and replaced with the yellow 3M tape prior to applying the slow set size and the laying metal, silver leaf. I’ve found that the yellow tape leaves a cleaner edge since it’s thinner. When I lay composition leaf I use my fingers and cut it to size with a single edge razor blade. I’ve found that if you press firmly down on 6 or so leaves and cut them on a piece of plywood they cut cleanly. This is much, much easier than handling them with a gilders knife on a pad. With this cove I was actually able to pick up the leaf and paper at the same time and use similar to how patent leaf is applied. I’d do one side of the cove first and then come back to do the opposite side.
Zinsser Shellac 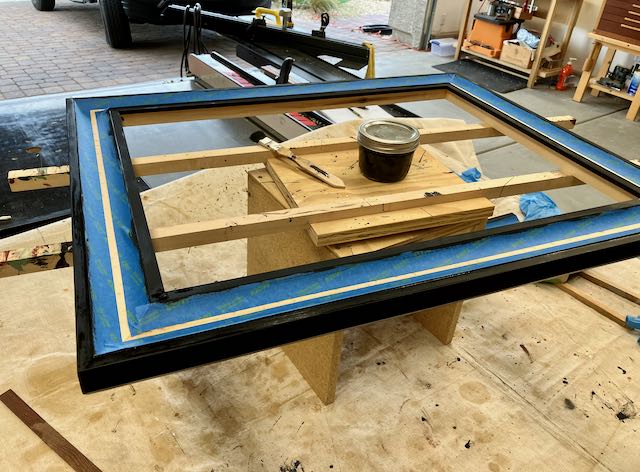
Japan Black 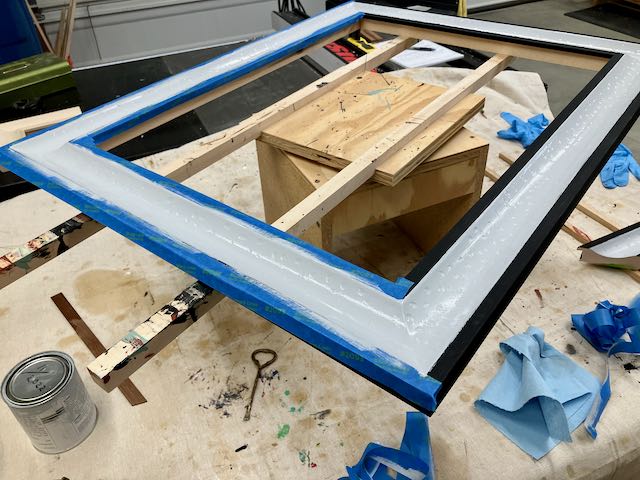
Gray burnisher/sealer 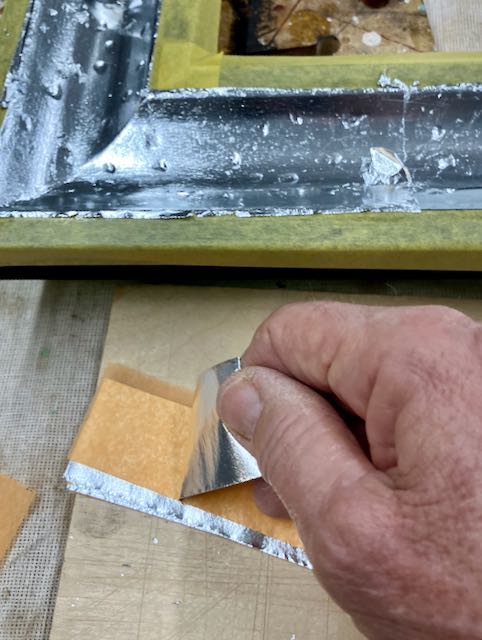
Picking up leaf & paper 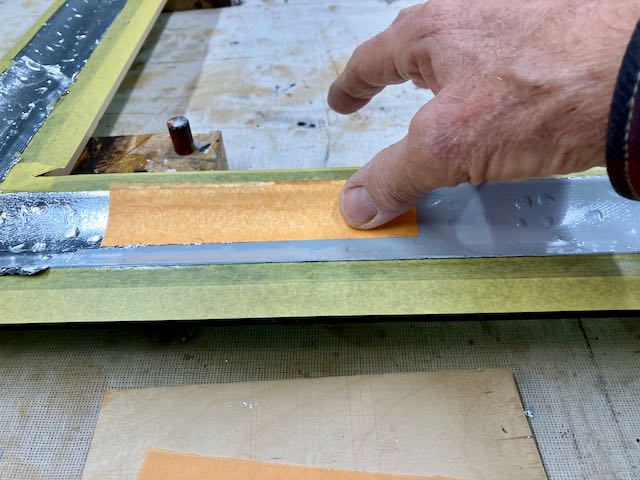
Laying leaf in cove 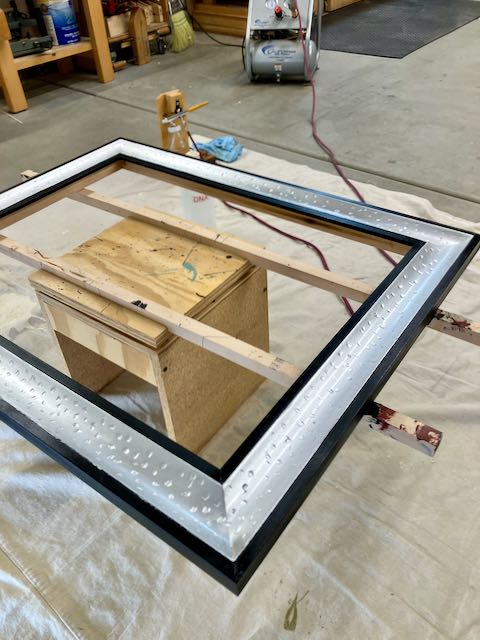
Plantinum Blonde Shellac
After the slow set size was completely dry the leaf was carefully burnished with 4/0, oil free Liberon steel wool to tone down the shine of the composition leaf. This was followed by a few coats of Platinum Blonde shellac applied with an air brush. The final step for my finish is to use a white nylon scrubby and Liberon neutral paste wax to tone down the gloss of the shellac. Here’s a final picture is of a corner detail — I believe it complements the picture nicely!