
New Roman Shades
Well, I did say a post or two ago that it was the last of the blogs about our recent family room remodel but —- guess what? Here’s another! If you work around your own home does it ever feel like there’s no end to it all? Happily, my wife has a great sense of style and design so our house stays up to date and a wonderful place to spend our time together. A high school friend of mine who I’ve re-connected with through Facebook has a design blog which is always inspiring, it’s called The Good Life of Design and is a good source of inspiration. Her style is coastal beach and even if that’s not your focus, her blog is a good read.
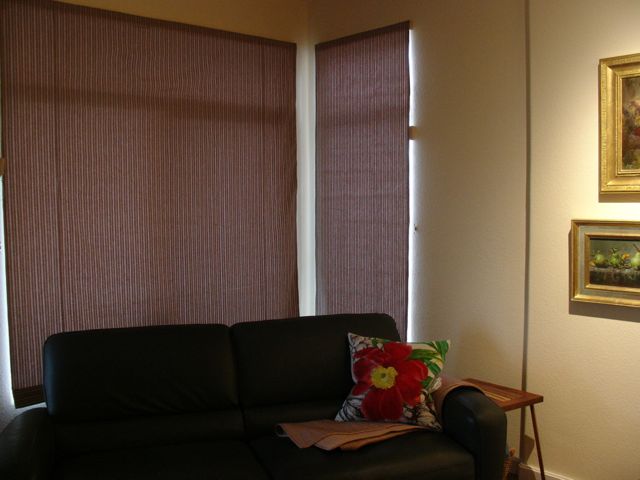
When we took down the original Roman Shades that Diane made for the house her first thought was to simply replace the cords and the numerous plastic rings that the sun had eaten up — well, not so easy! The desert sun was brutal, as a result the lining was so bad it was impossible to sew or repair. Our first instinct was to go the quick and easy route and contact one of the many companies that specialize in blinds. Kind of had the thought going in that we wouldn’t be satisfied with their offerings or pricing so Diane was off to the various fabric stores to find just the right material and she succeeded! Just as she was about to give up on her quest she came across this fabric and bought 15 yards to do the job. She didn’t know until checking out that it was all on sale, ironically the lining ended up costing more than the face fabric! Next on the agenda was to find rings and cord which she ended up buying on line. The rings are brass so will never deteriorate from the sun, unfortunately the storms back east delayed the shipment so Diane was “chomping at the bit” to get the job complete.
There were a total of 6 shades, two for the doors (25″ or so), two for narrow windows (36″ or so), and then two more for the large windows (75″ or so). That’s a lot of fabric and sewing to say the least! Ended up taking the assembly table from the shop and putting it on her sewing table to have enough room and support for the fabric. That was a lot of sewing for her to complete but the final results are beautiful. For my contribution to this job I only needed to re-size the mounting boards and change the eye-screws for the cords to run through. The shades are attached to the mounting boards with velcro which makes it easy to align them as needed. Believe it or not, the windows aren’t all square or level to the world so being able to adjust them is crucial.

Check out that shaving!
New pulls were made from a piece of 1″ square Poplar. This began by first planing the surfaces. I felt a bit like Rob Cosman as I planed this wood. The shaving came out just like it does for him in a YouTube video on planes. I’ve given you a link to it in case you’re wondering what I’m talking about. Once the piece was squared and smooth the edges needed to be chamfered which was done with a block plane. So much nicer doing this type of work with hand tools as compared to a router, shaper, or table saw. Quicker and better finish too:


After the piece was shaped and felt good to the touch the individual pulls were cut, they’re about 3″ long. Here’s a sequence of the finishing steps to this project. We’re happy with the results of the entire job but I’d bet there will be subtle changes moving forward!
-
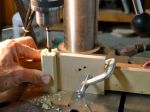
- Large hole to conceal knot of cords
-

- Smaller hole to pass cords (up to 7) through
-
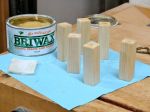
- Finished with wax, applied with abrasive pad
-

- End result!
