

Drawer Pull, Big Leaf Maple
I just couldn’t help myself, as I began preparing the Big Leaf Maple board for the sliding doors I tried to envision what and how the pulls could look like. The board was one of the Extra Special Boards from Woodworkers Source in Arizona. These are unique and beautiful boards they feature on their mail order site. As far as the completed cabinet and base go I’ve begun the shellac process which means 10 minutes or so of padding it on and then hours of drying time. That’s why work starts on the sliding doors.
 There was this one piece at the end of the board with some really wild grain. As I studied this area I couldn’t help but wonder what would happen if it was cut at an angle. The picture doesn’t begin to capture the grain. First, I cut a small section at 45 degrees on the chop saw to play with. Since I was able to plane it the next step was laying out these lines to go across the grain diagonally.
After the first cut, the edge was planed square. Then each piece was cut parallel on the bandsaw, planed square, and repeated until I had 3 sections of the wood. They are 3/4″ in thickness so a 3/8″ tongue was cut on one of the edges. I will mortise the drawer fronts and the drawer pulls will be glued into it.
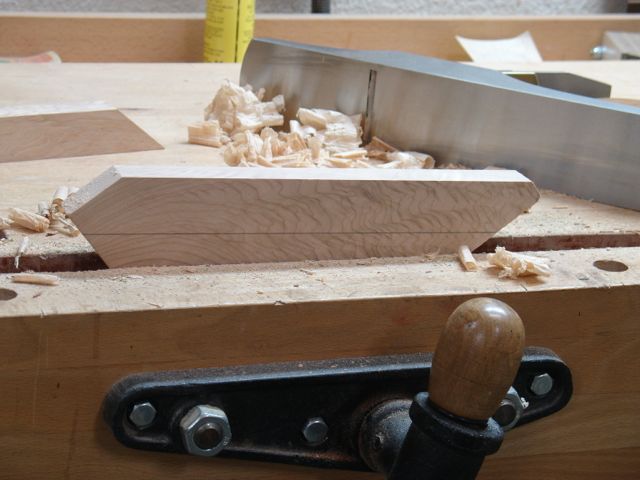
 Next up was giving it some shape and design. This was accomplished with a block plane. After penciling in guide lines, chamfers were cut on the outside edge. If you look closely at the shavings that came off the plane you may notice that they are “crinkled”. I think that has to do with the grain structure of the Maple. Once that shape was finished I just had to see what the piece would look like so proceeded to mortise a scrap of Sapele and stick it in. Since I was this far off track I might as well run a coat of shellac and see what that would look like as well! Looked pretty good but I felt it needed something else, the grip wasn’t quite right. That was remedied by cutting a shallow groove with a core box router bit. Here you can see the difference but the real difference comes in the feel.


Now that this is done it’s time to go back to the real work. The drawers need to be built, there are three of them approximately 6″ high by 13″ wide and 12″ deep. They will have half blind dovetails and to be honest, I suspect the stringy Sapele will want to give me some problems on that step. The back will be a panel and frame section, attached with screws into a rabbet. Then finally will be the planing and sizing of the top. I can probably skip my gym workout for a day or so after that’s done!

It’s fun to take a detour once in awhile. From this distance, the 2nd one looks spectacular.
LikeLike
Thanks Bob, you know how time consuming stuff like that is but as you said, detours are good! Now that I can see the cabinet in its entirety the pull seems a bit overwhelming. My wife (whose design sense I trust) suggested making it smaller and possibly mimic the dovetail of the case — playing with a dovetail key (butterfly) design. It’s all up for discussion until the glue hits the wood!
LikeLike
Looks good, John!
I was surprised that you were able to get though the wild grain maple with out problems. I just got done fooling around some mildly figured maple and had to go to my cabinet scraper. My plane is razor sharp too. Honed to 10,000 grit. It maybe the wood gods. 🙂
LikeLike
Jay, what seemed to really change the dynamics of this was to close the mouth as tight as I could and still pass a shaving through it. Did that for both the jack and block planes.
LikeLike
Pingback: Hardware = Jewelry for the Cabinet | Woodworks by John