
A few posts ago (here’s a LINK), I allowed myself to get off track and worked on what I thought would be a good pull for this project. Well, the pull was good but just didn’t fit into the over-all character and design I wanted for this piece. At the suggestion of my wife I began playing around with a design that would incorporate the dovetail joinery and here’s what developed:

Dovetail inspired, Birdseye Maple Drawer Pulls
I thought I’d taken a picture of the beginning stages but if I did they’re floating somewhere out in the electronic world! I think it’s easy enough to understand if I explain the process. The pull will be mortised into the drawer front so the over-all thickness needed to be about an inch to begin with. I had a 1/4″ thick piece of Birdseye Maple that was about an inch wide and 10″ long. This was first laminated onto a piece of Sapele to give a total thickness of an inch. Once that was thoroughly dry a dado head was used on the tablesaw to remove most of the Sapele leaving a 1/4″+ wide section centered in the Maple — this is a T-shape. You can see that piece in the upper left-hand corner of this picture:

Template for Pulls
The template is a piece of 1/4″ MDF and the pulls were cut out on the bandsaw, then filed and sanded to final shape. Here are the four, I know there’s only 3 drawers but just in case! Ever notice when you make an extra piece for a project you seldom need it but if you don’t have it you will?
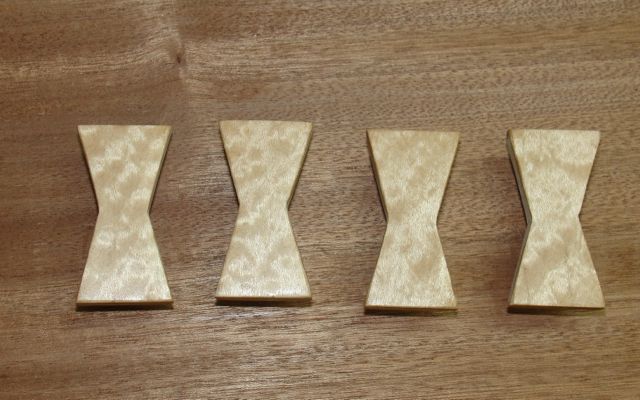
Four pulls, One coat of Shellac
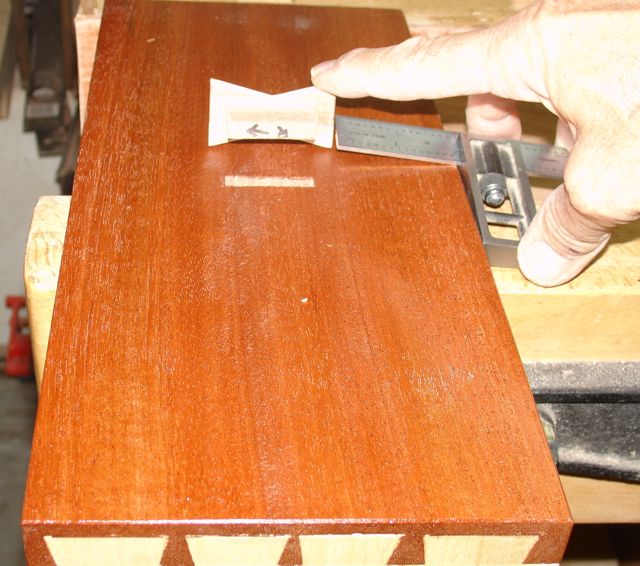
Final fitting of Pull
I chose three of them for the project and fitted them to the drawer front. A slight dilemma here was the finishing process. It would be difficult to finish with the pull in place as I’m doing combination brush and padding with the shellac. My concern was getting shellac in the mortise and on the tenon. To solve that dilemma I will wait until the shellacking process is done, then trim the mortise/tenon to fit and glue them together before the finish is rubbed out. After fitting the pull it was marked for the drawer and an arrow to show which direction faces down. Here I’m using setting the distance from the top of the drawer to the top of the pull (2″).
The tenon was wrapped with tape to keep the shellac off and they are now being finished. Right now they look like the top photo and I’m liking it!
