
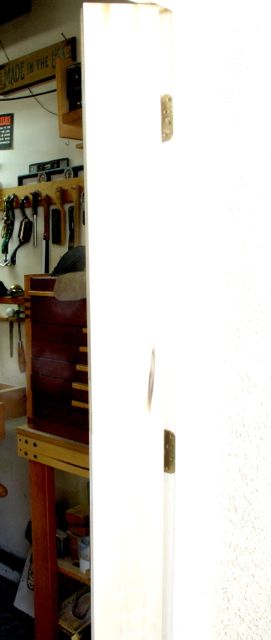
 This is a strange picture to say the least so I’ll try to explain what you’re seeing. The lighting and then white against white makes it a bit hard to distinguish — actually it’s a really crappy picture but I can’t adjust it any better so please bear with me. Since this is a solid 8/4 Poplar door (2/8 x 6/8) and I’m a one man operation I thought to myself: “do I want to fight this heavy door and put out my back?” Obvious answer was no! So why not just set the hinges on the hinge stile of the door before assembling the door? Well, since I couldn’t think of any argument against it, that’s what I did. What you’re looking at is the hinge side of the door, pivoting nicely on the existing hinges. To get to that point the center hinge was removed to make a template out of some 1/2″ plywood.
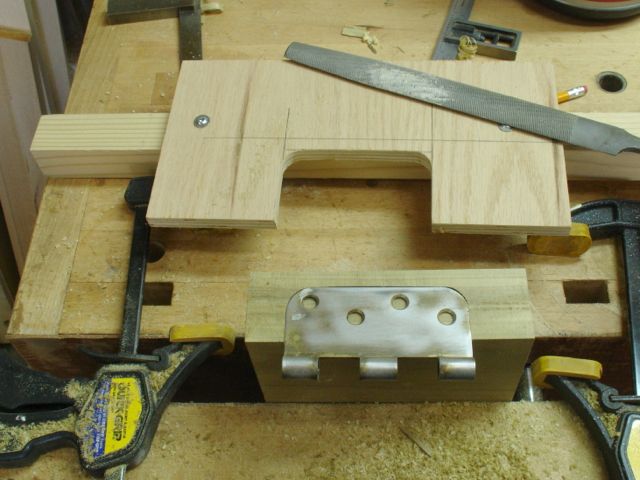
Hinge mortise jig test in scrap wood
Had the hinges been square cornered it would have been just as easy to do the entire hinge mortise with chisels but the radius makes it tough to accomplish. It took a little bit of adjusting with files but the end result was that the hinges fit snugly into the mortise. After doing this test piece on some scrap the locations were carefully measured, transferred to the door, and all of the mortises were cut. At this point I was able to remove the door, install the hinges onto the stile and give it a test. If you’ve ever set a solid door you’ll understand how much easier it was only working with the one stile rather than the entire door!
All mortises cut

Adjusting the backset
As luck would have it and as I kind of expected, my template didn’t go into the door far enough so some hand fitting was required. It was hard to get exact measurements for the setback on the old door due to multiple coats of paint and 18 years of weathering. After setting a marking gauge and scribing the needed setback the mortise was adjusted with chisels to fit. Once the fit was correct the first holes were plugged with 3/16″ dowels so there won’t be any weakness when the door is attached.

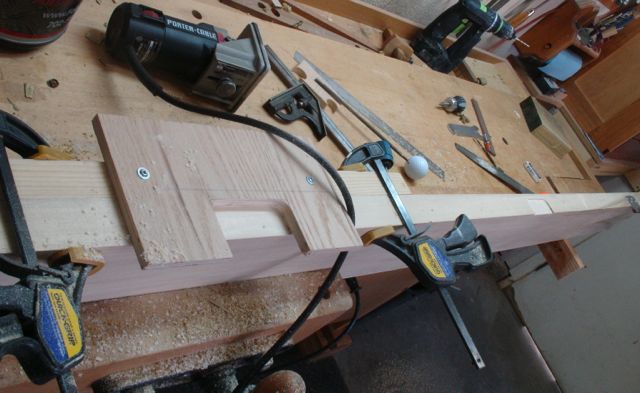
Lockset hole and mortise
I used the same unorthodox way to drill the holes for the lockset. Having just one stile I was able to set it up on the drill press to ensure straight and accurate holes without the use of a template guide. Once the holes were drilled the mortise was cut for the latch. Sure have been getting lots of use from the small, router plane on this project.
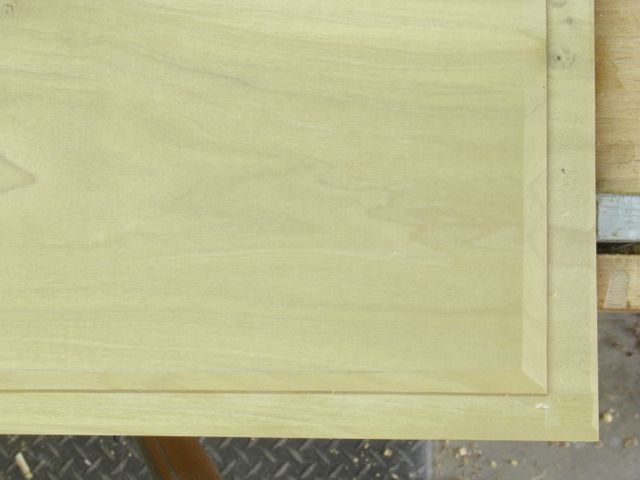
Chamfered Edge on Panel
In the first post about this door I talked about the joinery and stock preparation. The first piece to be assembled was the bottom and middle rail with the center stile. To fill this area in there are two, 1″ thick Poplar panels. They were initially formed with the use of a dado head to cut a 1/2″ long by 5/8″ wide tongue on the center of each panel. These were trued up with a rabbet block plane and then a chamfer planed all around. After penciling in a limit line the end grain was done first then the edges brought to them to get a crisp, mitered edge. You know I absolutely hate to paint wood and had really thought about just clear coating this door with an exterior varnish but it really would look odd so they were painted white before assembly; however, I couldn’t resist hand planing them to get my optimum finish!

Please — no Paint!!
At the end of the day I was able to assemble this door. Here’s another odd shot to show the completed work. I’ll use hand planes to bring all of the joints flush with one and other. I used Gorilla Glue for this project, it should be a good choice for a lasting job plus it made the joints slide together nicely.

Glued and Clamped
Only one of the pieces had a bit of a cup but this will be a good opportunity for me to brush up on my hand planing techniques. Unfortunately, the entire project will be painted! The only work still required will be planing the edge that closes at a slight angle (5 degrees or so) to make closing effortless. The panel in the center needs to be laminated and the molding/stop needs to be designed and formed. Getting anxious but it’s always the final steps that take the most time and care!
